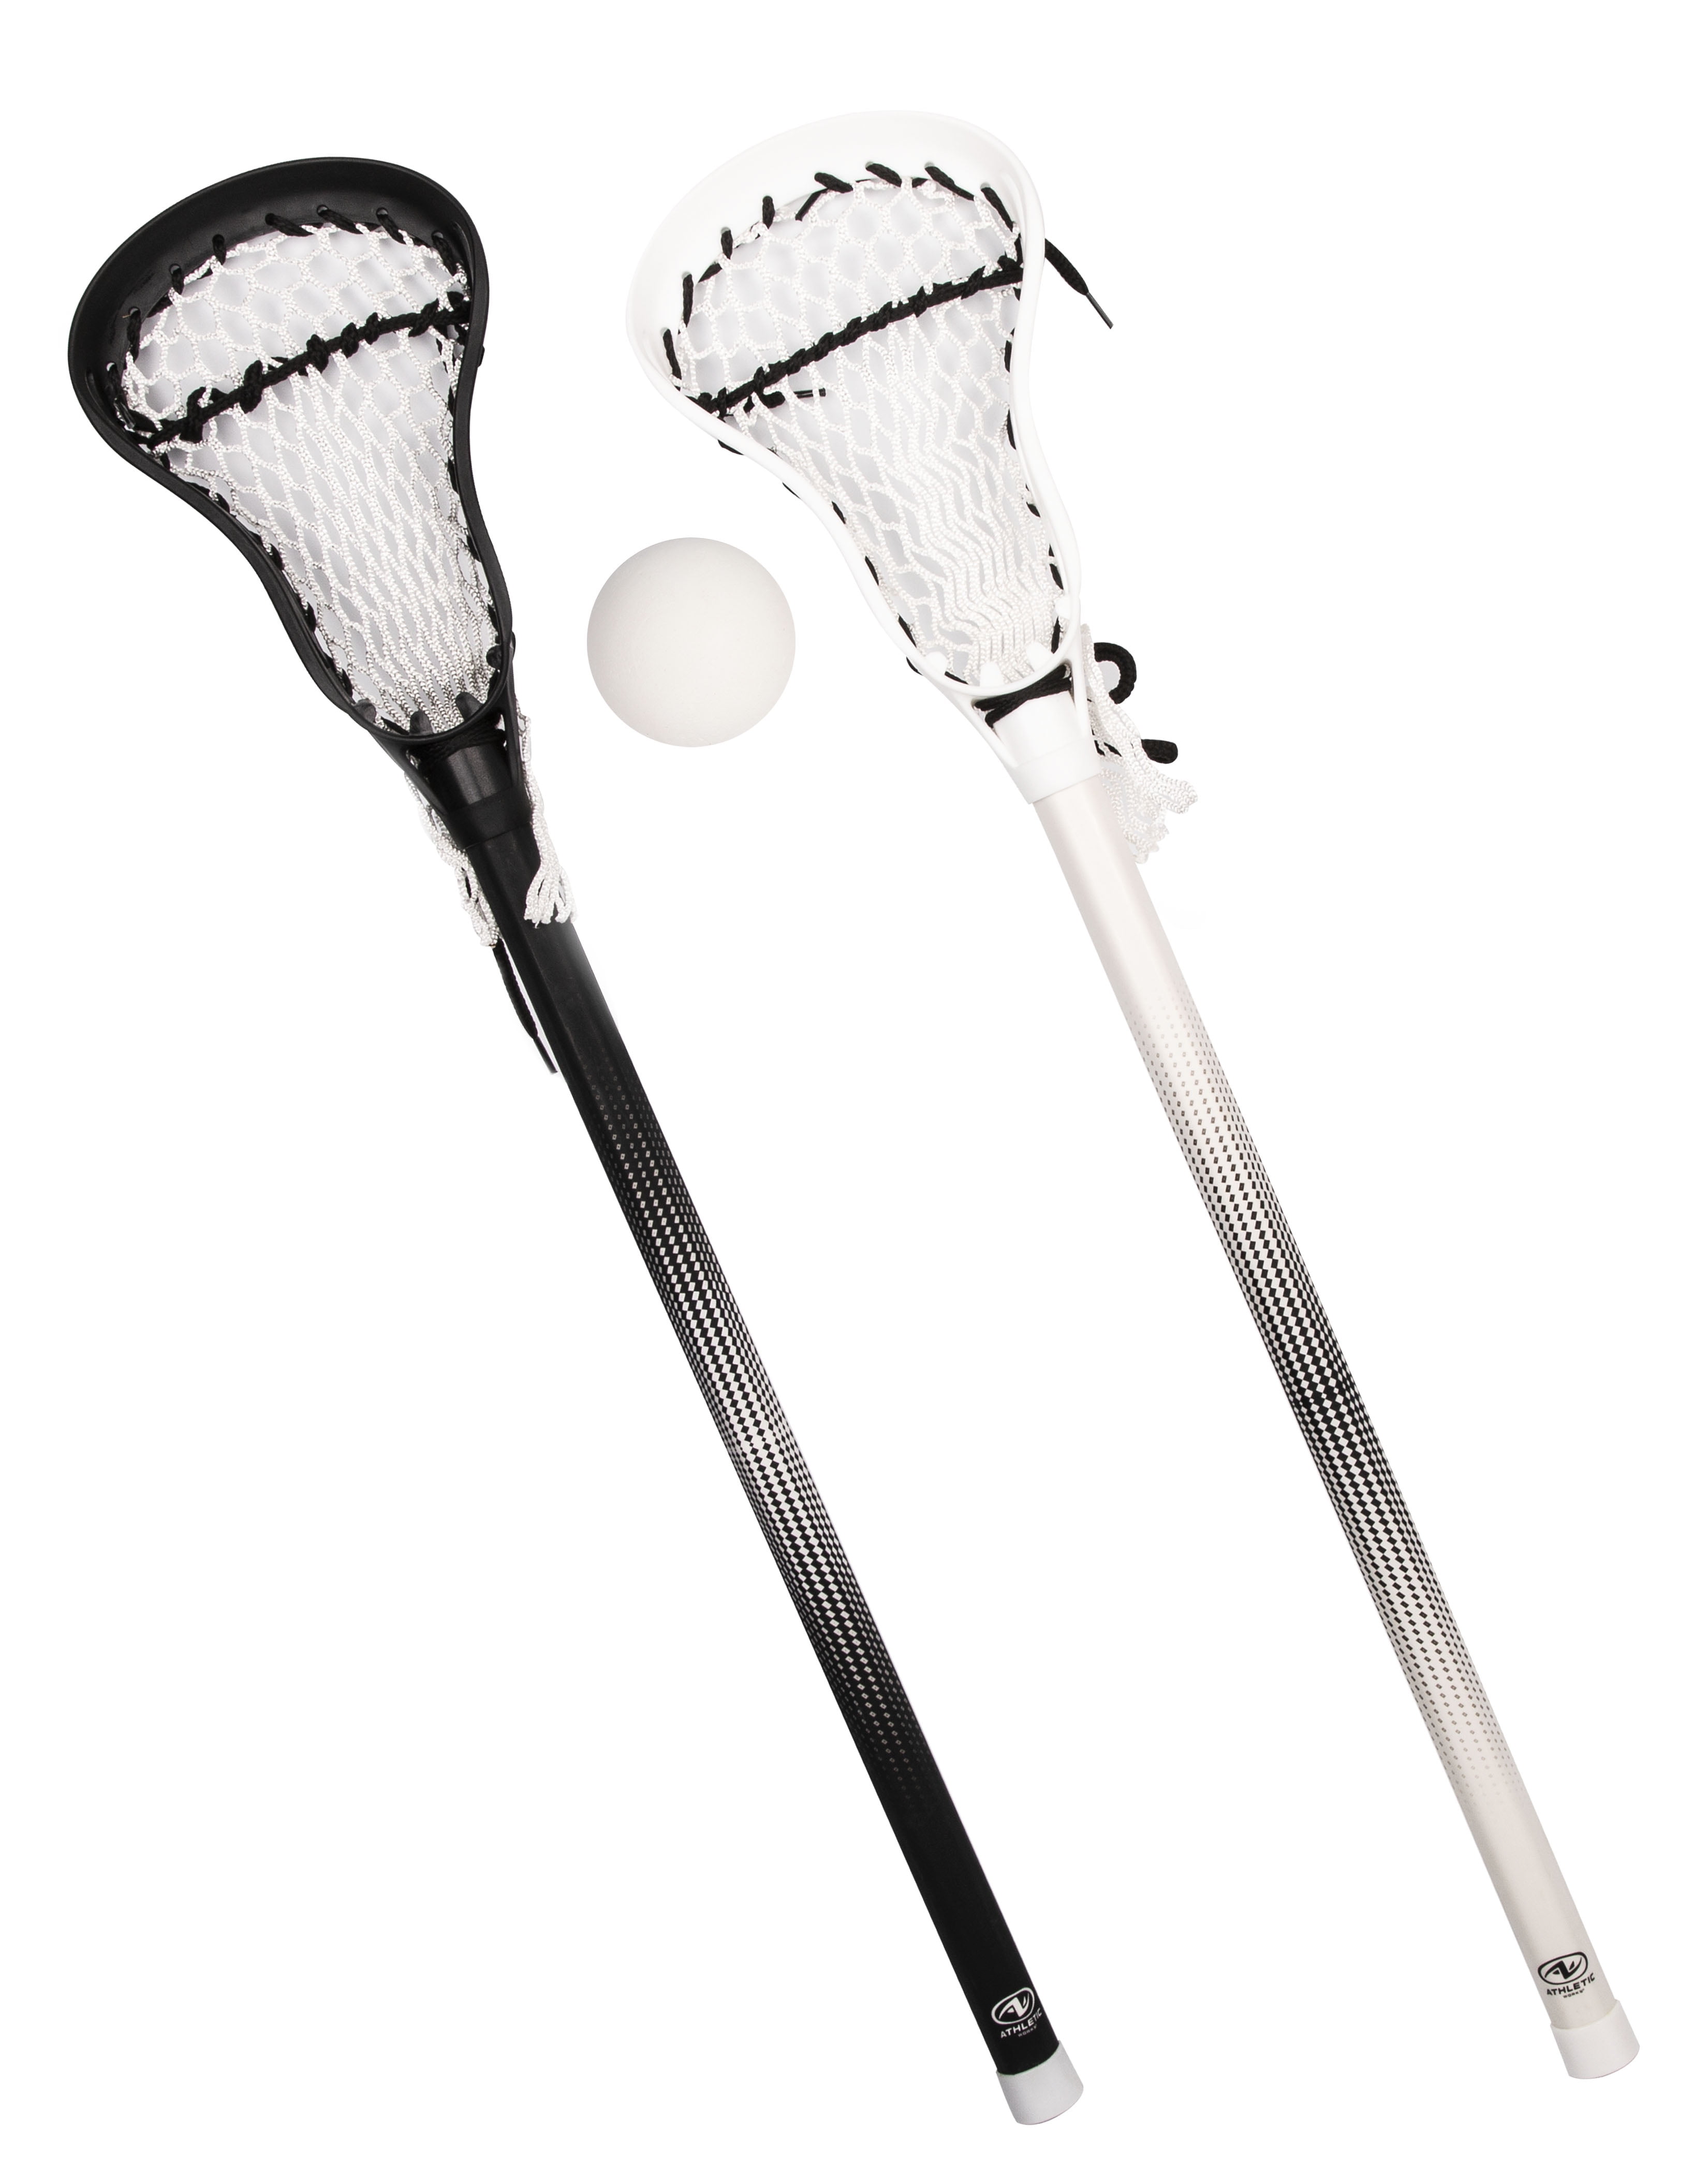
How to choose the right lacrosse stick tape. What are the key considerations for taping a lacrosse stick. How to prepare your stick for taping. What is the proper technique for wrapping tape on a lacrosse shaft. How to create custom designs and patterns with tape.
The Importance of Properly Taping Your Lacrosse Stick
Taping a lacrosse stick is a crucial ritual for players seeking to enhance their performance on the field. A well-executed tape job can significantly improve grip, control, and even add a personal touch of style. But what makes taping so essential for lacrosse players?
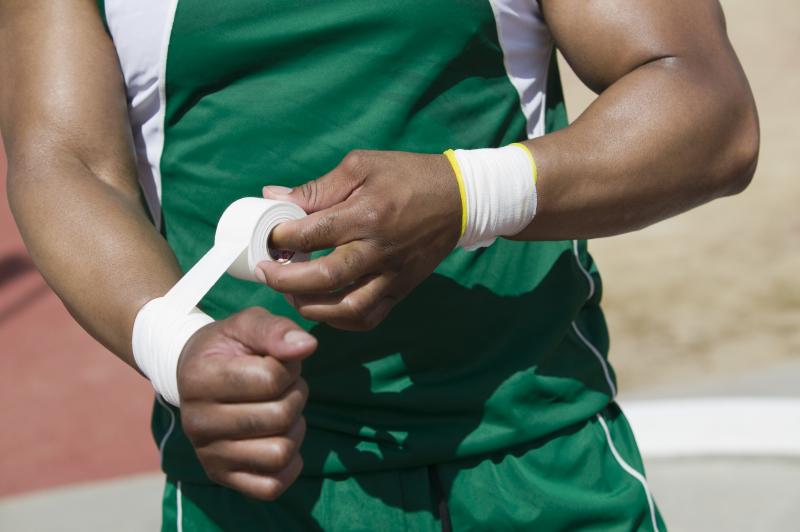
The primary benefit of taping your lacrosse stick is the improved grip it provides. An untaped metal or composite shaft can be slippery, especially during intense gameplay or in wet conditions. The texture and tackiness of tape give your hands a much better hold on the stick, reducing the chances of losing control during crucial moments like cradling, shooting, or defensive maneuvers.
Beyond grip, taping allows players to customize the feel and handling of their sticks. By varying the thickness and type of tape used, players can fine-tune the shaft’s diameter and texture to suit their preferences. This customization can make a significant difference in how comfortable and responsive the stick feels during play.
Lastly, tape offers an opportunity for personal expression. While functionality should always come first, many players use colorful or patterned tape to showcase their personality or team spirit on the field.
Selecting the Ideal Lacrosse Stick Tape
Choosing the right tape for your lacrosse stick is a critical decision that can impact your performance. With numerous options available, it’s essential to consider several factors:
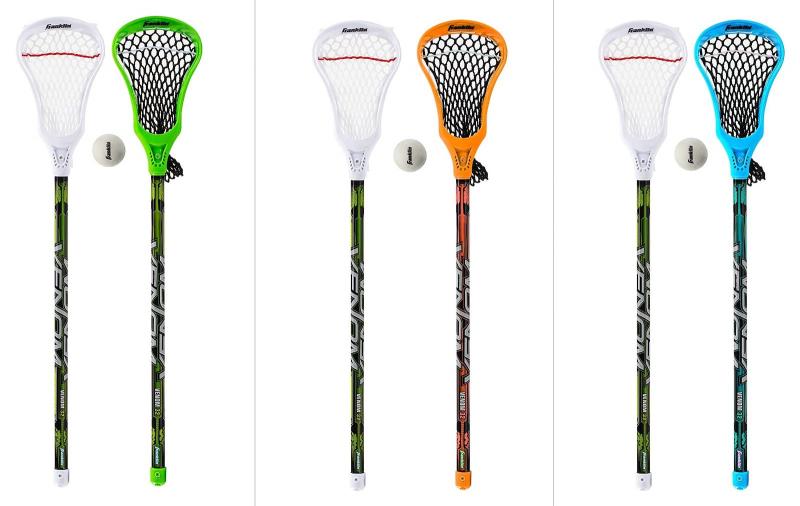
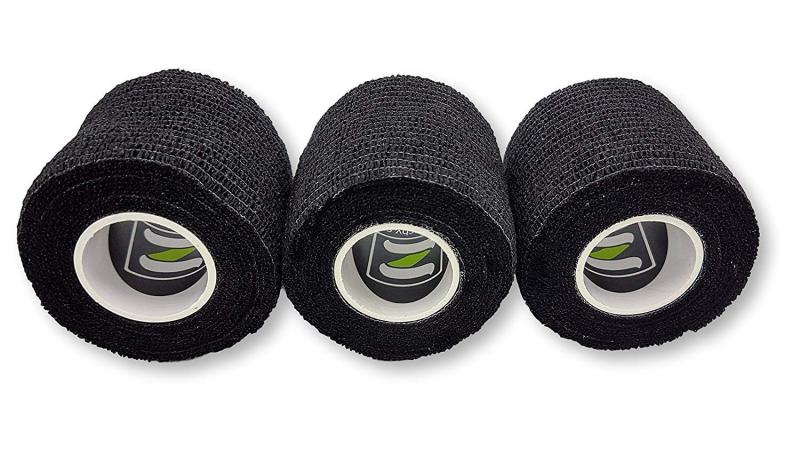
- Color: From classic black to vibrant neons, tape color options are vast. Consider matching your team colors or expressing your personal style.
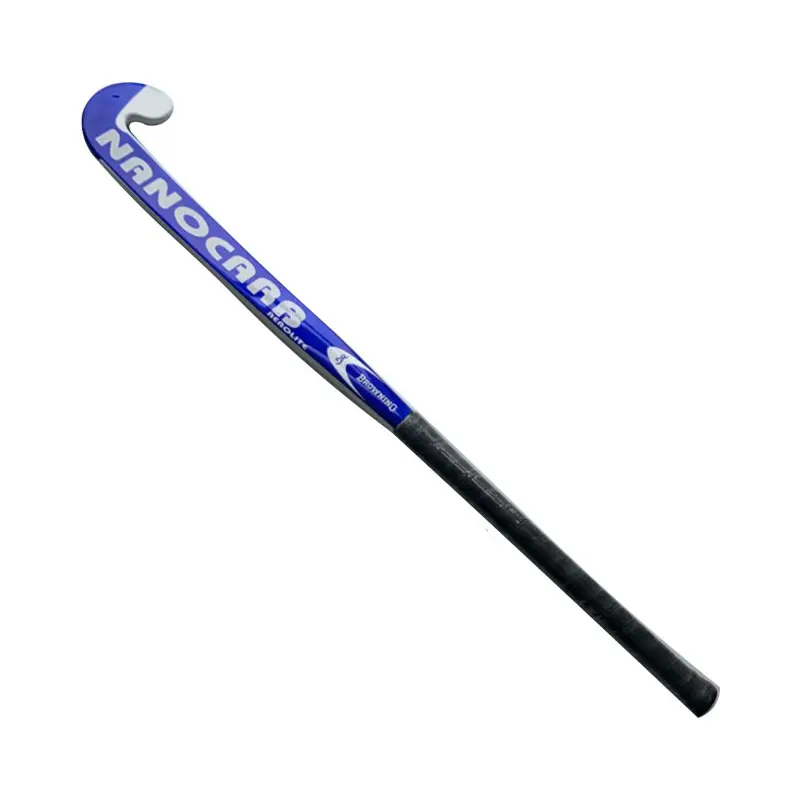
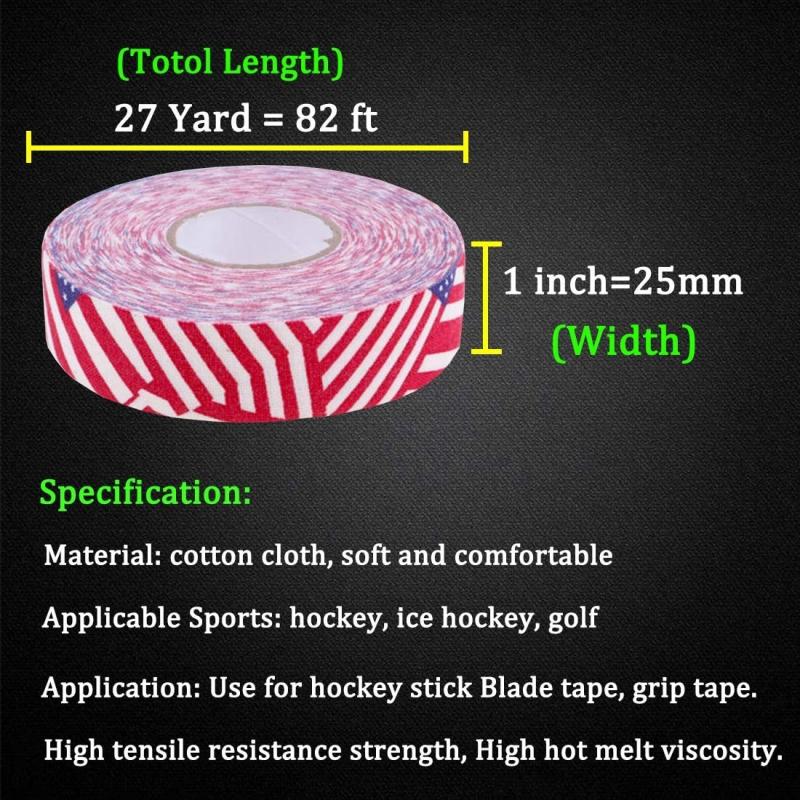
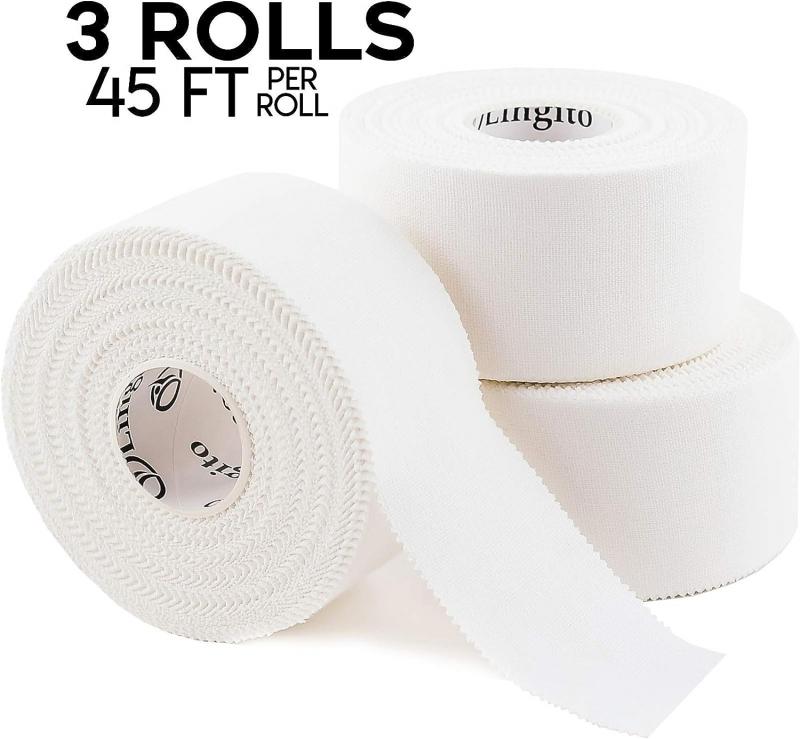
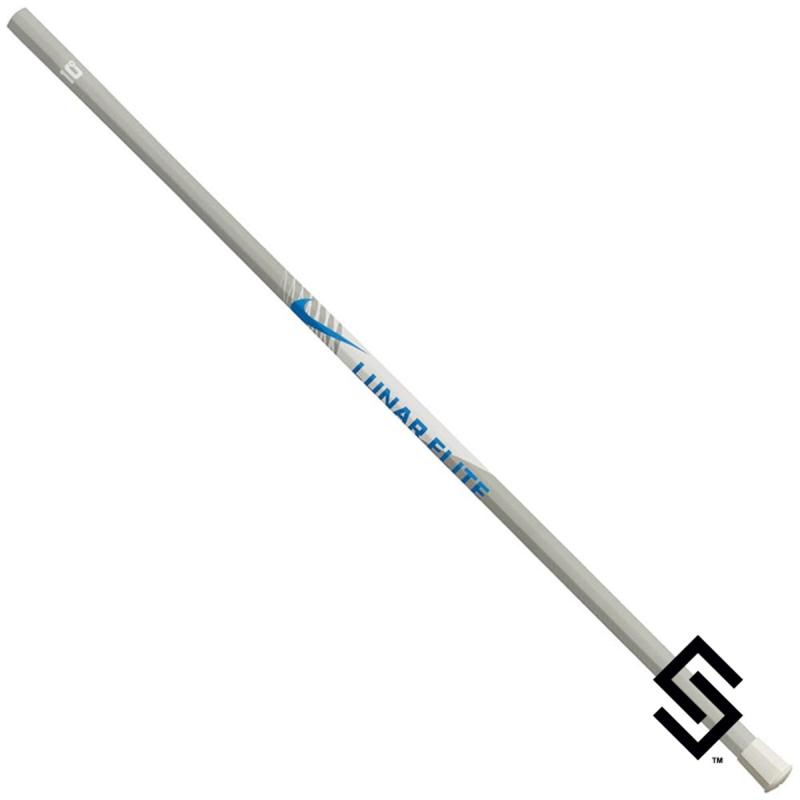
- Width: Standard lacrosse tape is typically 2 inches wide, but 1-inch and 1.5-inch options are also available. Narrower tape can save weight but may require more wrapping.
- Material: Cloth or cotton tapes offer excellent grip when dry, while synthetic or vinyl tapes maintain stickiness in wet conditions. Leather tapes provide superior grip but may be more expensive.
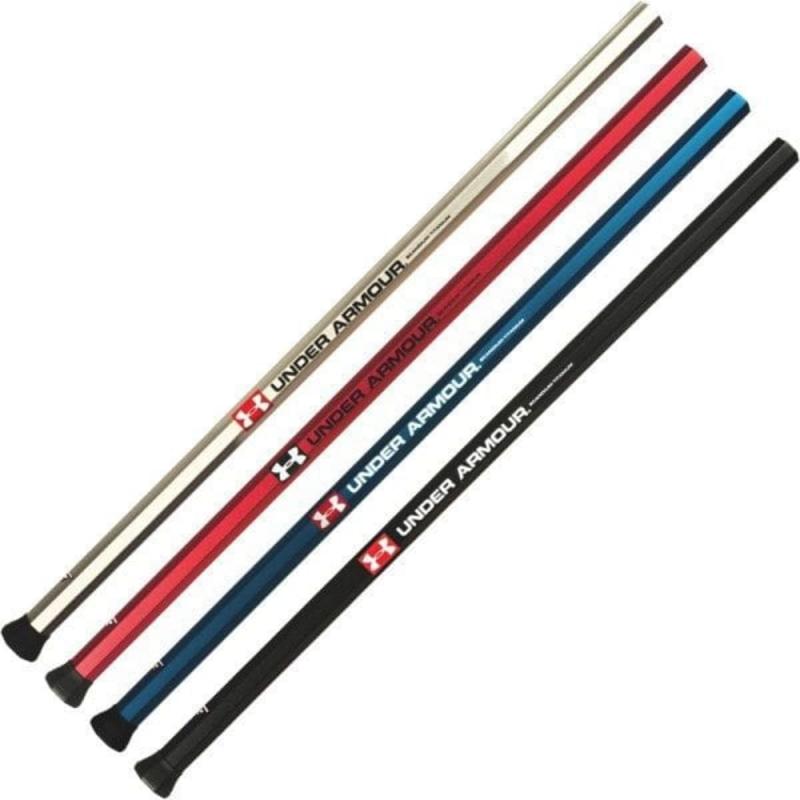
- Brand: Established brands like Warrior, STX, and East Coast Dyes are known for quality and durability.
- Specialty features: Some tapes offer extra texture for enhanced grip, while others are designed to stretch and conform to curves.
Experimenting with different tape types can help you find the perfect combination for your playing style and preferences. Many players keep multiple rolls of tape in various colors and materials to switch up their style and maintain optimal grip throughout the season.

Preparing Your Lacrosse Stick for Taping
Proper preparation of your lacrosse stick shaft is crucial for ensuring that your tape job lasts and performs as intended. Follow these steps to prepare your stick:
- Clean the shaft thoroughly using a specialized lacrosse shaft cleaner or rubbing alcohol. This removes dirt, oils, and any residue from previous tape jobs.
- For smooth composite shafts, lightly scuff the surface with fine-grit sandpaper. This creates a slightly rough texture that helps the tape adhere better.
- Wipe down the shaft again after sanding to remove any dust or debris.
- Allow the shaft to dry completely. Applying tape to a damp surface can lead to poor adhesion and premature peeling.
- Pre-wrap the bottom of the shaft with 1-2 layers of tape. This creates a smooth starting point for your main tape job.
Taking the time to properly prepare your stick will result in a cleaner, longer-lasting tape job that performs better during gameplay.
Mastering the Taping Technique
The key to a successful lacrosse stick tape job lies in the technique. How can you ensure your tape is applied correctly for maximum grip and durability?
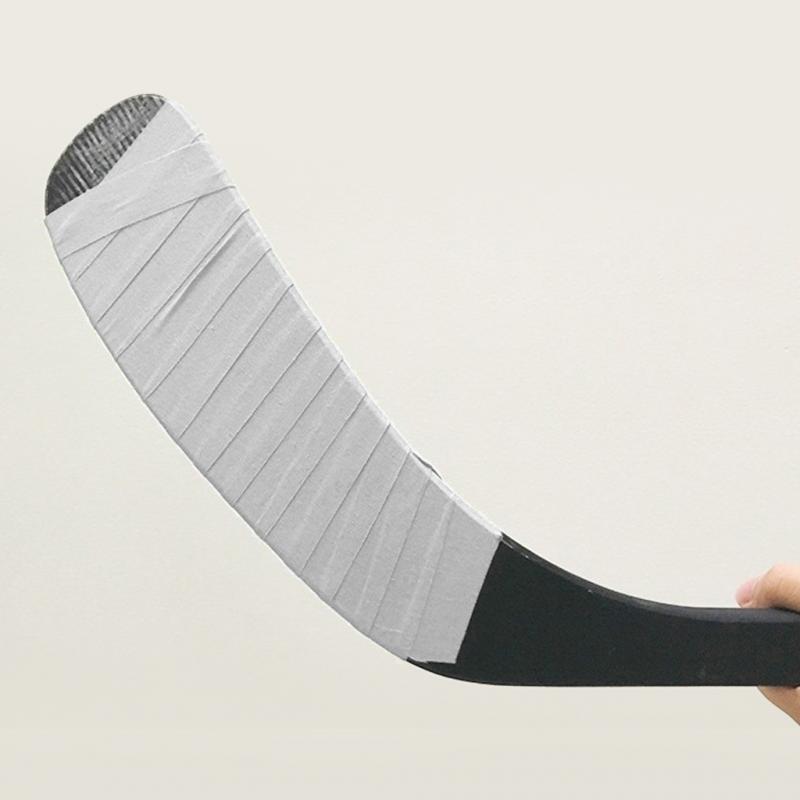
Start by anchoring the tape securely at the bottom of the shaft. Peel off about 6 inches of backing and stick the end along the shaft’s bottom edge. Wrap the tape once around horizontally, covering the anchored end completely. This creates a stable foundation for the rest of your tape job.
As you begin wrapping up the shaft, maintain consistent tension on the tape. It should be tight enough to prevent slipping or bunching, but not so tight that it wrinkles or distorts. Aim for about 50% overlap between each wrap to ensure complete coverage and prevent gaps that could affect grip.
Work your way up the shaft in a smooth, continuous motion. If you need to stop and adjust, try to do so at the back of the shaft where it’s less noticeable. Continue wrapping until you reach your desired endpoint, typically just below where your top hand grips the stick.
Creating Custom Designs and Patterns
While functionality is paramount, many players enjoy adding personal flair to their lacrosse sticks through custom tape designs. How can you create unique patterns that still provide optimal grip?
One popular technique is the candy cane stripe. This involves alternating two colors of tape in diagonal stripes up the shaft. To achieve this, start with your base color and wrap it at a slight angle. Then, use a contrasting color to fill in the gaps, creating a spiral effect.
Another option is the checker pattern. This requires more precision but creates a striking visual effect. Wrap horizontal bands of alternating colors, then use small pieces of tape to create vertical stripes, forming a checkerboard pattern.
For a more subtle design, consider using thin strips of accent tape over a base layer. This allows you to add team logos, numbers, or other personal touches without compromising grip.
Remember, while designs can be fun, they shouldn’t interfere with the tape’s primary function of providing grip. Always prioritize performance over aesthetics.
Maintaining Your Tape Job
A well-maintained tape job can significantly extend its lifespan and effectiveness. How can you keep your lacrosse stick tape in top condition?
Regularly inspect your tape for signs of wear, particularly after intense games or practices. Look for peeling edges, worn spots, or areas where the tape has become slick. Address these issues promptly to maintain optimal grip.
To clean your taped stick, use a damp cloth to wipe away dirt and sweat. Avoid soaking the tape, as this can weaken the adhesive. For stubborn dirt, a soft brush can help restore the tape’s texture without damaging it.
In areas prone to high wear, such as where your hands frequently grip the stick, consider applying an extra layer of tape for reinforcement. This can help extend the life of your overall tape job.
If you notice significant wear or loss of grip, it’s time to re-tape. Many players find that re-taping their stick every few weeks during the season helps maintain peak performance.
Advanced Taping Techniques for Specific Positions
Different lacrosse positions often require unique taping approaches to optimize performance. How do taping techniques vary for attackmen, midfielders, defenders, and goalies?
Attackmen and midfielders typically prefer a full-length tape job that provides consistent grip along the entire shaft. They might use a combination of tacky and smooth tapes to create zones optimized for quick hand transitions during cradling and shooting.
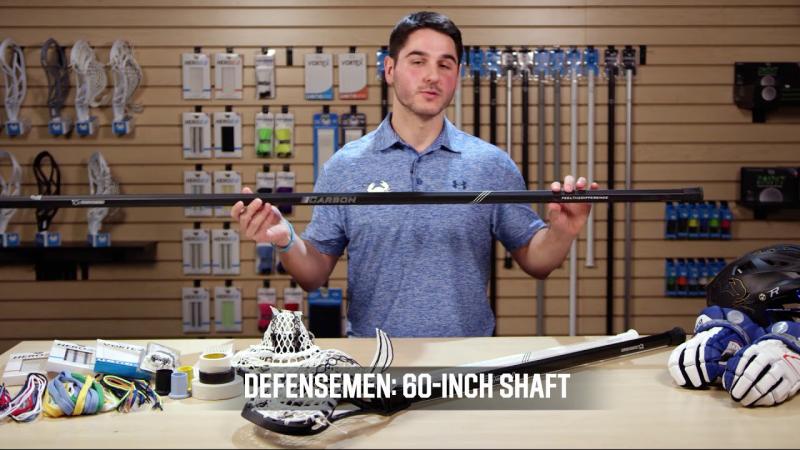
Defenders often focus on taping the upper portion of their longer shafts, where their hands are most frequently positioned. They might use extra layers or tackier tape in these areas to enhance their grip for checks and poke checks.
Goalies have unique taping needs due to the constant impact on their sticks. Many use extra-durable tape or even hockey tape on the shaft to withstand repeated ground balls and shots. Some goalies also tape their stick heads to dampen vibrations from hard shots.
Experiment with different taping styles and materials to find what works best for your position and playing style. Don’t be afraid to combine techniques or create a custom approach that enhances your performance on the field.
Troubleshooting Common Taping Issues
Even with careful application, lacrosse stick tape can sometimes present challenges. How can you address common taping issues to maintain optimal grip and control?

If your tape is peeling at the edges, try using a hair dryer to gently heat the adhesive. This can help it re-stick to the shaft. For a more permanent fix, apply a thin strip of fresh tape over the peeling edge.
Bubbles or wrinkles in your tape job can affect grip and aesthetics. To fix this, carefully slice the bubble with a sharp knife and smooth out the air. Then, apply a small piece of tape over the cut to seal it.
If your tape becomes slippery during play, especially in wet conditions, consider using a tacky spray designed for sports equipment. This can temporarily restore grip until you have a chance to re-tape.
For tape that wears out quickly in specific areas, try using a more durable tape in those high-wear zones. You can also apply an extra layer or two of tape in these spots for added longevity.
Remember, a well-maintained tape job is crucial for consistent performance. Don’t hesitate to make adjustments or completely re-tape your stick if you’re not satisfied with how it’s performing.
Innovative Taping Materials and Techniques for 2023
The world of lacrosse equipment is constantly evolving, and stick taping is no exception. What new materials and techniques are players using in 2023 to gain an edge on the field?
One emerging trend is the use of silicon-infused tapes. These tapes offer superior grip in all weather conditions and tend to last longer than traditional cloth or synthetic tapes. Some players are experimenting with combining silicon tapes with traditional options for a customized feel.
Another innovation is the rise of pre-cut tape kits. These kits come with precisely measured pieces of tape for specific stick models, allowing for quicker, more consistent tape jobs. Some even include templates for creating complex designs or patterns.
Eco-friendly tape options are also gaining popularity. Made from biodegradable materials, these tapes offer the same performance as traditional options but with a reduced environmental impact.
Some players are adopting techniques from other sports, such as using tennis overgrip tape for a tacky, absorbent surface that performs well in hot, sweaty conditions.
As with any new trend, it’s essential to test these innovations thoroughly in practice before relying on them in game situations. What works for one player may not be ideal for another, so don’t be afraid to experiment and find your perfect taping solution.
The Psychology of Stick Taping in Lacrosse
While the physical benefits of taping a lacrosse stick are clear, there’s also a psychological aspect to this ritual. How does the act of taping impact a player’s mindset and performance?
For many players, taping their stick is a form of pre-game preparation that helps them focus and get into the right mental state. The repetitive action can be calming and meditative, allowing players to clear their minds and visualize success on the field.
The personalization aspect of stick taping can also boost confidence. A player who feels their stick is perfectly tailored to their preferences may play with more assurance and decisiveness.
Some players view their tape job as a form of self-expression, using it to showcase their personality or team spirit. This can foster a sense of identity and belonging within the team dynamic.
Interestingly, the ritual of re-taping can serve as a mental reset after a poor performance. The act of stripping off old tape and applying a fresh layer can symbolize leaving past mistakes behind and starting anew.
Coaches and sports psychologists often encourage players to develop consistent pre-game routines, and for many lacrosse players, stick taping is an integral part of this process. By understanding and embracing the psychological benefits of this ritual, players can potentially enhance their mental preparation and on-field performance.
Balancing Tradition and Innovation in Lacrosse Stick Taping
Lacrosse is a sport steeped in tradition, and stick taping is no exception. How do players and coaches balance time-honored taping methods with modern innovations?
Many players still swear by traditional cloth tape and simple wrapping techniques, arguing that these tried-and-true methods have stood the test of time for a reason. The tactile feedback and predictable wear patterns of classic tape jobs are valued by players who prioritize consistency and familiarity.
On the other hand, advancements in materials science have led to new tapes with enhanced grip, durability, and weather resistance. Some players eagerly adopt these innovations, seeking any edge that might improve their performance.
A middle ground that many players find effective is combining traditional techniques with modern materials. For example, using a classic spiral wrap pattern but with high-tech, weather-resistant tape.
Coaches play a crucial role in this balance, often introducing young players to traditional taping methods while also encouraging experimentation with newer options as players develop their skills and preferences.
Ultimately, the best approach to lacrosse stick taping is one that respects the sport’s rich history while remaining open to innovations that can enhance player performance and enjoyment of the game.
The Role of Stick Taping in Team Unity and Culture
Beyond its functional purpose, stick taping can play a significant role in fostering team unity and culture. How do lacrosse teams use taping practices to build camaraderie and team identity?
Many teams adopt specific taping styles or color schemes as part of their uniform. This visual consistency can create a sense of unity and professionalism on the field. Some teams even incorporate their logo or motto into their tape jobs, reinforcing team values and identity.
Taping sessions can become social events for teams, with players gathering to prepare their sticks together before games or practices. These informal gatherings provide opportunities for team bonding and mentorship, with experienced players sharing tips and techniques with younger teammates.
Some teams have traditions or superstitions related to stick taping. For example, captains might tape the sticks of rookies before their first game, or players might have a designated “taping spot” in the locker room.
Coaches can use stick taping as a teachable moment, emphasizing the importance of attention to detail and preparation. The care a player puts into their stick can be seen as a reflection of their commitment to the team and the sport.
By recognizing and nurturing the cultural aspects of stick taping, teams can use this simple ritual to strengthen team cohesion and reinforce shared values and goals.
Introduction to lacrosse stick taping – benefits and key considerations
Taping a lacrosse stick is an important ritual for players of the fast-paced sport. A properly taped stick provides players with better grip, control, and style on the field. Though it may seem simple, there is skill and strategy involved in taping a lacrosse stick just right.
The main benefit of taping a lacrosse stick is to improve grip. Having tape on the shaft gives you significantly more holding power than an untaped metal or composite shaft. The texture and tackiness of the tape allows your hands to grip the stick better when cradling, shooting, or poke checking. A good tape job reduces the chance of losing control of your stick during play.
Taping also lets players customize the feel and handling of their lacrosse sticks. Thicker tape builds up the shaft diameter, while thin tape provides a “barely there” covering. The choice of tape material and tension affects the final feel too. Players can experiment to find the perfect tape method for their position and preferences.
In addition, taping allows players to add style and flair to their lacrosse sticks. Using colorful or patterned tape sets your stick apart on the field. Team colors and logos can be incorporated into unique tape jobs. However, style should come second to function – make sure the tape job still provides excellent grip and control first and foremost.
When taping a stick, key factors to consider are tape type, tension, and technique. Choosing a high-quality cloth or synthetic lacrosse tape is important, as cheaper vinyl options tend to lose stickiness. Tape should be pulled tight as you wrap the shaft, but not so tight that it bunches or wrinkles. And following some basic taping rules and methods will ensure the tape stays secure during intense play.
Choosing the right lacrosse stick tape – color, width, and material options
With so many types and brands of lacrosse tape on the market, choosing the right tape for your stick and preferences takes some consideration. Here are the main factors to think about when selecting tape:
- Color – Tape comes in a huge range of colors, from basic black to vivid neon hues. Pick colors that match your gear, team uniforms, or personal style.
- Width – Standard lacrosse tape is 2″ wide. 1″ and 1.5″ widths are also available. Narrow tape saves weight.
- Materials – Cloth/cotton tapes grip well when dry. Synthetic/vinyl tapes retain stickiness when wet but don’t last as long. Leather tapes provide extra grip.
- Brand – Trusted brands like Warrior, STX, and East Coast Dyes are known for quality and performance.
- Specialty tapes – Textured tapes add extra grip. Stretchy tapes conform to curves. Goalie tapes resist wear.
Try out a few different tape types to discover your favorites. Having multiple rolls in different colors and materials allows you to re-tape often and switch up your style.
Preparing to tape your lacrosse stick shaft – cleaning and pre-taping steps
Getting the shaft ready before taping is key for maximizing tape adhesion and longevity. Follow these pre-taping steps:
- Clean the shaft thoroughly with a lacrosse shaft cleaner or rubbing alcohol to remove built-up dirt, oils, and old tape residue.
- Lightly scuff smooth composite shafts with sandpaper to help the tape grip better.
- Wipe the shaft down again after sanding to remove dust.
- Let the shaft dry completely so tape sticks right away without sliding.
- Pre-wrap the bottom of the shaft with 1-2 layers of tape so the main tape job starts off straight.
Taking the time to properly clean and pre-tape the shaft will help the main tape application go on cleanly and last. Rushing this step can lead to early tape peeling and movement.
Starting the taping process – anchoring the end of the tape
Once your shaft is prepped, you’re ready to start wrapping on the main tape. The key first step is anchoring the end of the tape firmly in place, which sets the foundation for the rest of the taping job. Here’s how to anchor the tape start:
- Peel off about 6 inches of the backing and stick the end along the bottom of the shaft. Smooth it down firmly.
- Wrap the tape once around the shaft horizontal to the end you stuck down, covering the end completely.
- Make sure you pull the tape tight as you make this first revolution around the shaft.
- The anchored end should now be stuck firmly in place, allowing you to start wrapping upwards.
Taking extra time on this initial anchoring step prevents the rest of the tape job from loosening or sliding down during play. It provides a solid base upon which to build the rest of the taping.
Taping up the shaft – getting the right tension and overlap
Now you’re ready to start wrapping the tape up the shaft. This is where technique comes into play for a pro-level tape job. Follow these key tips as you wrap the tape upwards:
- Maintain consistent tight tension on the tape as you wrap. Pull it taut but not too tight.
- Overlap each revolution by 1/3 to 1/2 the width of the tape for full coverage.
- Wrap in a spiral motion up the shaft, overlapping smoothly as you go.
- Keep the tape smooth and wrinkle-free as you wrap. Apply evenly.
- Use your thumb to keep the outer edge lined up straight.
It will take some practice to get the technique dialed in. But keeping proper tension and overlap as you wrap upwards will deliver a pro tape job that provides great grip and control during play.
Finishing off the top of the tape job – folding or tapering the end
As you reach the end of the shaft near the head, you’ll want to finish off the tape job for a streamlined look and feel:
- Fold the end of the tape back on itself, smoothing down tightly.
- Or taper/feather the end by decreasing overlap until tape is gone.
- Check for any gaps in coverage and fill in if needed.
- Rub vigorously along tape with palm of hand to increase stickiness.
Taking the time to properly finish the top end of the taping prevents loose ends from catching on gear and uniforms. And firmly rubbing along the fresh tape activates the adhesive for superior grip.
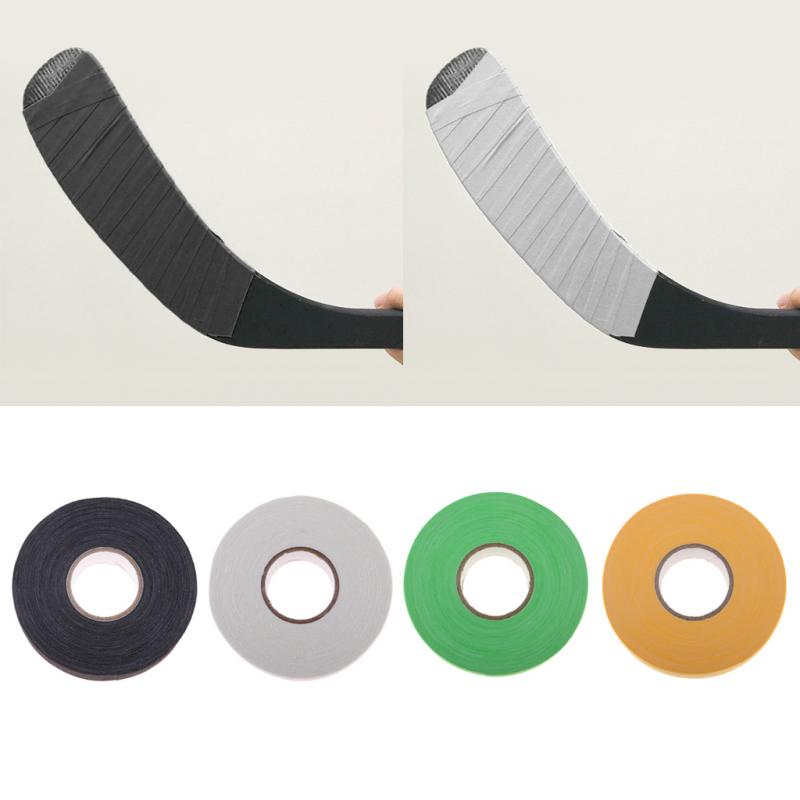
Creating unique tape designs – stripes, patterns, and logos
Once you’ve mastered the basics, taping a lacrosse stick opens up all sorts of creative possibilities for unique designs and looks. Some ideas for advanced tape jobs include:
- Color blocking with stripes of different colored tapes
- Hitting targeted areas with small logos/icons/text
- Tapering from one color to another
- Combining solid and patterned tapes
- alternating glossy and matte finish tapes
The only limit is your imagination! Just maintain proper technique so the tape still sticks and functions well. Taping lets every player put their own spin on their lacrosse stick style.
With the right tape materials, preparation, technique, and creativity, lacrosse players can tape a stick shaft for excellent grip, control, and unique style on the field. Mastering lacrosse stick taping takes practice, but pays off in improved performance and confidence during play. Tape on!
Choosing the right lacrosse stick tape – color, width, and material options
When it comes to taping up your lacrosse stick, you’ve got a rainbow of options for colors, widths, and materials to choose from. With all the varieties of lacrosse tape out there, it can be tough to select the right one for your preferences and playing style.
Color is probably the most fun choice – who doesn’t love making their stick pop with eye-catching neon or team-spirited hues? Bright colors like red, orange, yellow, green, pink, and purple are popular for standing out on the field. Classic options like black, white, and gray provide a more understated look. Match your gear, mimic school colors, or just pick what excites you!
Tape width affects the feel and control of your stick. Standard lacrosse tape comes in 2-inch wide rolls, providing full coverage with overlap. 1-inch tape creates a thinner grip, while 1.5 inches splits the difference. Goal is to find the width that suits your hands – narrower for smaller hands, wider for bigger mitts. Too thin and the shaft texture still comes through; too wide and it gets cumbersome.
For tape material, you’ve got a few main options:
- Cloth/cotton tape provides great dry grip and a classic feel, but gets slippery when wet.
- Synthetic/vinyl tape stays sticky when damp so performs better in rain, but doesn’t last as long.
- Leather and rubber tapes offer extra sticky grip, especially helpful for goalies.
Try out a variety to discover your go-to! Many players keep multiple rolls on hand for re-taping and switching up styles.
When choosing lacrosse tape, don’t forget quality – better tapes from leading brands like Warrior, STX, and East Coast Dyes hold up longer and provide superior grip. And specialty tapes like textured tape add extra control. With so many choices out there, part of the fun is testing different lacrosse tapes to find your favorites!
Preparing to tape your lacrosse stick shaft – cleaning and pre-taping steps
So you’ve got your tape picked out and you’re eager to get wrapping. But wait! Prepping the shaft properly before you tape is crucial for getting the tape to stick securely and last. Rushing into taping without proper prep leads to early looseness and peeling.
Here are some best practices for getting the shaft ready:
- Clean thoroughly with isopropyl alcohol to remove dirt, oils, and old tape residue so new tape adheres.
- Lightly sand smooth composite shafts to help the tape grip better.
- Wipe away all sanding dust for a perfectly clean surface.
- Let the freshly cleaned shaft dry fully before taping so the tape sticks right away.
- Pre-wrap the bottom with 1-2 passes of tape for a straight base.
Taking the extra time on shaft prep will pay off big time in your tape job’s longevity and grip. Don’t be tempted to cut corners here!
Starting the taping process – anchoring the end of the tape
You’ve prepped the shaft, chosen your tape, and are ready to get wrapping. The key first step is firmly anchoring the initial end of the tape to provide a solid base. Follow these tips when starting off the taping:
- Peel off 6 inches or so of backing and stick the tape end to the shaft bottom.
- Wrap over that anchored end horizontally with the first full revolution, pulling tight.
- This covers the end completely and locks it into place for a strong foundation.
- Now you’re ready to start wrapping upward with confidence.
Resist the urge to rush through the start – taking time here prevents loosening or sliding later. Nail this anchoring technique and you’re on your way to a pro-level tape job.
We’ve covered choosing tape, prepping the shaft, and starting off strong. Now it’s time to master the actual taping technique as you wrap up the shaft. Keep reading for the essential dos and don’ts of the taping process itself…
Preparing to tape your lacrosse stick shaft – cleaning and pre-taping steps
You’ve got your tape selected and you’re eager to wrap your lacrosse stick shaft, transforming it with color and grip. But wait – prepping properly is a crucial first step for a tape job that adheres securely and lasts. Rushing into taping without prepping leads to early failure as tape loosens and peels.
Here are some best practices for getting the shaft ready for taping:
- Clean thoroughly with a lacrosse shaft cleaner or isopropyl alcohol to remove built-up dirt, oils, and old tape residue. This allows the new tape to stick right away.
- Lightly scuff up smooth composite shafts with fine grit sandpaper. This roughens the surface so tape can grip better.
- Wipe off all sanding dust with a clean cloth. Any remnants left behind will impede tape adhesion.
- Allow freshly cleaned shaft to dry completely before taping. Any lingering dampness will prevent the tape from sticking.
- Pre-wrap bottom of shaft with 1-2 layers of tape for a straight base. This provides a guide for keeping the main tape job on track.
It’s tempting to skip right to the fun part of choosing colors and wrapping tape. But resist the urge! Proper lacrosse stick prep is the foundation for a long-lasting, high performing tape application.
With a clean, dried, and pre-wrapped shaft, you’ve got the ideal surface for tape to adhere tightly. Now the wrapping can begin!
Starting the taping process – anchoring the end of the tape
Your shaft is prepped and it’s time to start laying down tape. The key first step is firmly anchoring the initial end of the tape to provide a solid base for the rest of the job. Use this technique when starting off:
- Unwind about 6 inches of the backing and stick the tape end firmly to the bottom of the shaft. Smooth to maximize adhesion.
- Making sure to keep tension, wrap the tape fully around the shaft width, covering the end. This locks it in place.
- Check that the anchored end is stuck securely with no lifting edges. If not, press it down more firmly.
- You’ve created a strong foundation – now start wrapping upward with confidence.
It’s crucial to spend the time needed on this initial anchoring phase rather than rushing through it. A firmly stuck start prevents loosening and slipping as you tape up the shaft. Patience here pays off!
We’ve covered prepping the shaft and starting strong. Now let’s get into the technique for wrapping the length of the shaft for maximum grip and control…
Starting the taping process – anchoring the end of the tape
Prepping is done, tape is chosen, and you’re ready to start wrapping your lacrosse stick shaft. The key first step is firmly anchoring the initial end of the tape to provide a solid foundation. Taking time here prevents loosening and slipping later on.
Follow these tips when starting off the taping job:
- Unwind about 6 inches of backing from the tape roll and stick the end to the bottom of the shaft. Really smooth it down and press firmly.
- Making sure to keep tension on the tape, wrap it fully around the shaft width. This covers the anchored end completely.
- Check that no edges are lifting up. If so, press them down again to maximize stickiness.
- You’ve now locked down the initial end securely. Start wrapping upward with confidence.
It’s crucial not to rush anchoring the tape start. The patience taken here pays off down the road with a tape job that stays firmly in place, even during intense gameplay. A loose start leads to a loose wrap.
With the first end anchored cleanly and securely, you’re ready to move on to wrapping the length of the shaft. Maintaining proper technique as you wrap upwards is key…
Taping up the shaft – getting the right tension and overlap
You’ve started strong by anchoring the tape end. Now comes the fun part – wrapping the length of the lacrosse stick shaft. As you tape up the shaft, follow these technique tips for optimal grip and control:
- Keep consistent tight tension on the tape as you wrap. Pull taut but not too tight.
- Overlap each revolution by 1/3 to 1/2 the tape width. This prevents gaps.
- Wrap in a smooth spiral up the shaft, maintaining the overlap as you go.
- Avoid creases, wrinkles, and unevenness in the wrap. Keep it smooth.
- Use your thumb to keep the outer edge straight and aligned.
It takes practice to perfect the technique, but keeping proper tension and overlap will deliver a pro tape job. The tape provides cushioning and grip without muting feel for the shaft.
We’ve covered the start and the wrapping process. Now let’s finish strong…
Taping up the shaft – getting the right tension and overlap
You’ve anchored the tape start – now the fun really begins. It’s time to wrap the length of the lacrosse stick shaft using proper technique for optimal grip and control. Follow these key tips as you spiral the tape up the shaft:
- Keep consistent tight tension on the tape as you wrap. Pulling it too loose leads to early movement and failure. But over-tightening restricts cushioning.
- Overlap each revolution by 1/3 to 1/2 the tape width. This prevents gaps while allowing some shaft texture to come through.
- Wrap in a smooth, spiral motion up the shaft, maintaining the overlap as you go. Avoid abrupt edges.
- Watch for creases, wrinkles, and unevenness as you wrap. The tape should lay flat and tight.
- Use your thumb to keep the outer tape edge straight and aligned. It can drift if you’re not paying attention.
Dialing in the proper technique takes practice, but is key to a pro tape job. The tape should provide cushioning and grip while still allowing feel for the shaft.
Maintaining overlap as you wrap upwards prevents gaps that would lead to premature loosening. And keeping tension avoids unwanted bumps or slack in the tape. Take it slow and smooth.
Finishing off the top of the tape job – folding or tapering the end
You’re nearing the top of the shaft and want to finish off the tape job cleanly. Here are some options for completing the wrap:
- Fold the end of the tape back on itself, pressing down tightly to seal it.
- Taper off the end by decreasing overlap until tape is gone.
- Check for any thin spots in coverage and fill them in.
- Rub vigorously along tape with palm to increase adhesion.
A finished top end provides a streamlined look and prevents catching. And rubbing firmly activates the tape’s grip. Complete the job like the pro you now are!
Finishing off the top of the tape job – folding or tapering the end
Taping a lacrosse stick properly is crucial for maximizing grip, control, and performance on the field. With the right taping technique, you can elevate your game to the next level. While there are many approaches to taping a shaft, here is a comprehensive 15-step guide to taping a lacrosse stick for peak performance in 2023.
Step 1: Select Your Tape
First, choose a high-quality lacrosse tape designed for optimal grip. Popular options include purple lacrosse tape, pink lacrosse tape, green lacrosse tape, black lacrosse tape, and blue lacrosse tape. Consider the level of tackiness you desire. Stickier tapes like ThroneMesh provide more grip, while smoother tapes allow for quicker releases. The tape color is also important – bright colors are great for team unity, while neutral shades blend in. Pick the lacrosse tape that best suits your preferences and playing style.
Step 2: Prepare the Shaft
Before taping, thoroughly clean the shaft to remove any dirt, oil or old tape residue. Use a lacrosse shaft cleaner or rubbing alcohol to prep the surface. This helps the tape adhere properly for maximum grip. Allow the shaft to fully dry before continuing.
Step 3: Apply the Base Layer
Begin wrapping the shaft in a spiral pattern, starting about 2 inches below the throat of the head, overlapping each turn by half the tape’s width. Keep the tape taut as you rotate the shaft smoothly. This base layer provides cushioning and a foundation for the grip layers. Wrap down to about 2 inches above the butt end of the shaft.
Step 4: Create Cross Patterns
Now begin a new strip of tape, wrapping over the base layer at opposing diagonal angles to create cross-hatch patterns. This adds grip texture while stabilizing the base layer. Alternate between clockwise and counterclockwise angles as you wrap down the shaft.
Step 5: Add Grip Strips
Next, apply specialized grip tape strips lengthwise along the upper third of the shaft. Hockey-style grip tape works well. Position 2-3 strips evenly around the circumference. The extra tackiness provides maximum control for cradling, passing and shooting.
Step 6: Finish the Middle Section
Continue spiraling tape down the shaft over the grip strips to provide underlying support. Keep even tension and use diagonal cross-patterns periodically for added stability in high wear areas.
Step 7: Tape the Bottom
As you approach the butt end, begin angling the tape inwards to taper it down. Angle sharply in the last 2 inches before stopping 1 inch from the end. This tapered section enhances feel and range of motion when maneuvering the stick.
Step 8: Create a Wrap-Around Effect
To finish off the bottom, start a new strip of tape on the opposite side from your stopping point. Wrap it around the butt end horizontally like a bandage, covering the gap. This creates a clean wrap-around look.
Step 9: Prevent Unraveling
Secure the tape’s end by folding it over itself or applying a small circular piece underneath. This prevents unraveling that could loosen your grip mid-game.
Step 10: Texture the Upper Throat
For optimal ball control when cradling, add textured tape just below the scoop of the head. Hockey-style grip tape or electrical tape works well. This helps grip the ball on quick shots and tight maneuvers.
Step 11: Reinforce the Scoop
Next, stabilize the scoop by wrapping tape around the full circumference of the throat. Keep even tension for a tight bond. This fortifies the scoop against checks while securing the head to the shaft.
Step 12: Texture the Scoop
For added tackiness on the scoop, apply a 4-6 inch strip of grip tape lengthwise across the center. Position it to maximize contact with the ball during cradling. The grippy texture gives you confidence during intense plays.
Step 13: Inspect Your Work
Examine the entire tape job for any gaps, loose ends or uneven sections. Rewrap any problem areas to maximize performance. The tape should feel snug throughout when rotating the shaft.
Step 14: Seal the Deal
Once satisfied, seal the entire tape job with lacrosse stick tape sealant. This locks everything in place while providing a smooth, protective finish. Allow time to fully dry before playing.
Step 15: Enjoy Your Grip!
Your lacrosse stick is now optimally taped for dominating play. The wrap job provides cushioning, stability, tackiness and just the right grip areas. With practice, you’ll perfect taping to suit your unique preferences. Maintain the tape’s grip by reapplying as needed. With proper taping technique, you’ll notice significant control improvements on the field. Just remember to keep the tape clean and replace it once overly gritty. Now get out there and own the competition with your enhanced lacrosse stick!
Creating unique tape designs – stripes, patterns, and logos
Elevating your lacrosse stick’s style while optimizing its performance requires proper taping technique. With some creative thinking, you can design custom patterns and graphics that set your stick apart. From team logos to unique color schemes, specialized tape jobs showcase personality on the field. Here’s how to tape a lacrosse shaft with advanced pizzazz in 2023.
Planning Your Design
First, visualize the lacrosse tape design you want to create. Sketch concepts on paper, considering factors like team colors and personal flair. Think stripes, diagonal angles, shapes, and logos. Gather the necessary tape colors and types for your vision. Having a plan keeps the process smooth and the finished product sharp.
Incorporating Team Pride
Show team spirit on your lacrosse stick by integrating your squad’s colors and logos. Use white tape as a neutral base, then strategically place strips of your team’s primary and secondary hues. Frame the logo with parallel color bands or craftily reveal it through criss-cross patterns. Get creative with tape striping to exhibit passion for your program.
Coordinating Colors
Beyond team colors, consider complementary shades that aesthetically please you. Contrasting bright colors with neutral tones creates pops that stand out. Gradually blend hues with angled intersections or stagger short strips in a sequence. Applying lacrosse tape neatly in planned color schemes makes for dazzling designs.
executing Patterns
Expand beyond single spirals and crosses by layering multiple patterns. First follow the basic taping steps to create a durable foundation. Then overlay shapes like diamonds, chevrons, zigzags or diagonal stripes. Vary the angles and intersections to interlock or reveal designs for a unique stylistic touch.
Affixing Symbols and Lettering
Make your mark by taping stylized letters or custom symbols like stars and lightning bolts. Use pre-cut vinyl lacrosse stick decals to cleanly affix images and text. Or get crafty by hand-cutting tape strips into shapes with an X-Acto knife. Strategically position decals between color bands or patterns for artistic flair.
Incorporating Textures
Further elevate your tape game by integrating multiple tape textures. Combine smooth lacrosse tape with grippy hockey tape for contrasting visuals and feels. Or use rigid stringing tape to create defined striping against softer lax tape. Textured accents enhance grip while adding intrigue.
Maintaining Functionality
While aesthetics are important, performance remains priority number one. Ensure decorative elements don’t compromise taping’s main purpose – optimizing grip and control. Fully cover the shaft’s surface to cushion and reinforce high-wear areas. Keep vital sections tacky for handling the ball confidently in play.
Planning The Process
Thoughtfully arrange the taping order to make your vision a reality. Start by applying any background colors or base patterns first. Then layer on accent pieces like stripes, textures and decals. Building up the design requires patience and precision. But the end result will be well worth it.
Avoiding Clutter
While eye-catching designs are great, avoid visual clutter. Stick to 2-4 complementary colors and integrate patterns gradually. Use empty space between elements to create clean contrast. Centering logos and symbols prevents a haphazard appearance for a polished finish.
Sealing Your Masterpiece
Once your design is complete, seal the tape with a lacrosse shaft sealant. This locks in the graphics and provides a smooth feel. Take time with the finishing touches to really make your custom tape job shine. Your one-of-a-kind lacrosse stick will now command attention on the field!
Maintaining Your Design
Rewrap worn out sections as needed, matching the angles and patterns of your original tape job. Use old photos for reference to recreate the look. Freshening up the decor periodically preserves its luster all season long. With some imagination and proper technique, you’ll be sporting the boldest lacrosse stick around.
Taping a women’s lacrosse stick – differences from men’s sticks
When taping a women’s lacrosse stick, slight technique adjustments are required compared to taping a men’s stick. From grip placement to considering skinnier shaft dimensions, optimizing a women’s stick demands adaptations. Female players have unique needs for control, feel and ball security. Here are top tips for taping a women’s lacrosse shaft for peak performance in 2023.
Using Thinner Tape
Since women’s shafts have smaller circumferences, begin with thinner lacrosse tape. Standard tape can feel bulky. Precisely sized tape provides a better fit and grip without added weight. Test different tape widths to find your ideal wrap. Custom sizing creates a lighter, more maneuverable feel.
Focusing Grip Above Midpoint
Position the main grip area higher up the women’s shaft versus a men’s stick. With different legal cross-checking rules, maximizing control in the upper halves is ideal. Concentrate grip strips between the shoulders and hips for executing quick stickwork.
Minimizing Grip Near Butt
Avoid building up thick tape layers nearer the butt end on a women’s stick. Added weight here can feel unbalanced. Keep lower sections smooth by tapering tape as you wrap downwards. Lightweight maneuverability is key.
Emphasizing Grip On Throat
Aggressively texture the throat area below the scoop to facilitate cradling and ball retention. Women’s lacrosse involves constant motion, and jarring checks are illegal. Extra grip here provides confidence cradling on the run.
Reinforcing Stress Points
Watch for wear around the throat, bottom corners and any mid-shaft dents. Generously wrap extra tape layers to strengthen vulnerable stress points. Don’t overlook added reinforcement needs unique to each stick.
Balancing Grip and Glide
Women’s sticks benefit from a balance of control and fluidity. Don’t overdo the grip texture throughout. Add silky tape between grip strips to maintain smooth rotary movement for fakes and feeds.
Coordinating With Pocket
Consider how tape feels interfacing with the pocket. Keep lower taping smooth to avoid catching. Frame colored tape to match pocket strings for a cohesive aesthetic.
Testing Weight Distribution
After taping, test the stick’s balance and swing speed. Ensure any added weight doesn’t negatively impact quick handles and shots. Proper weight distribution maintains finesse.
Maximizing Sensory Input
Wrap tape snugly with few gaps or edges to enhance feel. Women’s lacrosse demands precise stick handling, so optimizing sensory feedback is key. Tight, thin tape transfers critical tactile nuances.
Considering Materials
Beyond lacrosse tape, experiment with alternatives like racket grip or cloth sports tape. Softer, flexible materials allow for more finessed play. Mesh tape providesextra tackiness without much thickness.
Updating Tape Jobs Frequently
Don’t overlook maintenance. Women’s sticks see heavy wear, so refresh tape after 4-5 practices or games. Rewrap high friction areas first like the throat scoop and grips. Keep wraps tight.
Crafting Unique Styles

Female players often incorporate colorful tape designs reflecting their style. Intertwine school colors with motivational words or symbols. Display your personality creatively while maintaining stick functionality.
Asking For Input
Talk tape preferences with teammates. A universal approach won’t suit every player’s needs. Experiment to see what works best for you. Don’t be afraid to modify techniques that maximize your strengths.
Emphasizing Fit Over Convention
While proper technique remains important, don’t be afraid to bend taping “rules” to enhance feel and control. Cater tape jobs to your hands, play style and strengths. Optimize stick function over form.
Taping a women’s lacrosse stick well requires adjusting approaches to serve players’ specialized needs. But with an understanding of key differences, female athletes can tape shafts for ultimate performance. Personalize tape jobs to feel like natural extensions of your body and game.
Taping for different player positions – attack, middie, defense, goalie
To optimize lacrosse stick performance, taping techniques should adapt to players’ positions. Attackmen, midfielders, defenders and goalies have unique needs based on their roles. Customizing tape jobs to suit each position enhances overall control and feel during play. Here are top taping considerations in 2023 for dominating at your position.
Attack Sticks – Grip and Accuracy
For attack players, concentrate extra grip tape in the upper third of the shaft for added control during quick stick maneuvers near the head. Reinforce the throat and scoop areas to facilitate accurate passing and shooting. Minimal tape lower down keeps the stick lightweight for dodging.
Midfield Sticks – Transition Speed
Midfielders rely on transition speed, so keep overall taping lighter. Focus on the throat and add grip strips for steadiness when sprinting coast to coast. Minimize lower taping to prevent catching on gloves during face-offs. A smooth finish anywhere not gripped allows swift direction changes.
Defense Sticks – Durability
Defensemen dish out physicality and suffer crosses in return. Protect sticks by wrapping extra tape layers in the throat and any vulnerable dents along the shaft. Emphasize durability over minimized weight. Thicker tape absorbs harsh checks better.
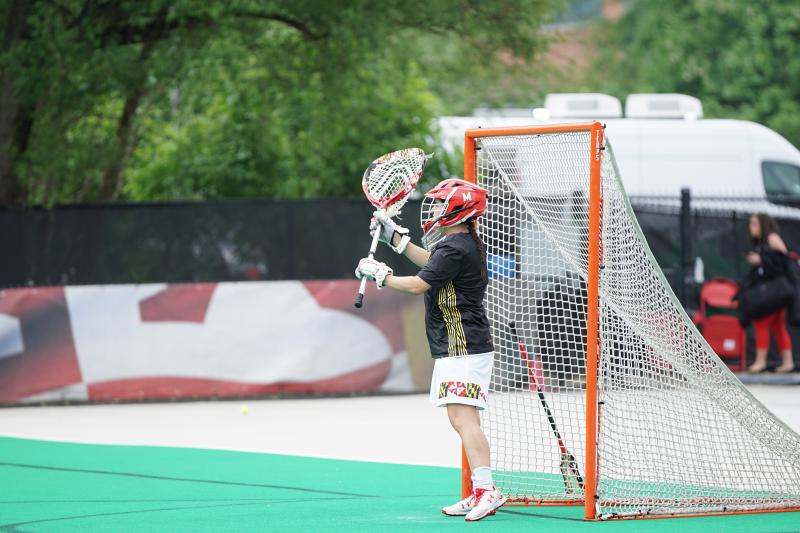
Goalie Sticks – Maximum Coverage
For goalies, fully wrap from throat to butt with slightly overlapping spirals. This provides a cushioned grip and protects against ball impact shock. Don’t leave any gaps or half-finished sections. Complete coverage is ideal for goalie sticks.
Attacker’s Finessed Touch
Attack requires controlled stickwork, so use thinner tape strips with smooth transitions between grips. Keep lower sections sleek for quick release passes and shots. Aim for minimal material buildup for a finessed touch.
Midfielder’s Secure Grip
Cradling while sprinting demands extra grip, so midfielders should utilize cross-patterns and hockey tape strips for stability. Heavier wear around the throat also necessitates reinforcing tape to maintain ball control.
Defender’s Battle-Tested Tape
For defenders, don’t be shy with tape layers. Wrap multiple base coats up and down the shaft for impact absorption. Ample texture in grips and on the throat keeps the ball secure during physical contests.
Goalie’s Protective Barrier
Goalies need full-shaft padding, so use extra wraps to create a shock-absorbing barrier. Soft tennis grip tape underneath adds cushion too. Durable, thick tape jobs protect goalie’s sticks from ball bruising.
Matching Team Styles
Incorporate team colors and logos in tape jobs for unity. But maintain position-specific grip and handling. Form follows function when taping sticks for game situations.
Testing Adaptations
Experiment with tape techniques in practices to ensure advantages for your position. Don’t settle if initial taping attempts fall short. Seek input from coaches and teammates too.
Re-Wrapping Worn Sections
Rewrap high-wear areas like the throat after games and practices to keep optimal function. Reapply matching tape frequently to fix fraying before it compromises performance.
Reviewing Game Footage
Study where grip failed you in games. If turnovers occur during transitions, reconsider if shaft tape needs more grip there. Address weak spots.
Considering Weather Conditions
Factor in how moisture or cold temperatures impact grip. Use stickier tape or add an overwrap clear tape shield against the elements. Don’t get caught off guard game day.
Focusing on Stick Compatibility
Ensure your taping complements the head, pocket and gloves for unified control. For example, soften lower grip areas if catching on gloves occurs. Seek holistic harmony.
With the right taping techniques tailored to positions, every player can optimize their lacrosse stick’s performance. Consider your needs in the game, then tape accordingly for an advantage over opponents. Mastering specialized taping for your role takes stick skills to the next level.
Matching tape color to team/gear colors and personal style
Coordinating lacrosse tape color with team uniforms and personal preference showcases creativity and unity. Matching gear aesthetically pleases the eye while representing team commitment. Tape also provides self-expression opportunities. Consider factors like uniforms, accessories and individual style when selecting tape color for optimal lacrosse stick grip and control.
Complementing Team Uniforms
Use lacrosse tape hues that directly coordinate with team colors and logos. For example, university teams can match primary jersey shades with a white tape base. Integrate secondary colors through stripes along the shaft. Uniform-matching tape proudly displays team spirit.
Coordinating Helmets and Gloves
Scan teammates’ gear for inspiration. Identify helmet and glove shades that complement each other well. Mimicking successful color combos creates uniformity across equipment. Matching your tape to gloves and helmets pulls the look together.
Contrasting Team Colors
Sometimes contrast pops more than matching. Use opposing color wheel shades to make team colors and tape stand out. For example, pair purple apparel with yellow tape accents. Complementary contrast attracts the eye while representing your team.
Expressing Your Style
Beyond team consideration, choose tape colors reflecting your personality. Prefer bold neon hues or pastels? Monochromatic or multifaceted? Express your style preferences through creative color combinations. Your gear represents you.
Standing Out or Blending In
Determine if you want your tape to stand out or subtly blend in. Bright colors attract attention, while neutral earth tones provide understated style. Either approach works with proper team color coordination.
Testing Color Combo Aesthetics
Try out potential tape colors next to gear to visualize the overall look. Edit hues that feel imbalanced or clash visually. Proper color coordination requires seeing combinations fully realized on equipment.
Sampling Tape Color Effects
Don’t just imagine color pairing results. Wrap tape samples on your stick to test effects firsthand. Evaluate in varied lighting conditions. Optimize appearances from both player and spectator perspectives.
Photographing Results
Snap photos of potential tape combos on your stick from multiple angles. Review images over time to judge what pairs best with gear. Share photos with teammates for color combo feedback too.
Matching Glove and Pad Colorways
Consider how tape colors complement pad and glove colorways beyond just team uniforms. Pads and gloves utilize creative fades and accents. Either match or contrast tape with existing colorways.
Coordinating Cleat and Short Colors
Don’t forget footwear and apparel beyond pads and helmets. Match tape to cleat color accents or short trim for a complete look. Consistent colors project put-togetherness.
Referencing Brand Palettes
Check gear brand style guides online that detail official colorways. Use specific hues from logo palettes for perfectly harmonious pairings. Represent brands beyond just slapping logos on gear.
Researching Color Theory
Study basic color theory guiding pros. Learn why certain shades complement each other. Informed color coordination looks polished rather than randomly matched.
With strategy and experimentation, lacrosse athletes can create tape jobs that complement team gear and personal style preferences beautifully. Well-matched colors project professionalism on the field through unified aesthetics. Don’t overlook this impactful finishing touch when taping sticks for optimal performance and appearance.
Removing old tape and residue from your shaft

Before re-taping your lacrosse stick, properly removing old tape and adhesive residue is crucial. Leftover stickiness and tape fragments under new wraps compromises optimal grip. Taking time to thoroughly clean the shaft provides a fresh start for maximum control. Here are tips for cleaning lacrosse shafts in preparation for tape jobs in 2023.
Slowly Unwrapping Used Tape
Carefully unwrap used tape spirally down the shaft to avoid tearing. Tightly adhered tape may require gently slicing along the length first to lift an edge. Take care not to cut into the shaft surface. Removing tape methodically prevents damage.
Picking Off Leftover Tape
After unwrapping the main tape sections, use your fingernails to pick off any remaining tape pieces stuck to the shaft. Scrape at edges gently to remove stubborn fragments rather than forcing them off.
Removing Adhesive Residue
Adhesive residue is common after removing old tape. Rub firmly with a clean rag and warm water to scrub it away. Avoid harsh scrubbing that could scratch the shaft finish.
Using Rubbing Alcohol
For really sticky tape residue, use rubbing alcohol applied with a cotton pad. Gently rub affected areas while frequently using fresh pad sections. The alcohol helps dissolve stubborn goo without damaging composite shafts.
Trying Lacrosse Shaft Cleaner
Specialized lacrosse shaft cleaners also effectively remove old tape remnants and glue. Spray onto shaft per directions. Let it sit briefly before wiping clean for a spotless result.
Sanding Off Severe Adhesive
For thick leftover residue not removed by other methods, gently sand using fine grit sandpaper. Rub lightly to avoid removing shaft material. Avoid sanding carbon composite shafts to prevent damage.
Avoiding Harsh Solvents
Refrain from using acetone or extremely harsh solvents that could weaken shaft integrity and fade logos. Stick to gentle cleaners to safely eliminate tape residue buildup.
Rinsing Residue Away
After cleaning, rinse the shaft thoroughly with water to remove any remaining cleaner or adhesive residue. Allow to fully air dry before taping to prevent moisture issues.
Checking for Bumps and Gaps
Run your hand up and down the cleaned shaft to ensure no leftover tape bumps or uneven adhesive remain. Strive for a smooth, neutral taping foundation.
Re-sanding Old Shafts
On older shafts with multiple tape jobs, consider lightly sanding overall after cleaning to renew a smooth grip-ready surface. Don’t over-sand alloy or composite shafts.
Avoiding Oily Agents
Don’t apply any oily cleaners or agents prior to re-taping, as these can inhibit tape adhesion. Stick to water-based cleaners only.
Storing Cleaned Shafts Properly
Once cleaned, store shafts safely to avoid new scratches or residue from other gear contact. A clean shaft is ready for fresh, optimal tape adhesion.
With the right lacrosse shaft cleaning techniques, old tape and adhesive won’t hinder new grip. Proper removal creates ideal taping conditions for performance and control all season long. Don’t cut corners on prep work.
Caring for your taped stick – keeping it clean and intact
Maintaining your lacrosse stick tape job keeps optimal grip and control intact. With proper care, tape stays cleaner, adhered and textured all season. Neglect leads to poor performance. Implement pro maintenance habits for maximizing your taped shaft’s lifespan and playability in 2023.
Keep It Dry
Moisture compromises tape adhesion and dirt accumulation accelerates deterioration. Thoroughly dry your stick after games and practices before storage. Allow damp tape to fully air dry before rewrapping if needed.
Minimize Dirt Contact
Avoid laying taped sticks in grass, dirt or mud that can embed into tape texture. Dirty tape loses grip effectiveness. Keep your stick off the ground when not in use.
Clean Periodically
Use mild lacrosse shaft cleaners to refresh dirty tape and restore tackiness. Avoid over-scrubbing textured areas. Let air dry fully afterwards.
Check For Wear
Inspect tape daily for wear, peeling edges, gaps or smoothing grip texture. Rewrap high friction areas like the throat and handles before deterioration intensifies.
Re-tape Thinning Areas
Don’t wait until bare shaft shows to re-tape. Thinning tape has already lost cushioning and grip. Freshen up wraps before they fail.
Seal It
Applying lacrosse shaft sealant over tape preserves texture and adhesion. Reapply sealant before games for optimal grip and water resistance.
Keep Tape Out of Sun
Avoid leaving taped sticks sitting in direct sunlight when not in use. UV rays and heat accelerate tape deterioration.
Check Ends
Rewrap untucked tape ends promptly. Loose ends catch and unravel quickly. Refold or add a securing wrap to keep ends tidy.
Remove After Wet Games
Immediately unwrap damp tape after rain games to allow prompt drying. Storing wet accelerates molding, mildew and adhesion loss.
Keep Away From Heat
Don’t leave taped sticks beside heaters or in hot cars. Excessive heat can melt glue and ruin tape jobs over time.
Rewrap Before It Fails
Don’t wait for tape to fully fail before rewrapping. Deterioration Creeps up quickly. Stay vigilant and proactive.
Properly Remove Old Tape
Taking time to fully remove old tape prevents adhesive residue buildup compromising new tape’s grip. Start fresh each time.
With attentive, preventative care, lacrosse tape jobs maintain grip integrity longer. Implementing pro maintenance best practices reduces deterioration for consistent control. Keep your lacrosse stick’s tape fresh and clean all season long.
Common taping mistakes to avoid – creases, wrinkles, uneven tension
Avoiding common errors is crucial for optimal lacrosse stick taping. Creases, wrinkles, loose ends and uneven wraps undermine performance. Imprecise technique creates discomfort and lack of control when playing. Be mindful of these common pitfalls and best practices for crisply taping your lacrosse shaft correctly in 2023.
Preventing Creased Tape
Creases form when tape folds onto itself during wrapping. Always keep tape tautly pulled to prevent creasing while overlapping spirals. Tension smoothes potential creases before they imprint.
Smoothing Out Wrinkles
If wrinkles occur, unwrap that section and re-tape while gently pulling to remove creases before rewrapping over it. Massage wrinkled areas as you go.
Maintaining Even Tension
Inconsistent tape tension while wrapping leads to grip inconsistencies. Maintain steady tension while providing just enough tautness to prevent creases.
No Loose Ends
Prevent sloppy appearances and unraveling by cleanly finishing off tape ends. Fold ends over neatly or place a securing wrap atop them.
Check Adhesion
All tape should stick firmly in place when pressed down. If adhesion issues occur, thoroughly clean the shaft and let dry before rewrapping.
Wrapping Straight
Carefully wrap tape perpendicular to the shaft’s axis without spiraling at angles. Even straightness reinforces grip efficacy and neatness.
Prevent Gaps
Consistently overlap tape by half its width to eliminate any bare shaft gaps. Gaps create weak points vulnerable to wear and slipping.
No Bubbles or Ripples
Watch for any raised bumps, ripples or air bubbles while smoothing tape. Pause to rewrap bumpy sections for flat adhesion.
Clean Cuts
Never tear tape ends irregularly. Always cut cleanly with scissors for tidy terminations preventing premature fraying.
Avoid Lower Shaft Bunching
Don’t allow excessive overlapping that bunches up at the butt end. This alters handling. Trim tape width if needed.
Check Texture Spacing
Evenly space grip textures like cloth or hockey tape. Clustering looks sloppy and creates imbalance.
Maintain Shape
Tape should contour the shaft’s shape without bulging. Irregularly taut sections create handling issues.
Remaining mindful and proactively correcting mistakes while taping prevents grip and control inconsistencies. Strive for precision wrapping with experience. Well-executed technique makes the difference on the lacrosse field.
When to re-tape your stick – after heavy use and before games
Determining optimal times for re-taping your lacrosse stick ensures you maintain maximum grip and control. Tape loses stickiness and cushioning with use, necessitating fresh wraps. Prioritize re-taping after heavy use and right before games or practices for ideal performance.
After Each Game
Games involve heavy physical play that wears tape down. Re-wrap thinning or deteriorating spots like the throat and handles post-game to restore grip.
After Several Practices
While less grueling than games, multiple practices wear tape wraps over time. Freshen up tape after a few back-to-back practices before deterioration progresses.
When Texture Fades
Grip tape areas rely on coarse texture for tackiness. Re-tape once sections lose distinct texture from wear for optimal re-gripping.
When Edges Loosen
Rewrap immediately if tape edges begin lifting or peeling. Loose edges unravel quickly once started. Nip it in the bud.
When Gaps Form
Bare shaft exposure from tape gaps mandates quick rewrapping. Gaps indicate cushioning and grip fading. Don’t delay fixes.
If Ooze or Dirt Embed
Deeply embedded ooze, dirt and grime can’t be cleaned from deteriorating tape. Fresh wraps make the stick look and feel like new.
Before Game Days
Re-taping the night before games provides fresh tape tackiness and cushioning when it matters most. Don’t play games with worn, old tape.
If Experiencing Poor Control
Take control inconsistencies during play as signs worn tape should be replaced. Restore handling precision with new tape.
Change Color When Needed
Freshen up old, grimy tape with fresh color changes for aesthetics. Keep school spirit colors looking vibrant.
Before Big Games
Ensure grip is optimal going into major matchups. Don’t let deteriorated tape compromise your performance when it counts most.
Between Tournaments
Replace tape between back-to-back tournament game days. You’ll start each tournament with ideal grip for success.
Re-taping at the right times prevents grip and cushioning deterioration from hindering your lacrosse game. Prioritize fresh wraps after significant use and prior to key games.
Taping tips for optimal grip, control, and style on the lacrosse field
Proper lacrosse stick taping technique optimizes grip, handling, and personal flair. With the right strategies and materials, tape can elevate your game through enhanced control and eye-catching style. Use these key taping tips when wrapping lacrosse shafts this season for next-level performance.
Establish a Neutral Base
Start with a smooth, single-color base wrap down the full shaft length. This provides an even foundation for adding grip and design layers. White tape works well for a neutral look.
Focus Grip Above Midpoint
Concentrate extra grip texture like cloth or hockey tape on the top half of the shaft for control during cradling, passing and shooting. Keep lower areas smooth.
Reinforce High Wear Areas
Heavily wrap vulnerable areas like the throat and bottom corners with extra protective layers to prevent denting and fractures from checks.
Get Creative With Color
Use colorful tape designs to express personal style and team spirit. Consider complementary colors, stripes, fades and colorblocking for unique looks.
Incorporate Logos and Lettering
Cut lacrosse tape into shapes to adhere decals, numbers, names or logos. Integrate custom graphics for next-level customization.
Seal It
Finish tape jobs by sealing the full shaft with a protective lacrosse tape sealant. This locks in designs and prolongs grip.
Check Weight Distribution
Ensure any extra tape weight doesn’t throw off overall stick balance. Keep lower sections lighter to prevent sluggish handling.
Overlap 50%
Consistently overlap each wrap by half the tape’s width to eliminate gaps and create a cohesive grip surface.
Maintain Tension
Keep tape pulled tautly when wrapping without over-stretching. This prevents wrinkles while ensuring optimal adhesion.
Set with Heat
Use a blow dryer on medium heat to warm and set tape. The gentle heat melds tape for extra durable adhesion.
Check Tactile Sensations
Ensure taped grip feels tacky yet smooth. Too slick and drops occur, but overly tacky hinders swift maneuvers and passing.
By tailoring tape techniques to your preferences and play style, next-level grip, control and personality shine through. Display your lacrosse passion proudly through creative, performance-focused tape jobs this season.