How to cradle a lacrosse ball effectively. What are the key elements of proper cradling technique. Why is cradling important in lacrosse. How to practice cradling for beginners. What are the differences between one-handed and two-handed cradling.
Understanding the Fundamentals of Lacrosse Cradling
Cradling is a crucial skill in lacrosse that allows players to maintain possession of the ball while moving across the field. It involves creating a centrifugal force on the stick head to keep the ball securely in the pocket. Mastering this technique is essential for success in the sport, as it enables players to dodge checks, protect the ball from defenders, and maintain control during fast-paced gameplay.
Why is Cradling Important in Lacrosse?
Cradling serves several vital purposes in lacrosse:
- Prevents the ball from falling out of the stick during movement
- Protects the ball from defensive pressure and stick checks
- Allows players to maintain possession while running, dodging, and maneuvering
- Enables smooth transitions between passing, catching, and shooting
By developing strong cradling skills, players can significantly improve their overall performance and contribute more effectively to their team’s success.
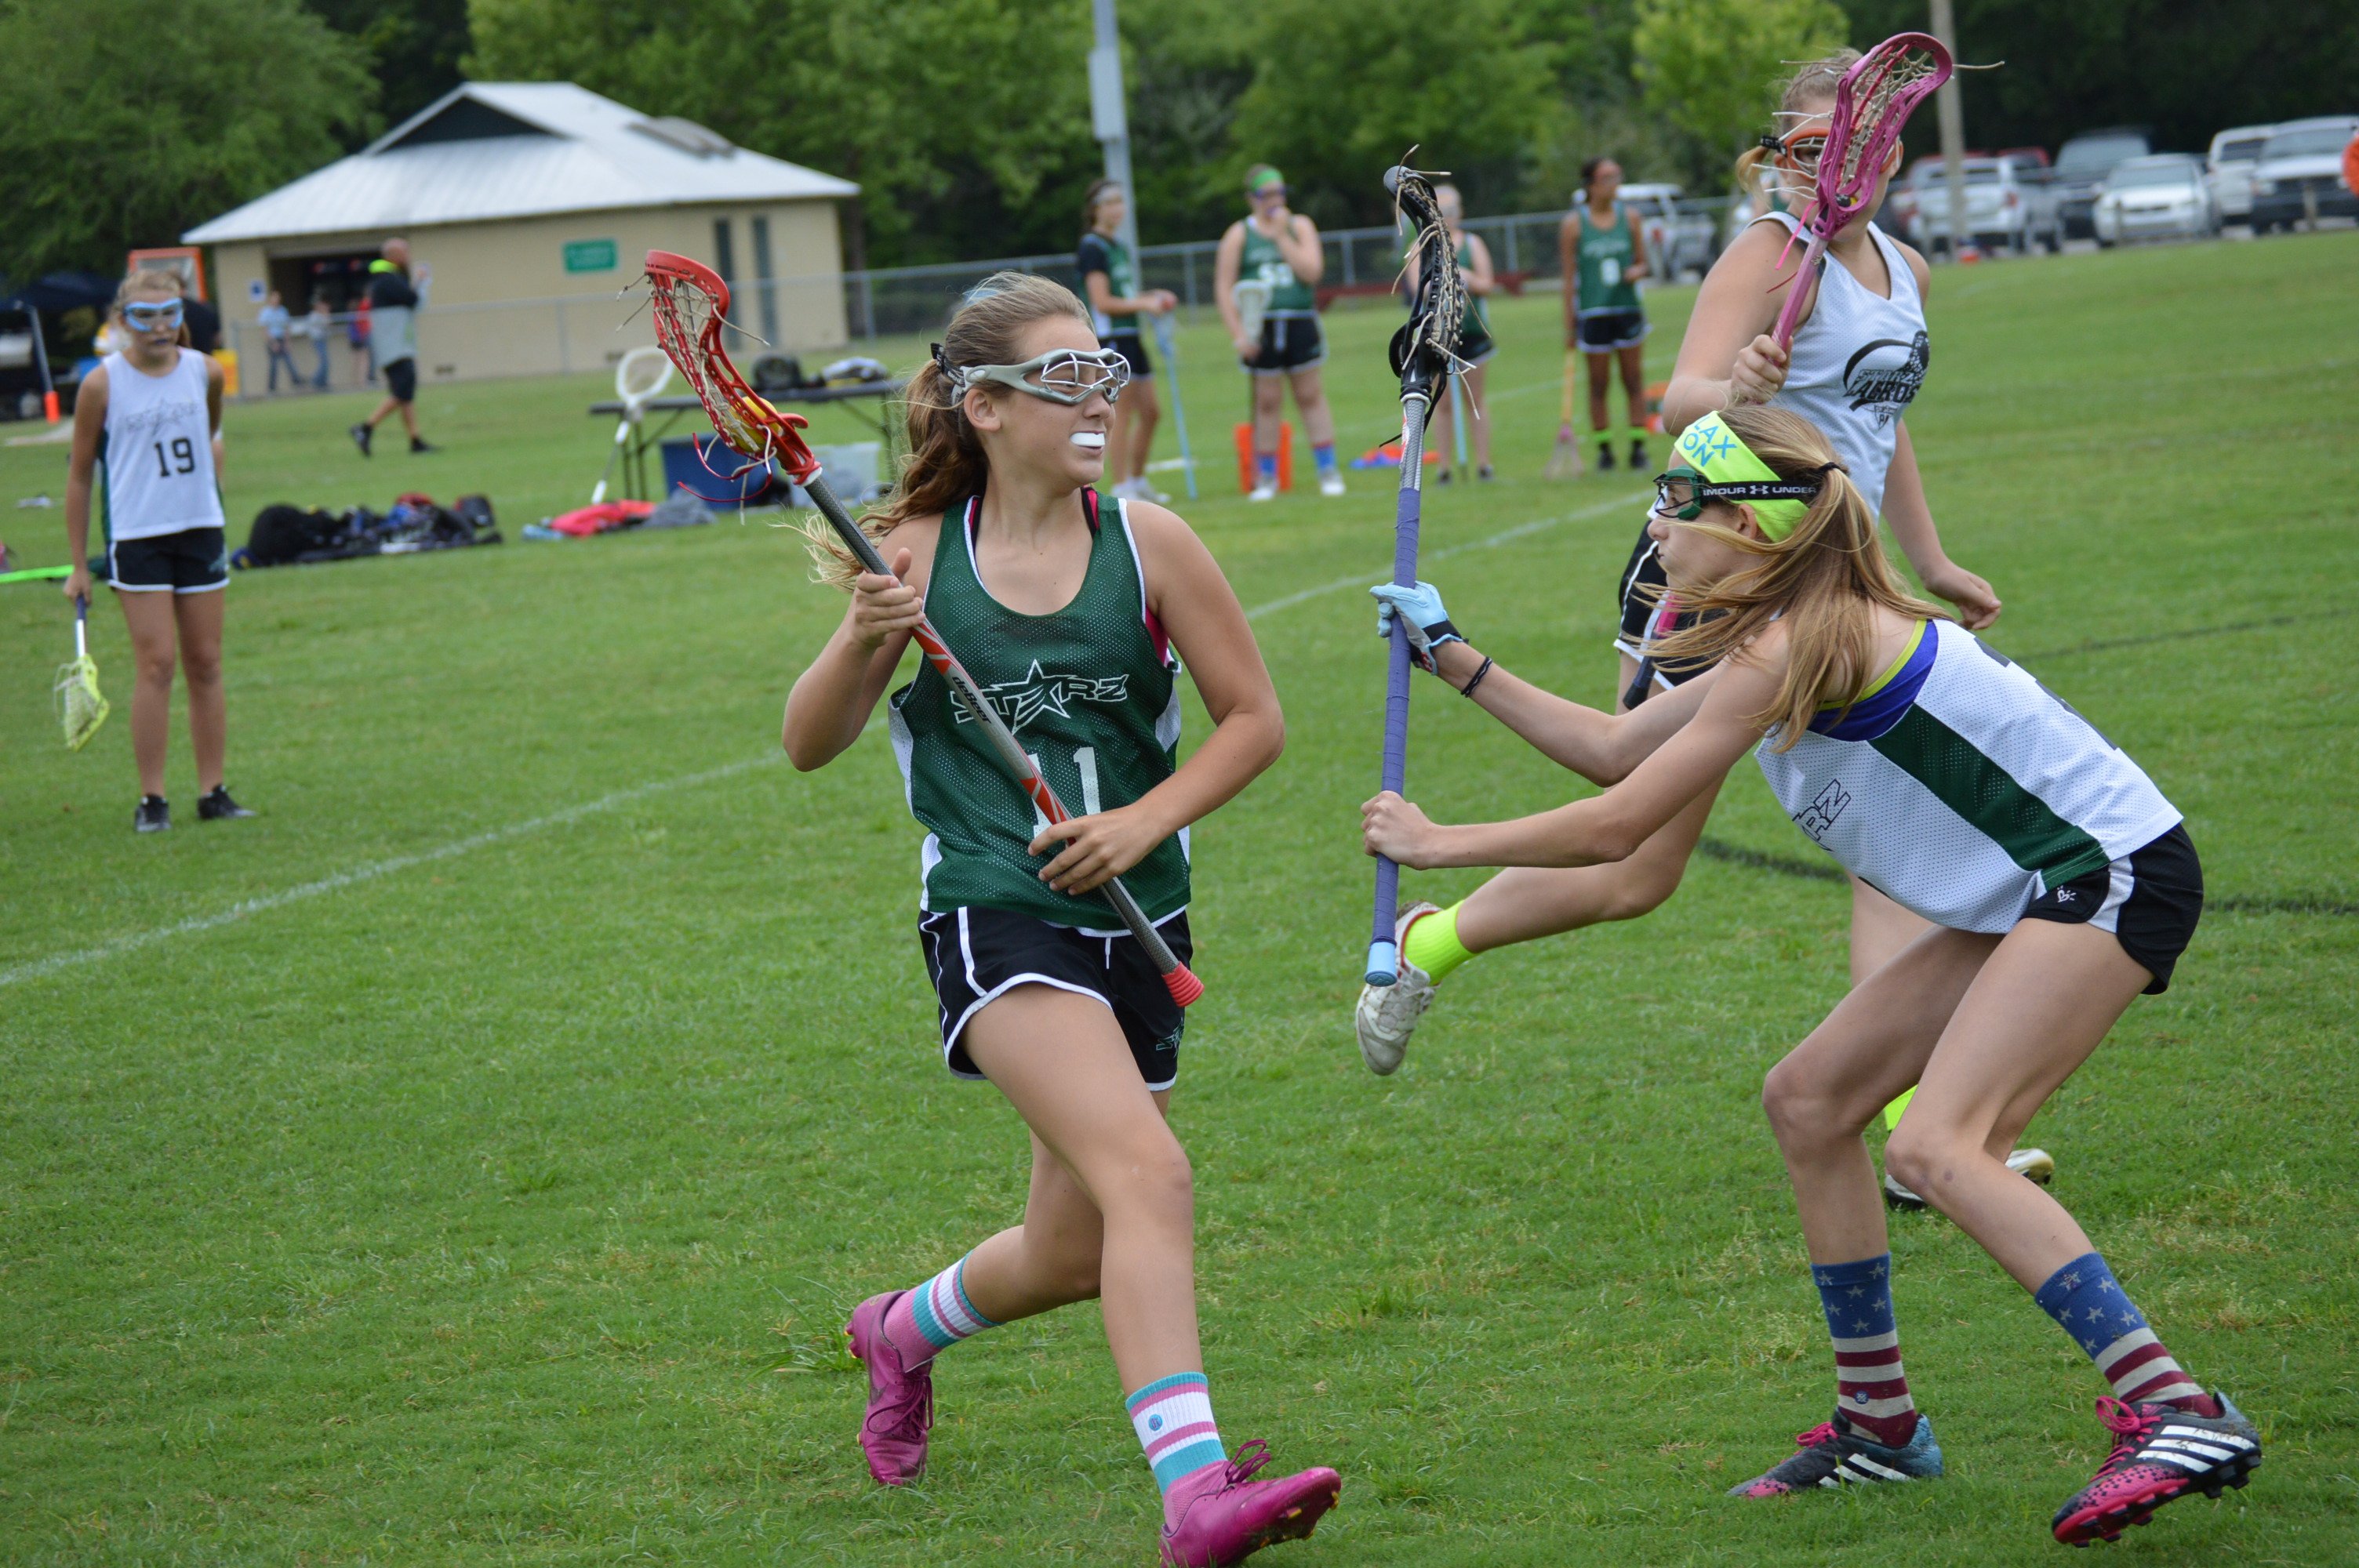
Basic Cradling Technique for Beginners
For those new to lacrosse, learning the proper cradling technique is essential. Here’s a step-by-step guide to get you started:
- Grip the stick with your dominant hand near the head and your other hand loosely at the bottom
- Hold the stick parallel to your body, with the bottom near your hip and the top above your shoulder
- Use your dominant hand to curl the stick towards and away from you in a smooth rhythm
- Start slowly and gradually increase speed as you become more comfortable with the motion
- Keep the curling motion tight and efficient to maintain better control of the ball
Remember, the key to effective cradling is creating a consistent, fluid motion that keeps the ball securely in the pocket of your stick.
Advanced Cradling Techniques and Variations
As players progress, they can incorporate more advanced cradling techniques to enhance their game:
Vertical Cradling
While horizontal cradling (parallel to the ground) may feel more natural, vertical cradling offers better protection against stick checks. Practice cradling with your stick in a more upright position to make it harder for opponents to dislodge the ball.

One-Handed Cradling
One-handed cradling allows for greater maneuverability and better ball protection. To execute this technique:
- Use your dominant hand to control the stick near the head
- Keep your non-stick arm in a fixed position (often in an upside-down L shape) to avoid warding penalties
- Use your body to shield the stick from defenders
One-handed cradling is particularly useful when dodging opponents or navigating through tight spaces on the field.
Cradling While Moving: Integrating Motion into Your Technique
Once you’ve mastered stationary cradling, it’s time to incorporate movement into your practice. Cradling while running is essential for game situations, so focus on the following aspects:
- Synchronize your arm movement with your natural running motion
- Maintain a smooth, consistent cradle even as your speed changes
- Practice changing directions while cradling to simulate game scenarios
- Work on transitioning between cradling and other skills like passing and shooting
Regular practice of cradling while moving will help you develop muscle memory and improve your overall ball control during gameplay.

Common Cradling Mistakes and How to Avoid Them
As with any skill, there are common pitfalls that players may encounter when learning to cradle. Being aware of these mistakes can help you improve your technique more quickly:
Cradling Too Wide
A wide cradle may feel more comfortable, but it makes it easier for defenders to check your stick and dislodge the ball. Focus on keeping your cradle tight and close to your body for better protection.
Neglecting Off-Hand Practice
Many players become overly reliant on their dominant hand for cradling. Make sure to practice cradling with both hands to become a more versatile player and keep defenders guessing.
Inconsistent Rhythm
An erratic cradling motion can lead to loss of control. Work on developing a smooth, consistent rhythm that you can maintain even under pressure.
Forgetting to Protect the Stick
Always be aware of your positioning relative to defenders. Use your body to shield your stick and keep the ball on the side away from opponents whenever possible.
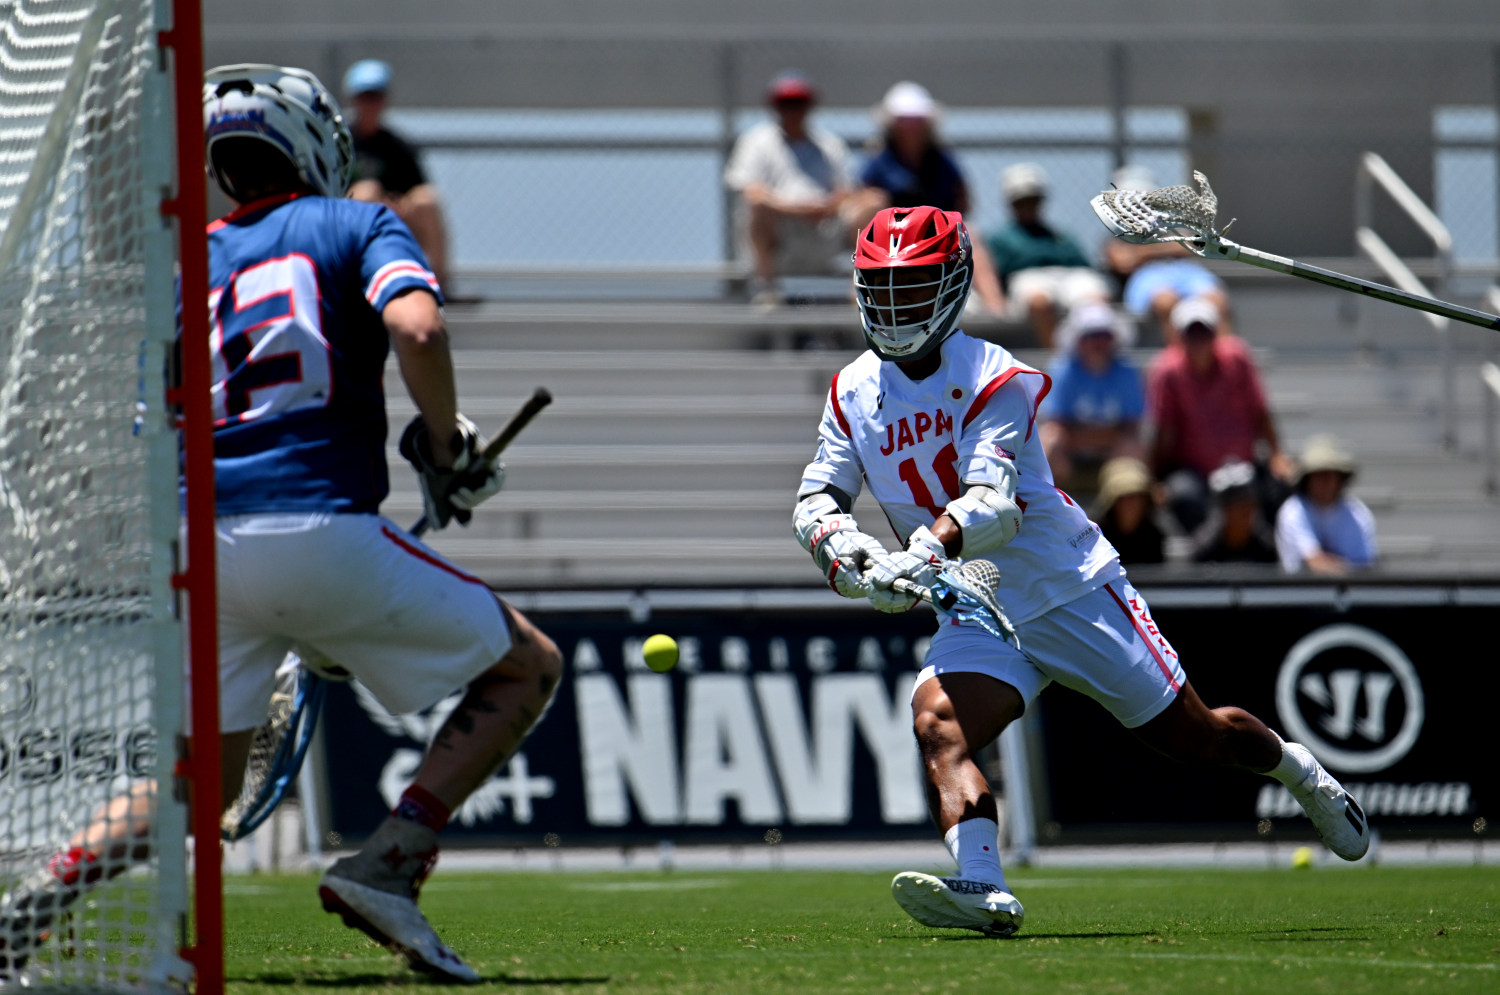
Drills and Exercises to Improve Your Cradling Skills
Regular practice is key to mastering cradling technique. Here are some effective drills to incorporate into your training routine:
Mirror Drill
Practice cradling in front of a mirror to observe and refine your technique. Focus on maintaining a smooth, efficient motion and proper stick positioning.
Wall Ball with Cradling
Combine wall ball practice with cradling by incorporating a few cradles between each throw and catch. This helps develop fluid transitions between skills.
Obstacle Course Cradling
Set up a simple obstacle course and practice cradling while navigating through it. This helps improve your ability to cradle while changing directions and speeds.
One-Handed Cradling Drill
Spend dedicated time practicing one-handed cradling with each hand. Start stationary and progress to moving drills as you improve.
Cradling in Game Situations: Applying Your Skills on the Field
Understanding how to apply your cradling skills in actual game scenarios is crucial for success. Consider the following situations where effective cradling can make a significant difference:
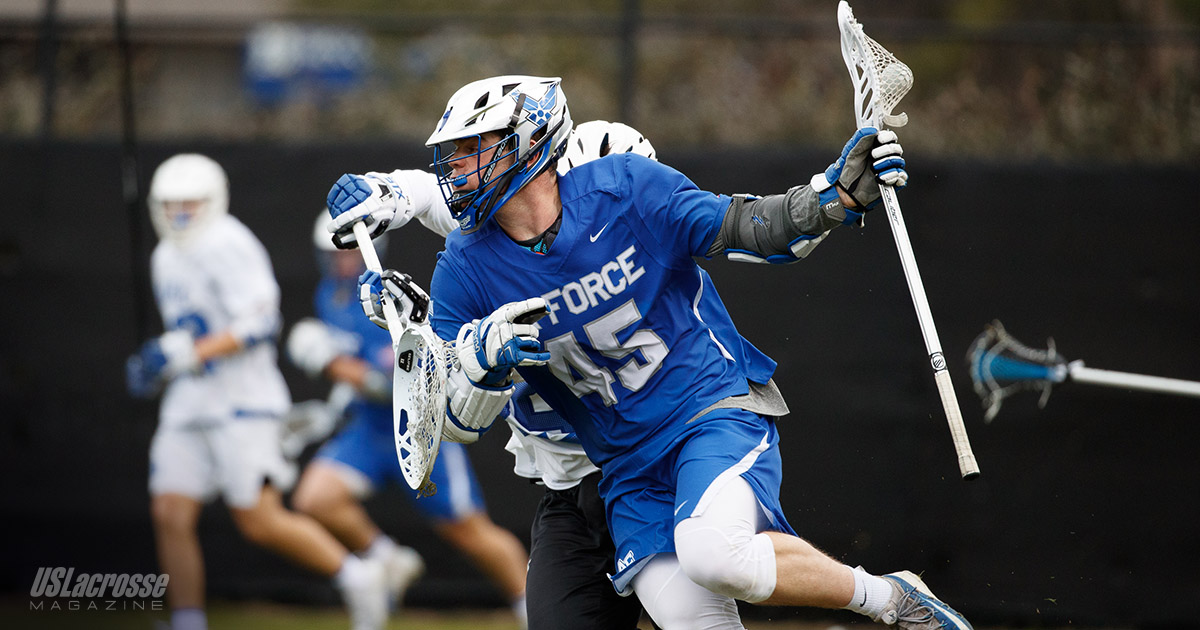
Clearing the Ball
When clearing the ball from your defensive zone, strong cradling technique allows you to maintain possession while evading pressure from opposing attackers.
Dodging Defenders
Skilled cradling enables you to protect the ball while executing dodges and fakes to get past defenders.
Transitioning to Offense
As you move from defense to offense, proper cradling helps you maintain control of the ball while surveying the field for passing or shooting opportunities.
Stalling and Possession Play
In situations where your team needs to maintain possession and run out the clock, solid cradling skills are essential for keeping the ball away from defenders.
By practicing these game-specific scenarios, you’ll be better prepared to use your cradling skills effectively when it matters most.
Equipment Considerations for Optimal Cradling
While technique is paramount, the right equipment can also impact your cradling effectiveness:
Stick Pocket Depth
A properly strung pocket that’s neither too deep nor too shallow can significantly affect your cradling ability. Experiment with different stringing patterns to find what works best for you.

Shaft Length and Material
The length and material of your shaft can influence the feel and balance of your cradle. Some players prefer shorter shafts for better control, while others opt for longer shafts for increased reach.
Grip Tape or Coating
Adding grip tape or using a shaft with a textured coating can improve your hold on the stick, potentially enhancing your cradling control.
Practice Balls
Using softer practice balls like Swax Lax balls can be beneficial for beginners learning to cradle. These balls are designed to help develop proper muscle memory without the fear of injury or damage to household items during indoor practice.
Remember, while equipment can play a role, it’s ultimately your technique and practice that will determine your cradling proficiency.
Mastering the art of cradling is a journey that requires patience, practice, and perseverance. By focusing on proper technique, avoiding common mistakes, and regularly incorporating cradling drills into your training regimen, you’ll steadily improve this essential lacrosse skill. Whether you’re a beginner just starting out or an experienced player looking to refine your technique, dedicating time to cradling practice will undoubtedly elevate your game and make you a more valuable asset to your team.
Lacrosse Cradling – Instructions – Beginner Lacrosse
Lacrosse Cradling for Beginners
Lacrosse athletes need to work on their cradling skills. This is a very important basic lacrosse skill in order to avoid dropping the ball (i.e. when kids are running down the field) and to protect the ball from defensive pressure.
Beginner Lacrosse – Best Lacrosse Books
Cradling Instructions & Tips
- Practice cradling the ball vertically. While it is easier to cradle a ball with your stick horizontal (parallel to the ground), it is also easier for an opponent to check and dislodge the ball.
- Cradle the ball close to your head. If an opponent is trying to dislodge the ball, he could miss and strike your helmet. If an opponent hits your helmet, he will be called for a slashing penalty and this will help your team.
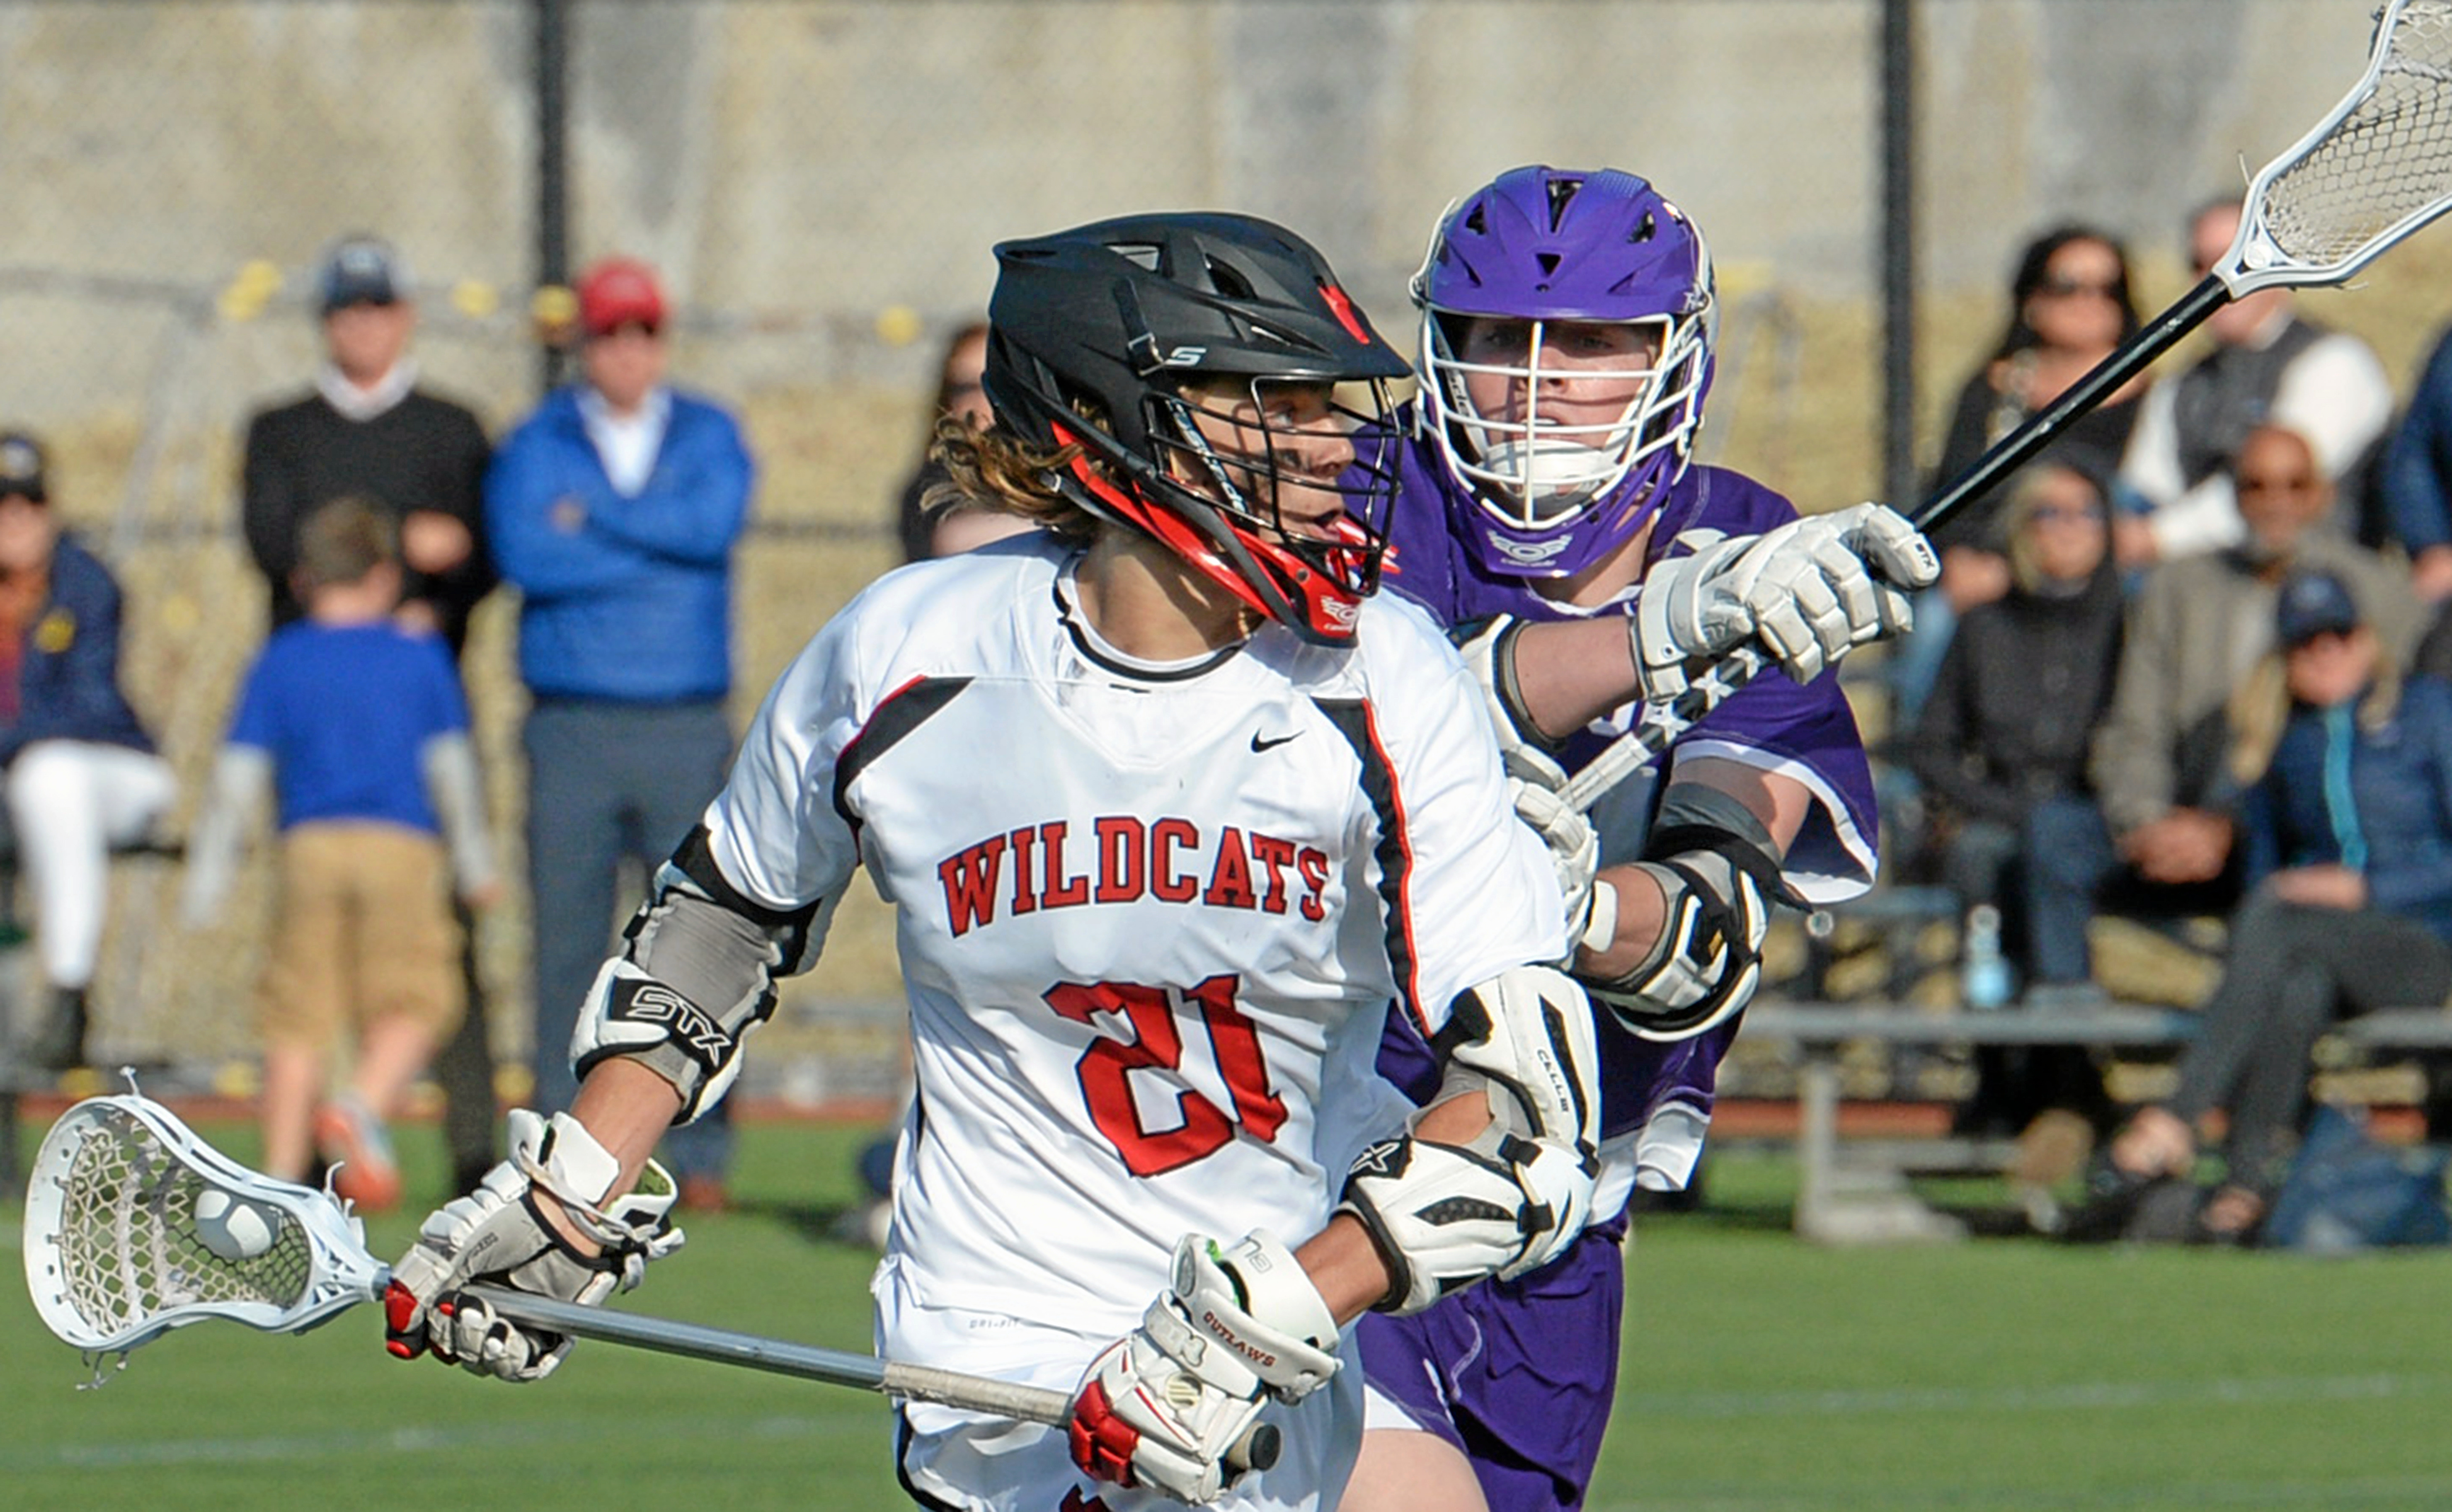
- Cradle the ball on the side away from your opponent. Use your body to protect the stick.
 Have your body between your opponent and the ball.
 - Practice one-handed lacrosse cradles in order to better protect the ball (as it is easier to move your stick and “shield” the stick with your body). However, you will need to “lock” the arm without the stick into one non-moving position (usually in a position that looks like an upside down L) in order to avoid a warding penalty (i.e. moving this arm to block an opponent’s stick check). See the video below for one-handed lacrosse cradling instructions.
- For cradling drills, please visit the main Beginner Lacrosse Drills section.
Instructional Videos for Lacrosse Cradling – One & Two Handed Cradles
youtube.com/embed/akKZCdwp1uo” frameborder=”0″ allowfullscreen=”allowfullscreen”>
Lacrosse 101: Cradling — WINNERS Lacrosse
During a lacrosse game you see players running all over the field – dodging checks, getting hit, shooting, passing – and yet the ball seems to never fall out of their stick. How is this possible? The answer is “cradling”. Cradling is using the movement of the stick to maintain possession of the ball without it falling out. Cradling is essential to being able to move around the field while protecting and handling the ball. After throwing and catching, cradling is one of the most important skills that young players need to learn to become successful lacrosse players. Here is a quick how-to guide on cradling a lacrosse ball.
First, use your dominant hand to control the stick by holding it near the head of the stick, while your other hand loosely grips the bottom of the stick. Hold your stick parallel to your body, with the bottom of the stick resting near your hip and the top of the stick above your shoulder.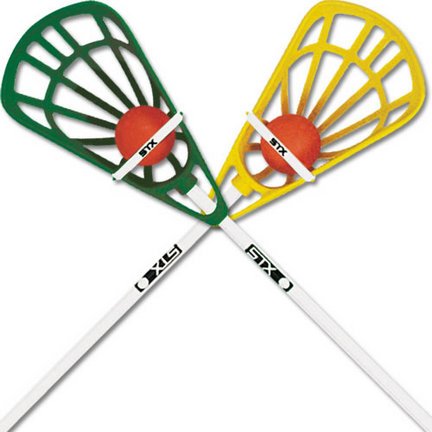 Next, use your dominant hand to curl the stick towards you (by curling your wrist), and then away from you, all in one smooth rhythm. Start slow at first, and then slowly speed up as you become more used to the cradling motion. The curling motion creates the centrifugal force on the stick head, which keeps the ball in the pocket. The repeated curling of the stick should be kept as tight and efficient as possible. The wider your cradle is, the easier it will be for the ball to fall out or for a defender to knock it out.
After cradling while standing still, try to practice cradling while on the run. Your arms should move similar to the natural movement of one’s arms when running, and running while cradling should feel natural after you get the hang of it. This will be essential for moving the ball down the field without it falling out of your stick.
And that is how to cradle! Cradling is an important skill to becoming a good lacrosse player and it takes time and practice to perfect it.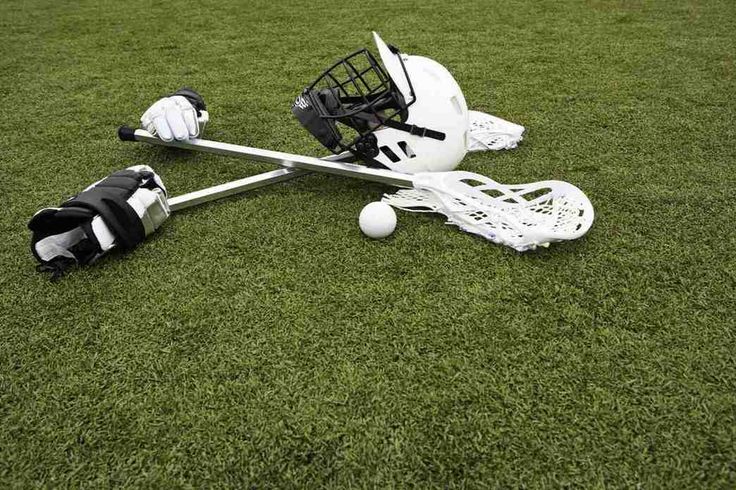 Stay tuned for more how-to guides from WINNERS Lacrosse! See below for cradling in action, it’s a bit different in the boys and girls game!
Your Child Has a Swax Lax Ball, Now What? Practice Cradling!
Now that my kids have Swax Lax balls, what can they do with them?
The short answer to that question is anything they could do with a rubber lacrosse ball, with the exception of bouncing it (which may help protect your TV and other valuable items in the house)!
However, digging a little deeper, Swax Lax balls were developed with the intent to teach new players how to cradle and catch. They help teach players to develop the proper muscle memory, allowing them to be more efficient in their movements. Over time we have come up with lots and lots of other uses, but cradling and catching were the real inspiration for Swax Lax balls. Today we are going to do a deep dive into cradling.
Cool Cats Cradle with a Swax Lax Ball
Cradling is the finger, wrist, elbow, and shoulder movements that create centripetal force on a ball, forcing it into the stringing of a lacrosse stick — similar to swinging a bucket of water over your head. If you swing it fast enough, the weight of the water will exert force on the bottom of the bucket, keeping the water from spilling. Same concept applies to lacrosse balls in a lacrosse stick. This is why we can keep the ball in the stick while the stick is in a vertical position.
Swax Lax balls are ideal for practicing cradling because they are the same weight as a regulation lacrosse ball. This means you have to exert the same amount of force to cradle a Swax Lax ball as you would a regulation lacrosse ball.
Sorry if the science there scared anybody. I’ll try to avoid it moving forward.
For new players, cradling is all about keeping the ball in their stick. For more advanced players, it involves manipulating the ball in the pocket of the stick so they can pass, shoot, or dodge more efficiently.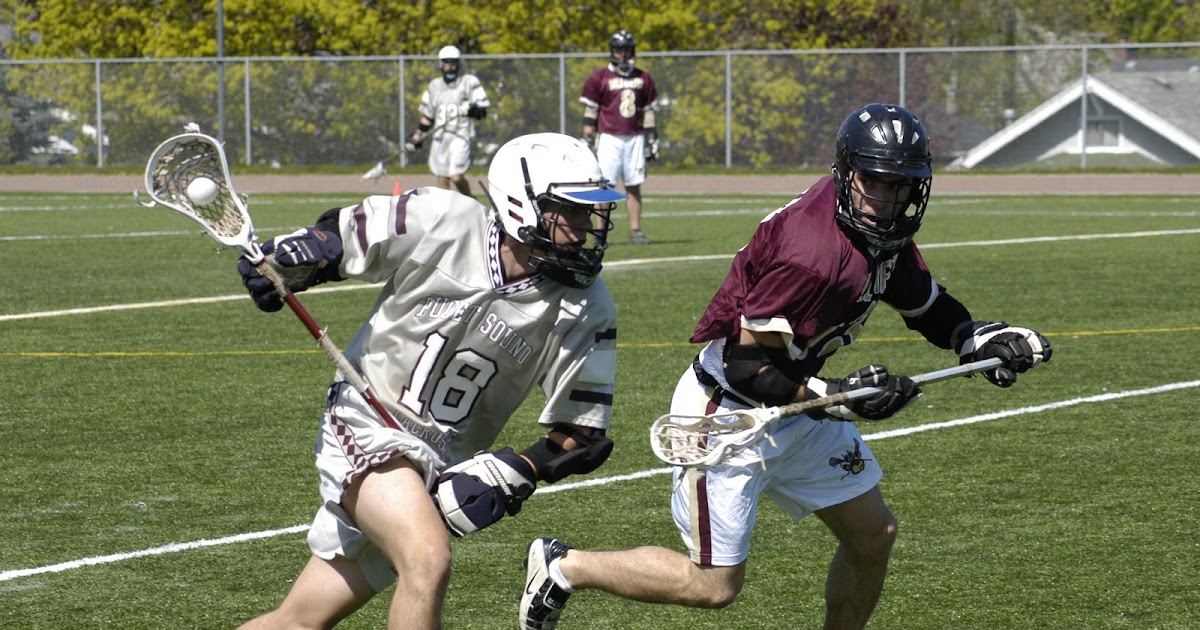 Proper cradling is learned by cradling — a lot.
Proper cradling techniques
Keep the stick as vertical as possible. Bottom hand is relaxed, it’s just a placeholder. The top hand is right below the head of the stick, and the bottom hand is right above the butt of the stick (same for boys and girls).
Finger-wrist-elbow-shoulder:
All these joints are involved. Palm in, palm out. Stick close to the body. Fluid movement.
Common mistakes or corrections:
- Stick is horizontal at hip level. Easy target for defenders and difficult to pass, shoot, or dodge. Keep stick head up.
- Bottom hand is too tight or is doing all the work. Loosen up.
- Stick is held out, away from the body. It’s a little counter intuitive, but players’ sticks are better protected the closer they are to their body.
- Cradling too hard. Be efficient, just enough to control the ball in the pocket.
- Players can start cradling standing still in front of the TV.
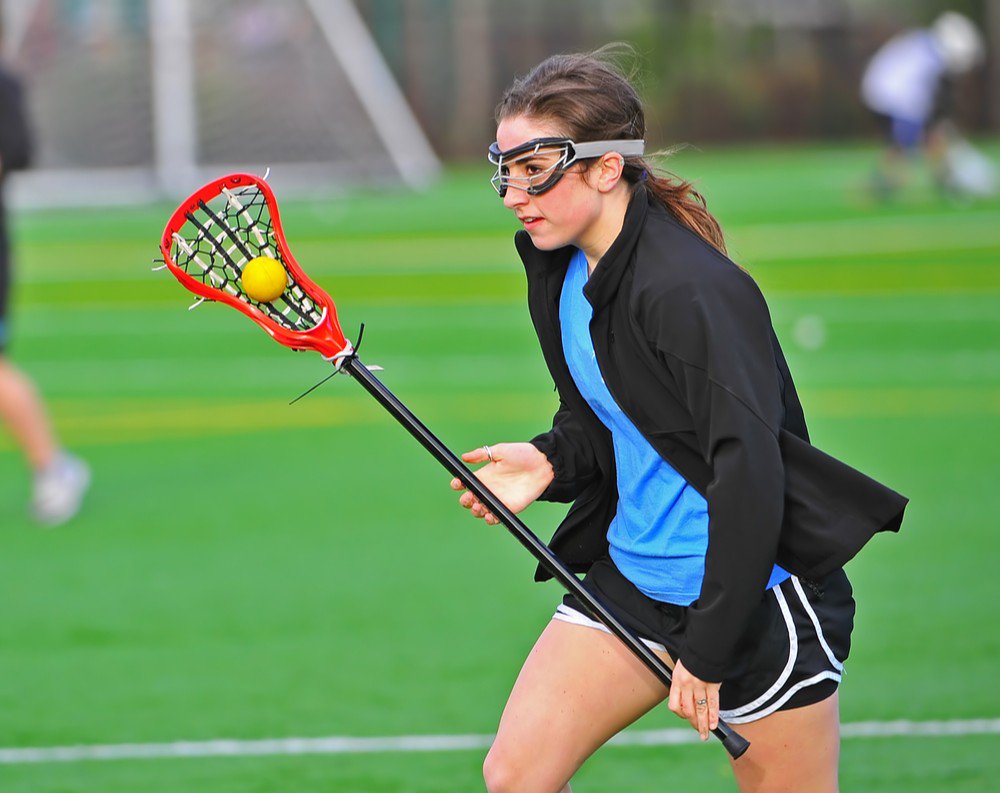
 Turn on SpongeBob or Star Wars, whatever is age appropriate, and cradle for 22 minutes. But eventually players want to take it on the road. Start walking and then move on to running. When players think they have it mastered, switch hands. That will humble them enough to keep practicing.
Cradling is a vital skill for a lacrosse player, but it takes practice. Swax Lax balls are the size and weight of a regulation lacrosse ball and gives players the proper stick feel. They also are softer and don’t bounce like rubber lacrosse balls, allowing for quicker recovery from drops and mistakes. Have your child use her Swax Lax ball to improve her cradling. This is the foundation of all lacrosse stick skills. Controlling the ball in her pocket will improve her passing, shooting, and dodging.
Next time I will talk about how that ball got into your child’s stick so he could cradle it. Catch you later (that’s a hint in case you weren’t paying attention).
About The Author
Kevin Meany is the head boys coach at Swax Lax Lacrosse. He was a goalie for Providence College, and when he’s not coaching for Swax Lax Lacrosse, he coaches varsity and middle school lacrosse at the Morristown-Beard School in Morristown, NJ. He’s also a valuable contributor to the Swax Lax team.
【How-to】How to Cradle a Lacrosse Ball
Do you have to cradle the ball in lacrosse?
Cradling is essential to being able to move around the field while protecting and handling the ball. After throwing and catching, cradling is one of the most important skills that young players need to learn to become successful lacrosse players.
How do you cradle a lacrosse ball girl?
How do you cradle after catching a lacrosse ball?
Why do we cradle in lacrosse?
How do you hold a girls lacrosse stick?
Cradling is a technique used to keep the ball in the pocket of your stick. By doing so, your team can maintain possession and ultimately score. With proper form and understanding, you will be able to keep possession while fending off an opposing player.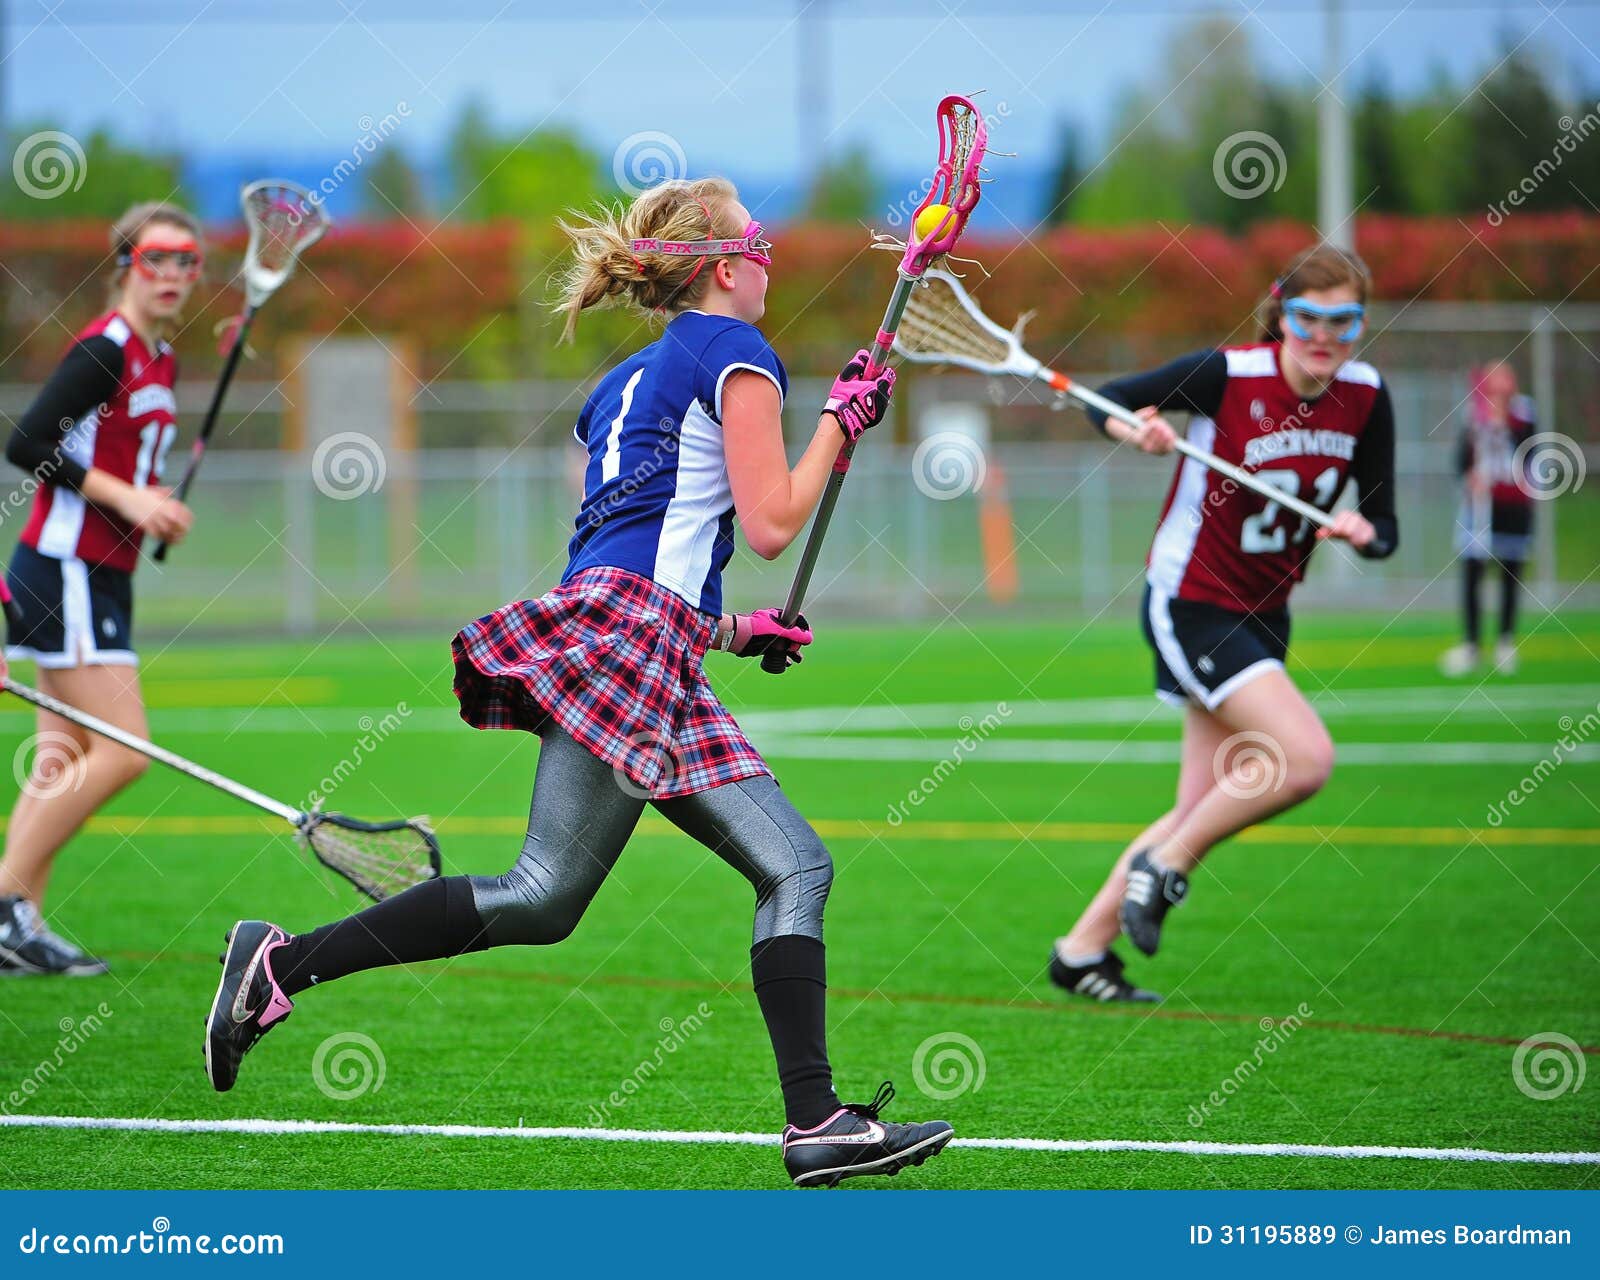
How do you teach a girl to cradle?
What is an illegal cradle in lacrosse?
Do girls cradle in lacrosse?
Illegal cradle – players cannot cradle too close to their head or body so as to make an otherwise legal check impossible. Players may only check using the side of their stick.
What is scooping in lacrosse?
Can goalies shoot in girls lacrosse?
Cradling the stick properly is an essential skill that lacrosse players need to master to maintain possession of the ball. When you are cradling, you want to keep the head of the stick just above your shoulder and close to your body.
How do you teach a lacrosse cradle?
What is defense in lacrosse?
The lacrosse scoop is a technique used to gain possession of the ball when it is on the ground. Quickly scoop up the ball. Then angle upward to keep the ball forced into the deep part of the pocket and from rolling back out. Now the player can transition to a cradle, pass, or shot, and continue on.
Can a lacrosse goalie stick be illegal?
(9) In women’s lacrosse, the goalie may not attempt a shot or be credited with a goal scored.
Can you kick the ball in lacrosse?
What 3 sports make up lacrosse?
Each team in a lacrosse game will spend some or most of the playing time on defense. When the opposing team is in possession of the ball, all players on the field are collectively considered to be the defense.
Can you hit a goalie in lacrosse?
How do you fix an illegal pocket in lacrosse?
Once they leave the crease they’re considered a field player and the goalie stick, with its deep pocket, is illegal for a “field player”.
Can you touch the goalie with your stick if he is in the crease?
How long do you have to clear the ball in lacrosse?
Yes, in Men’s and Women’s lacrosse, you are allowed to kick the lacrosse ball into the goal. A Lacrosse Shot is a lacrosse ball leaving youth lacrosse stick but kicking a ball is a legal way to score a goal.
Why do lacrosse players drop their sticks?
The sport of lacrosse is a combination of basketball, soccer and hockey.
Can a goalie pick up a throw in?
What is the 3 second rule in lacrosse?
Goaltenders are the only ones on the field who can touch the ball with their hands. However they are not allowed to pick up or control the ball with their hands. Hand touches are legal only when in the crease. Each team has a goaltender on the field at all times.
What is a clear attempt in lacrosse?
Second, DRY YOUR STICK AFTER EVERY GAME OR PRACTICE. A wet pocket is one of the most common causes of an illegal stick. When you get home take you stick out of your bag and stuff your pocket with old newspaper or even paper towels. The paper will absorb the water and help your pocket retain its’ shape.
Do you like this article?
Lacrosse cradling tips to get you up and running
Cradling is a fundamental lacrosse technique – running at full speed, changing directions and dodging defenders will all come much more naturally if you are comfortable carrying the ball in your stick. Poor lacrosse cradling limits other aspects of your game and can quickly lead to your team losing possession, so learning and practicing this crucial skill should be at the top of the list for players and coaches alike.
The technique comes naturally to some and requires lots of practice for others, but once you become comfortable with it, you’ll be able to take your game to the next level! This article contains some handy lacrosse cradling tips to help you get the most out of your practice sessions.
Key Skills
1. Create the right pocket
Creating a pocket is a careful balance between ensuring your pocket is deep enough so that the ball doesn’t easily fall from your stick, or get knocked out by an opposing player, but not so deep that it is against the rules of lacrosse. If the referee notices your pocket is too deep you could get a penalty.
Check the depth of your pocket by putting a lacrosse ball into it. The ball should protrude beyond the rim of the head, but not too much. If you need to adjust the depth of your pocket, simply untie and retie the strings. A little tighter for a shallower pocket, a little looser if you need more depth.
2. Basic cradling technique
The basic technique for cradling is all about hand position. Your dominant hand should rest midway up the shaft, between the shooting and catching positions, while your non-dominant hand should support the butt of the stick, taking the weight so that your dominant hand is free to slide up or down the stick if you need to quickly change position to make a catch, pass or take a shot.
The stick should be parallel with your body, and at an angle to the ground of between 45 and 60 degrees, with the open side of the net facing towards the front.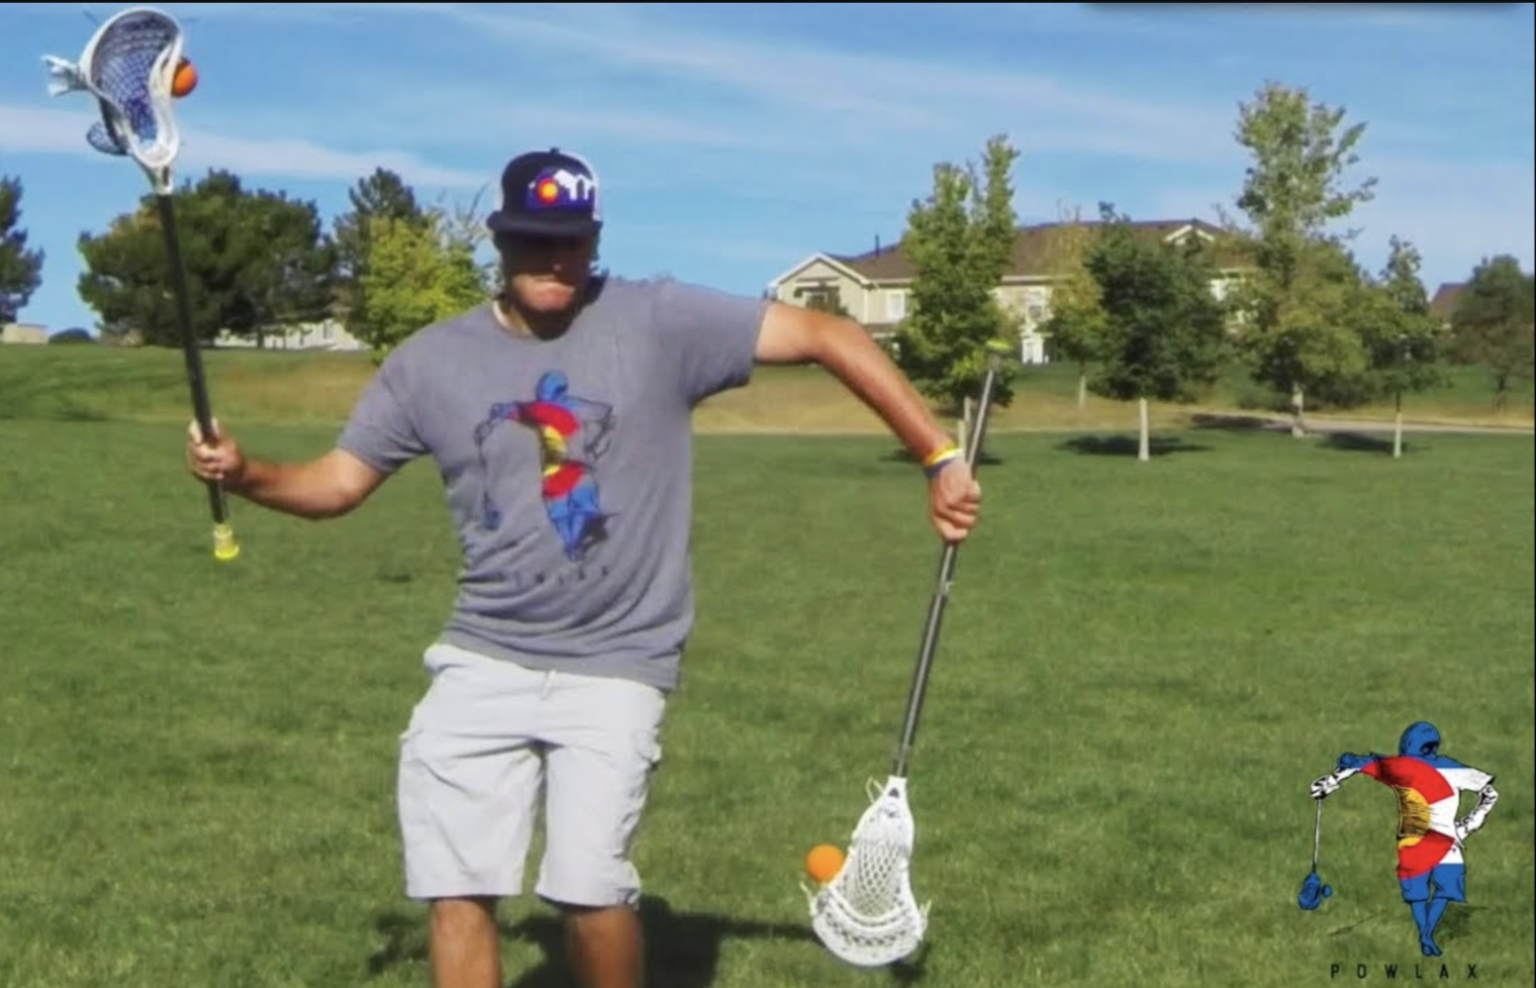
Now, with your dominant hand, you’ll curl your stick back and forth, applying a slight inward twist so that the momentum keeps the ball in the pocket.
Start by practicing in place, and when you’ve developed your technique and feel more confident, move on to cradling as you run. Remember to keep your range of movement tight, and don’t have your stick remain still for too long, as this is inviting an opposing player to attempt to knock the ball away from you.
3. Switching sides while cradling
To be able to protect yourself from opposing players, you’ll need to be confident in switching sides while cradling. It’s a vital technique to allow you to quickly swap your stick from one side of your body to the other. The steps are simple, but you should practice until you can combine them into one fast and fluid motion.
With slightly bent knees and your feet planted wide, bring your stick to a vertical position, with the open side of the head towards your face. Your dominant hand should be towards the top of the shaft at this point, but with a few inches of space between your hand and the head.
Now, swing the stick in a V shape, below your knees, and as it moves from one side to the other, switch the position of your dominant and non-dominant hands, allowing the dominant hand to slide to the base while the non-dominant hand moves towards the top of the shaft.
Now you’re essentially in the opposite of the standard stance, with your hand positions flipped. It’s important to practice in both the dominant and nondominant stances until you’re as close to equally comfortable as you can be. It’s hard to start with, but with plenty of practice it’s achievable, and it’ll make you a more versatile player.
4. One-handed cradling
If you’re under a lot of pressure from the opposition, you may need to switch to one-handed cradling. It’s similar in principle to the two-handed version, but as you can’t swing the stick, you’ll need to apply a twisting motion with your wrist to keep the ball in the pocket.
It also helps to match the motion of your stick to the timing of your stride. This will vary between individuals, but with enough practice, you’ll work out the right rhythm for your running style.
One-handed cradling allows you to move down the field much more quickly, although it does mean it takes slightly longer to move into an attacking position, as you need to bring your other hand back onto the stick. As you progress, you’ll learn how to combine the right mix of one and two-handed cradling depending on whether you need speed or stability at that moment in the game.
5. Passing and shooting techniques
The next thing to master is how to move from a catch into cradling the ball, and then how to move from cradling the ball into a shooting position.
For a catch, you should position your stick vertically, sliding your dominant hand up towards the head and allowing the stick to move back a little to deaden the momentum of the ball and stop it bouncing out. If you’ve moved your hand up smoothly enough, you should be able to fluidly return the stick to the normal 45-60 degree angle and start cradling the ball.
To go from a cradle to making a pass, or taking a shot, you need to continue the last cradling movement a little further, curling the stick right round so the open side of the head is facing forwards (or the specific direction you want to pass or shoot).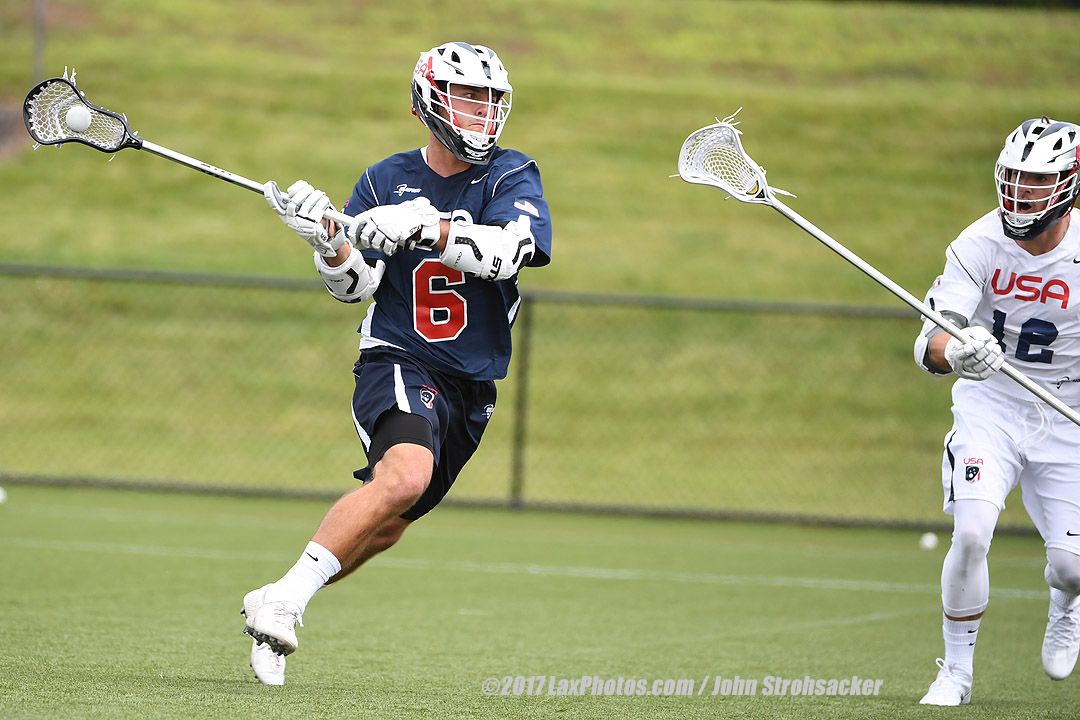 Then, slide your top hand down the shaft as you pull the stick over your shoulder, and then in one smooth movement whip it forwards to release the ball from the channel. The more you practice, the greater your speed, power and accuracy will become.
So there you have it – some basic things to know about how to cradle in lacrosse. All that’s left to do is to grab your stick loosely (soft hands, shoulder-length apart, top hand dominant), and get practicing!
How do you teach lacrosse cradling?
For coaches, cradling is one of the first skills that you’ll want to work on with your players. Proper hand positioning is key, so make sure your players know how to cradle a lacrosse stick in their hands. It should not be either in the palm or the fingertips – that middle area where fingers connect to palms allows for the best control and ‘soft’ hands.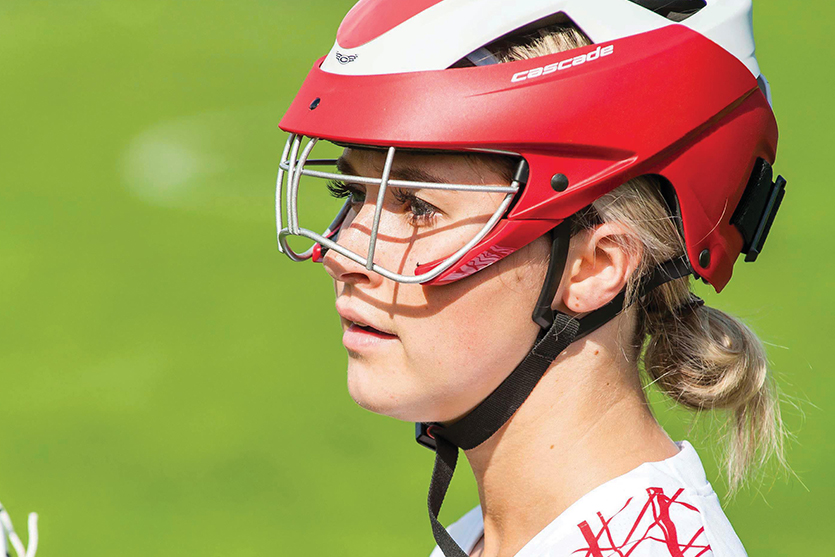 The top hand will be dominant, providing control and direction in the movement while the bottom hand keeps things stable. Always ensure that your players are aware not to ‘choke’ the stick – a loose, soft-grip allows for a more fluid movement.
To get your players used to the movements required for cradling, there are some basic lacrosse cradling drills you can do at practice. First, have players try running down the pitch with two-handed cradling. Encourage them to use the natural movements of the body to curl the stick back and forth in rhythm with their feet – any jerky or unnatural movements will quickly dislodge the ball from the pocket. This can take a lot of practice for beginners, so continue training these movements until they are able to run at least 20 meters without dropping the ball.
As players begin to get comfortable with the technique, you can progress to one-handed cradling, which is better to protect the ball as a player can use their body as a shield for the stick.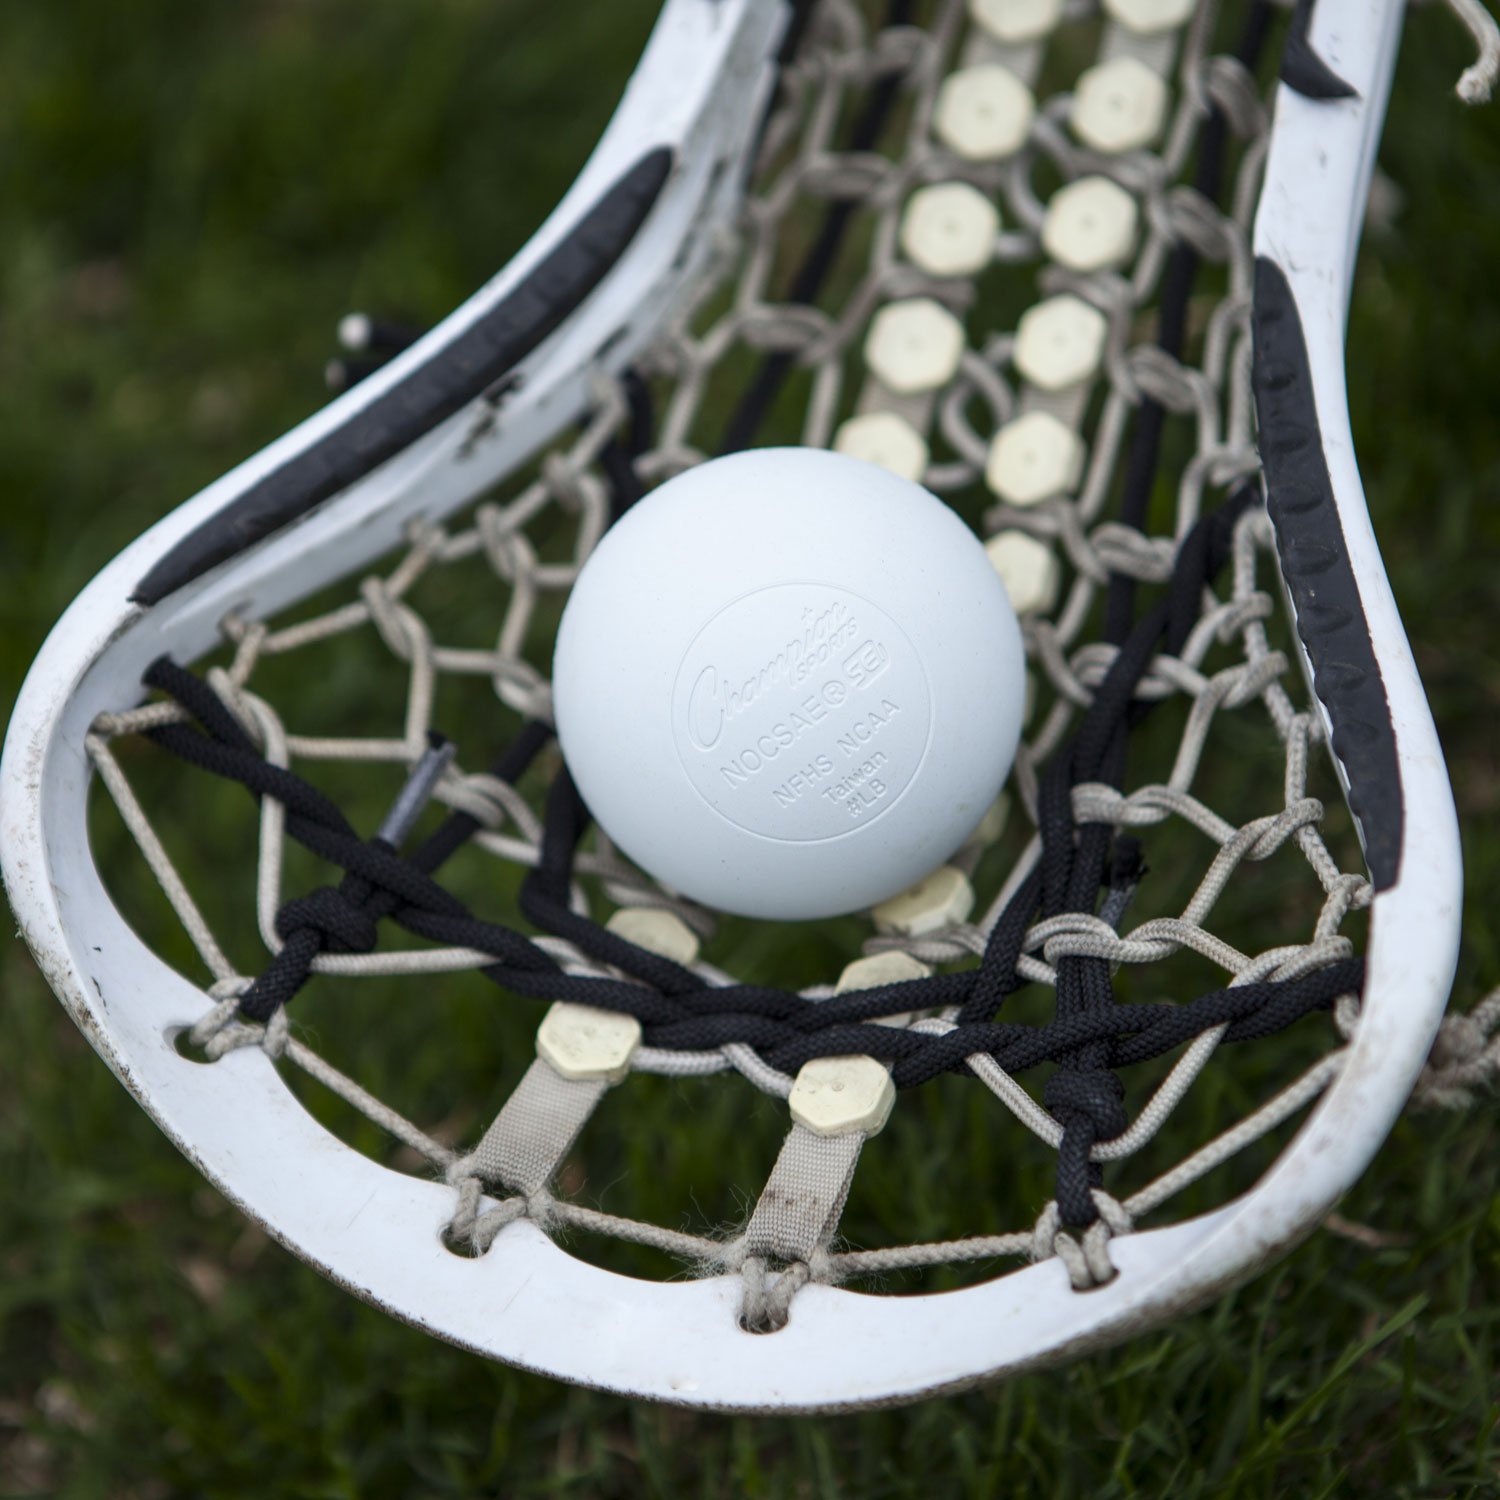 It is important to teach players to lock their non-cradling arm in place during this drill – to avoid warding penalties during matches – and to keep the stick parallel and as close to their body as possible.
Now, players are ready to receive some light defensive pressure. As the player in the possession is running while cradling the ball, have a defender approach from one side. Here, you must ensure that the player keeps his body between the ball and the defender, and practices cradling whilst avoiding attempts to knock the ball from the pocket.
How do you practice cradling lacrosse?
As a player, cradling will eventually become second nature. But only with plenty of practice! Aside from hitting the field, here are a few other things to consider when learning how to cradle a lacrosse ball:
It is best to cradle the ball close to your head. This is because defenders are penalized for hitting your helmet, so they are less likely to risk trying to dislodge the ball if you keep it close to yourself. While it is easier to carry using horizontal cradling, meaning that the stick stays parallel to the ground, this also makes it much easier for opponents to knock the ball out! Practice the harder skill of cradling vertically for better attacking play. To find the right ‘rocking rhythm when you practice cradling, use the natural swing of your body. As your left foot comes forward, curl your bicep and wrist to swing your right arm back. Follow this opposite arm, opposite foot pattern to build a natural movement into your cradling, and you will find that it comes automatically in time.
Is cradling a rule in lacrosse?
There are certain lacrosse cradling rules, mostly around the depth of the pocket on your stick. In men’s lacrosse, players are usually required to use deeper pockets, while the women’s game uses shallower ones. When you put a ball in the net of your stick, it shouldn’t be nestled completely below the plastic rim of the pocket – that would make it too easy for you to carry the ball and give an unfair advantage! Make sure you adjust your net so it falls within the rules of the game, and use cradling to carry the ball effectively.
So there you have it – some basic things to know about how to cradle in lacrosse. All that’s left to do is to grab your stick loosely (soft hands, shoulder-length apart, top hand dominant), and get practicing!
How to Run With a Lacrosse Stick | Woman
i Jay Paul/Getty Images Sport/Getty Images
As a lacrosse field player, you want to set up goals with precise passes, or better yet, fire the ball into the net yourself. But running into the proper position — with or without the ball — is equally important, because smart positioning frequently leads to scoring chances. Carrying your stick correctly when you’re on the run helps you maintain possession or take a quick shot — or to receive a pass when you’re running without the ball.
Step 1
Position your stick straight up and down, perpendicular to the field, when you’re running without the ball. This technique helps put you in position to pass or shoot immediately after you receive the ball from a teammate. Hold the stick close to your body, to help shield the ball from defenders if you receive a pass.
Step 2
Perform a cradling technique by holding the stick vertically and rotating your upper wrist when you’re running with the ball. Hold the stick close to your body and twist your wrist from side to side to keep the ball in your stick’s pocket. Hold the stick’s handle loosely with your bottom hand so the stick can rotate smoothly. More advanced players can cradle the ball while holding the stick horizontally, as long as no defenders are close enough to check your stick. Even more advanced players can cradle the ball while rotating their bottom hands, or can cradle the ball with one hand. The one-handed cradle lets you pump your opposite arm to produce more speed when you’re running.
Step 3
Choke up on your stick if you’re running in a high-traffic area — near the net, for example — and you want to be ready to shoot quickly after receiving a pass. Slide your top hand up the stick’s shaft and position the stick’s pocket so it’s visible to the player with the ball — but keep the pocket close to your body, if possible. You can’t shoot the ball as hard when you choke up on the stick, but a quick shot is often more deadly than a hard shot when you’re close to the net, because you may catch the goalie out of position.
Step 4
Hold the stick vertically with the pocket behind your head if you want to take a quick, hard shot from the perimeter. Instead of receiving a pass, drawing the stick back, then shooting, holding the stick behind your head lets you catch and shoot quickly, while still putting the necessary zip on the ball when you’re firing from a distance.
Basic Stick Skills with Gary Gait – Championship Productions Blog
As the 2011 lacrosse season approaches, thousands of players and coaches will hit the field once again from California to New York and everywhere in between. Whether you have a few seasons under your belt or are just learning the fundamentals of the game, mastering these basic stick skills will make a big difference in improving your overall play. And with legendary lacrosse player and coach Gary Gait leading the way, you’ll be in good hands when it comes to learning about proper grip, catching the ball, throwing the ball and controlling the ball.
Grip
Before we can do anything in lacrosse, it’s crucial that we know how to hold the stick and use it in our hands. First, the stick should be held at the base of the fingers. This allows you to control the stick and develop a cradle. Meanwhile, your bottom hand should be placed at the bottom of the stick shaft. This hand controls the stick. Grip it at the base of the fingers while using the thumb.
Now, start on developing a cradle without the ball. Take the stick and develop a flat cradle by rolling the hand up and moving the arm. The elbow will go back and forth as well as rolling up the hand.
Remember, the bottom hand doesn’t have to turn (even though some players are taught this). It can sit over the stick and be loose. Then you can really let the stick spin within the hand. This way, if you are ever bumped or draw contact in a game, you still have the ability to maintain control and possession. Key: the top hand really controls the cradle.
As you start cradling with the ball, maintain a nice fluid swinging motion. You really want to be able to move the stick around and cradle in a variety of positions.
Next, it’s also important that we develop the ability to switch hands while cradling. To do this, drop the stick down a little bit and let your bottom hand slide up, then release, before pulling the stick back to the opposite hand. A good way to do this is to bend your knees and practice turning your body and keeping the stick to one side. Then bring the stick down, across and out the other way.
Catching the Ball
When it comes to catching the ball, it’s critical to make sure you always have a target up so teammates have somewhere to pass the ball. To do this, get your stick out in front at about eye level. Take your top hand and slide it down so you have some reach and can make adjustments on the ball.
Meanwhile, the bottom hand comes in a bit so that as the ball comes, we can absorb it. The number one key to catching in women’s lacrosse is as we absorb the ball, instead of just balancing it back, we should take the stick in to a side-to-side motion. So, as you catch it, turn the stick out. This helps create your cradling motion and also allows you to keep the ball in the stick. And even if there’s a bad pass, just that little turn will help you keep the ball inside the pocket and not bouncing out.
Throwing the Ball
When it comes to a basic throwing motion, it’s important to always get the stick up. Next, flatten the stick over your shoulder to provide some leverage. Really utilize the bottom arm here to get a good pull.
Next, you want to turn and have a pull to your strong side. Meanwhile, your throws should be a little bit diagonal as this will allow you to utilize the power of both arms. On a good throw, the stick is out, there’s a push-pull motion and you get a good throwing motion. Remember to bring that opposite shoulder out on a throw so the other shoulder comes forward on the follow-through as this will add power to the shot.
Controlling the Ball
Finally, to take our stick skills to the next level, we want to develop controlling the ball at the top of the stick. Many players let the ball sit at the base of the head, but passing and shooting become predictable from here because it’s mostly using top arm and this telegraphs our passes and shots.
However, with the ball in the middle of the head, or the soft spot, we can now move the stick a lot more and be much more deceptive. You can learn this by having the ball sit in the spot and develop a little cradle at the top of the stick. Then move the stick across and side to side with the ball in this spot — this develops a little pocket out front. Now, you can bring the stick back flat and it gives you more power, quickness and overall range of motion.
These segments — along with many others — can be found on Championship Productions’ DVD “Gary Gait: Coaching Girls Lacrosse – Basic Stick Skills & Drills.” To check out other videos in the Gary Gait library, click here.
Source Rubber Silicone Lacrosse Ball with Message Function on m.alibaba.com
(1) can be placed in the baby’s palm, walking or limb by pressing a button, rolling or massaging, stimulating the skin to help develop a positive and stable mood nerve …
(2) local massage slimming: quickly scatter fat, save time and effort, no longer give cosmetic bags rub asthma.
(3) head massage: improve hair, prevent hair loss, scalp, insomnia, dreams, memory card reader, dark complexion.It is very convenient to use
(4) motorized foot brush foot brush before hand massage, the effect to activate blood flow is more than 20 times stronger than hand massage, and it is very economical, the whole body is unhindered and the whole body is free …
(5) Leg lymphatic detoxification massage, leg sculpting Shape: in order to relieve swelling, eliminate leg, rash, eliminate dry legs and eliminate leg weight when choosing products, a convenient brush, in cases where the effect is effective.
(6) back massage, we can guess the health value instruction depending on the product promptly. Application: from top to bottom, head, neck, back, waist – spontaneity and abdomen, limbs, massage the skin on the left side of the body, first, massage movements on the right side of the body.
(7) Head massage: Use the body brush from the forehead to the back of the brain, no need to smear with lubricant, dredge 30 times in every part.
(8) neck massage: brush from top to bottom, thus often scratching and rubbing on the neck.It has a convenient capacitive mini-stylus, which also serves in the prevention and treatment of diseases.
(9) and folds with massage inserts in the chest area: midline of the abdomen dredging from top to bottom with a body brush. The sides of the chest are bounded in the anterior midline of the chest, respectively, on the left and right (first, left, back, right).
(10) belly massage: belly dredging up and down (with abdominal prolapse, which should be dredging up and down) or spiral.
(11) lower limb massage: from bottom to top (that is, massage towards the dirty direction).
(12) with massage effect: from heel to feet.
| 1. What are the parts of our foam roller? | |
| Excerise Foam Roller Feature | 1) Size: S, M, L, 33 * 14 cm 15×45 cm 15×90 cm 15×30 cm and so on |
| 2) Material: EVA + PVC or ABS | |
| 3) Certificate: SGS, EN71 | |
| 4) Option: Any color can be accepted | |
| Packing | 1) Each shrink wrap + box, or others upon request |
| 2) Carton size: 440 * 500 * 350 mm 12 pcs / ctn | |
| Samples | 1) Sample time: 1 day in stock, customer designed 5 days |
| 2) Sample fee: according to sample details | |
| 3) Returns Samples: Negotiated | |
| 4) Sample Shipment: Via TNT FedEx DHL Express | |
| Sample is free if you need our stock to check the quality | |
| Payment | |
| Delivery time | 15-30 days depending on the quantity |
| Shipping point | Ningbo port or upon request |
| 1) We are a professional manufacturer of massage roller with mesh and foam roller | |
| 2) we can help customer to make customers’ design products | |
| 2.What are the characteristics of our foam roller? | |
| 1. Size and shape: according to customers’ requests, customer’s logo and designs are acceptable. | |
| 2. Our expressive material will keep a close and careful observation of each procedure. | |
| 3. What are the advantages of our foam roller? | |
| 1.Factory direct sales at competitive price | |
| 2.20 years of production experience | |
| 3.professional design team to serve you | |
| 4. Various varieties of products we can make economical, environmentally friendly or durable | |
| 5. SGS certificate guarantees you our good quality | |
Throw-in – medwayraynet.org
For other uses, see Face Off.
Methodology for starting ice hockey and some other sports
Video of a face-off in a Swiss ice hockey match
A A face-off is a method used to start and resume play after goals scored in some sports using sticks, mainly in bandy, bandy and lacrosse.Both teams line up against each other and opposing players attempt to gain control of the puck or ball after the referee has thrown or otherwise placed them between their sticks.
Hockey
Hockey face-offs (originally called “puck”) are generally centralized, although some wingers do face-offs and, very rarely, defenders. One of the referees throws the puck into the center of the ice to start each period after a goal is scored.Linesmen are responsible for all other faceoffs.
One player from each team stands at the throw-in point (see below), waiting for the puck to fall. All teammates must be to the side or behind the player taking the throw-in. Generally, the goal of the player taking the throw-in is to get the puck back towards his teammates; however, they will occasionally attempt to throw the puck forward past the other team, usually to kill time in a short run, although shooting straight into the net is also possible – a straight-from-throw-in goal, although rare, is not unheard of.from. However, if the throw-in occurs at one of the five face-off points around which there are circles, there can only be two opposing players in the circle responsible for the throw-in. A common formation, especially on the center ice, is for the skater to throw in with the wings flanked to the center on either side and the skater, usually the defender, behind the thrower, one to the side. each side. However, this is not mandatory and other formations are observed, especially when the throw-in occurs at one of the four corner face-offs.
Throw-in on the center ice of a youth hockey game
Throw-in points are usually taken at designated spots marked on the ice, called throw-in points or throw-in points . There are nine such points in total: two in each attack zone, two at each end of the neutral zone and one in the center of the site. Face-offs did not always take place at designated face-off points. If, for example, the puck leaves the playing surface, the throw-in will take place where the puck was last played.On June 20, 2007, the NHL Board of Governors approved an amendment to NHL rule 76.2 governing faceoff locations. The rule now requires all faceoffs to take place at one of the nine faceoff points on the ice, regardless of what caused the game to be stopped. Rule 76.2 also prescribes, with some exceptions, that the post-penalty throw-in must take place at one of the two face-off points on the offending team’s side.
The referee may send off a player taking the throw-in if a player or any other player on the same team tries to gain an unfair advantage during the throw-in (this is called a throw-in violation).When a player is sent off, one of the teammates who did not originally participate in the throw-in must take the throw-in. Common throw-in irregularities include stick movement before the puck is thrown, improper stick positioning when requested, not placing a square of the body on the face-off point, or a teammate’s intrusion into the face-off circle. … In the NHL, the away team player must first place the stick on the ice for a throw-in when it occurs at the midpoint.On all other throw-ins, the defending player must put in the stick first. Prior to the 2015-16 league season, the away player had to put the club first on all faceoffs.
| No penalty | Delayed penalty | |
|---|---|---|
| Start of period | center spot | |
| Target | ||
| Icing | ||
| Intentional offside | Defending team defensive point | |
| Offside | Defending team neutral point (usually) | |
| Offside error | ||
| Icing caused by error | Central location (except US hockey) | |
| Defense Point of the Defending Team (Hockey USA) | ||
History
In the first organized rules of ice hockey (see p.Amateur Hockey Association of Canada, AHAC) both centers were facing the center line of the rink, as wingers do today. There was another forward position at the time, the rover , which looked ahead like the centers today, but a few feet away.
Ball hockey
In ball hockey, the game is restarted with a throw-in when play has been temporarily interrupted. The throw-in is taken from where the ball was when the game was interrupted.If the ball was in the penalty area when the game was interrupted, the throw-in continues to the nearest free kick on the foul line.
On a throw-in, players from each team face each other with their backs to their endlines. The clubs are held parallel to each other on either side of the ball. The ball must not be touched until the referee blows the whistle. When the ball is thrown in, it can be played in any direction.
In bandy face-offs are regulated in section 4.6 of the Laws of the Ball Game as established by the International Bandy Federation (FIB).
Lacrosse
Field Lacrosse
Two lacrosse players prepare for a throw-in when the referee places the ball on the ground between their club heads.
Throw-ins are used in men’s field lacrosse after each goal and at the beginning of each quarter and extra periods, unless the team playing in the match has control of the ball at the end of the previous quarter.
On a lacrosse throw-in on the field of play, two players bump into each other at X in the center of the field, squatting with the ball placed on the ground on the center line between their club heads, four inches (10 cm) apart, parallel to the center line. lines, but the ends are directed in opposite directions.The other two players from each team must wait behind the flank line, 20 yards from the throw-in point on opposite sides of the pitch, until the whistle is blown.
Any player other than the goalkeeper can come face to face due to the fact that the head of his club is much larger; in practice, face-offs are usually carried out by midfielders. When a team loses to a player by a penalty, there will be only one other midfielder on the wing, or none if two or more players are serving time. When the third player, the maximum allowed by the rules before the penalty is added, is serving time, the team thus penalized is allowed to withdraw one of its defenders and play on the wing during the throw-in.
Players playing face-to-face should place their club with their gloved hands on the ground and position themselves completely to the left of their club’s head. They can kneel or stand with both feet on the ground. Between the moment they take position and the referee’s whistle, the players opposite must remain in place. Premature movement of any player will be considered a technical foul and the ball will be awarded to the other team. To ensure that they remain stationary, officials are instructed to time the whistle differently on each throw-in.
On the whistle, each player taking the throw-in makes a motion to get his head on the ball or attempts to direct the ball to his team-mates on the wing. Only these six players can try to pick up the ball first. The three attackers and defenders of each team must remain in their respective zones, outside the boundary lines, 20 yards from the center line. Once possession is established or the free ball crosses any boundary line, the throw-in is complete and all players are allowed to leave their areas.
If a loose ball goes out of bounds on a throw-in before either team can pick it up, it is awarded to the team that touched it last and all other players are released when play resumes.
Opposite players cannot step on or hold each other’s clubs to prevent another player from receiving the ball. They also cannot grab the ball with their club without trying to “grab the ball” to prevent someone from gaining possession, an act normally penalized as keeping the ball out of play is another technical foul.If they pick up the ball with the back of the club, but do not immediately throw it into the pocket, this also counts as a hold. In all these cases, the throw-in ends with a pass to the opposing team at the point of infringement. Players in opposition who deliberately touch the ball with their hand in an attempt to gain possession of the ball or use their open hand to hold the stick of the opposing player taking the throw-in receive a three-minute unfulfilled penalty for unsportsmanlike conduct in addition to the player’s possession.another team.
As per NCAA college lacrosse rules, if a team fouls the faceoff rules either because of a false start in front of them by any player in midfield or because of illegal actions of players opposing each other more than two and a half times, each additional The violation results in a 30 second penalty assessed against the team, which must be tackled by the designated player at home.
A player who takes a throw-in but does nothing else for the team is called “FOGO”, which means “throw-in, exit”.
Women’s Lacrosse
Players Prepare for a Draw in the Women’s College Lacrosse Game
Women’s lacrosse also uses a throw-in-like procedure, though called a draw. The two toss players stand in the center of the field and hold their clubs together at waist level while the referee places the ball between their heads facing each other. Four other players from each team stand outside the 30-foot (9.1 m) center circle.On the whistle, the two center players raise their clubs, tossing the ball into the air, while the outside players try to gain possession of the ball as the ball descends.
Field hockey
Two female hockey players prepare to start or resume a match with hooligan in midfield.
A similar technique known as Bully is used in field hockey. Two opposing players alternately touch the ground and each other before attempting to hit the ball.Its use as a starting method for playing was discontinued in 1981.
Similar rules in other sports
A throw-in is also similar to a jump ball in basketball, a ball in Australian football and a throw (if disputed) in associative football. In all these cases, two opposing players try to gain control of the ball after it has been released by the referee.
A throw-in-like event has been attempted in at least two American football leagues: the XFL, a short-lived professional football league that held its only season in 2001, organized a kick-off, replacing the coin toss.in which one player from each team tries to recover an loose ball after a twenty yards dash; the team whose player took the ball has the choice of hitting, getting or defending one side of the field. Due to the extremely high injury rate in these competitions (in the first game of the league, one XFL player was lost in the season after breaking his shoulder in a fight), the tournament did not gain massive popularity in most other football leagues. However, when the X-League Indoor Football game was changed in 2014, a modified version of the starting scrum was adopted (using the name “X-Dash”), but it was changed to avoid injury, so that every player was chased behind your ball.’The rules of American football’
How the Russians who returned from America, Grigorenko, Nesterov, Yelesin, Sheng, started the season in the KHL
Most of them, unfortunately, have not yet been able to find their game.
Every year, Russian players return to the KHL who, for various reasons, failed to play in North America. For such hockey players, relocation gives them the opportunity to reboot and make a new round of their careers. We will tell you how things are going with the Russians who returned to Russia on the eve of and during this season.
Almost two weeks after the start of the season, Artyom, who played five not very successful, to put it mildly, matches on loan at Metallurg during the previous championship, having failed to gain a foothold in Calgary (only one game in the NHL), returned to Magnitogorsk by signing a full contract. The one-year agreement is bilateral in nature – Artyom still needs to get in shape in order to try to oust someone from the Olkinuore-Koshechkin duet. While the game of the main goalkeepers does not cause the coaching staff to turn to Zagidulin’s services – the 26-year-old goalkeeper has never even appeared in the application of the “steelworkers”.
Statistics: 1 match
The day after Zagidulin’s transfer, CSKA made another comeback by signing a two-year bilateral contract with a graduate of the club Vladislav Kotkov. The oversized forward (194 cm, 95 kg) pleased with his performance in the main junior league of Quebec, scored in his debut match in the AHL, but, having managed to play another game there, San Jose was put up for a draft refusal.
Perhaps returning to his home club will help Kotkov to reach a new level.After two matches for Zvezda, Vladislav made his debut in the KHL in yesterday’s meeting between the army team and Traktor, but spent only five minutes and eight seconds on the ice, so it’s too early to judge his game.
Statistics: 9 matches, 4 (1 + 3) points, “-3”
The decision of “sharks” to put another Russian, Ivan Chekhovich, on the draft refusals, was quite unexpected. After an excellent stretch in Torpedo, the striker returned to the location of San Jose, took part in four games in the NHL and even managed to score the first point with an assist.
In the current situation, the citizens of Nizhny Novgorod reacted with lightning speed, returning Ivan to their ranks on a permanent basis. But it is still far from the previous performance. Chekhovich’s link with Andy Mili and Damir Zhafyarov did not give such results as in the previous season, so in the last matches the first two play in a link with Daniel Zaar. But this does not help yet. Even despite the large amount of playing time, Ivan is of little use and, like all Torpedo, is not impressive.
Statistics: 9 matches, 2 (1 + 1) points, “-1”
Traktor’s results do not seem to suffer from this – the Chelyabinsk team started the season well and are among the leaders of the East, – but Vitaly’s attacking potential is clearly hits.In a company with far from the most creative players, he periodically strives to create something extraordinary on his own, such as an attempt to throw in the lacrosse style at Severstal’s goal, but so far he has only two effective actions.
Statistics: 7 matches
Before the start of the regular season, in an interview with the Championship, Pavel called the upcoming season decisive for himself, but so far things are far from favoring the 22-year-old striker. Sheng has already played one more match for Sochi than last fall, but, like then, he still has not scored a single scoring point.
Pavel is practically invisible on the court – he rarely throws and sharpens the game, does not act in the best way on face-offs. As a result, the playing time is falling rapidly. If in the first matches Sheng got 14-15 minutes on the ice, then in the last three everything is really bad – 3.32 and minus in the game with SKA, 11.05 in the meeting with Ak Bars and 6.46 and minus in the match with Moscow Dynamo”. The forward urgently needs to improve the quality of the game, otherwise the links in the VHL cannot be avoided.
Statistics: 5 matches, 87.7% RP, 4.06 KN
Ivan did not stand out for his reliability in four matches in the farm club “Chicago” “Rockford” the goalkeeper had the best performance in his career.Although it is also not worth hanging all the dogs on him – the defense of the Far Eastern club does not allow Nalimov to be out of work for a long time.
Despite this, the last match can be recorded by the 27-year-old goalkeeper. In the game against Metallurg Magnitogorsk, Ivan replaced Nikita Serebryakov with a score of 0: 4 at the end of the first period and conceded only one goal after 15 shots. Not to say that the “steelworkers” put a lot of pressure on Nalimov, but this game can instill a little confidence in the goalkeeper.
Statistics: 1 match, 1 funny interview, “+1”
After the missed season 2020/2021, Rinat still returned to his native land from the abyss of oblivion, in which he was stuck during his stay in the AHL.The pupil of Ak Bars made his debut in the KHL in a match with Nizhny Novgorod Torpedo and earned a plus by being present on the ice while Dmitry Kagarlitsky scored the first goal for the Kazan club and the only one for the Tatar team in that meeting.
However, Valiev is not remembered for this at all. During the first break, the defender gave all hockey fans one of the funniest moments of the current KHL season. During the flash interview, Rinat uttered phrases with a clear American accent, which amused the match commentator Roman Skvortsov, who immediately parodied the manner of speech of the 26-year-old player.
By the way, that game is still the only one for Valiev this season. The defender did not appear on the ice again.
Statistics: 6 matches
Vasily is not doing well in Spartak yet. In the first match of the season, Ponomarev got the longest playing time – 7.52. In five more meetings, the 19-year-old striker spent no more than three minutes on the ice, and in his last game to date in the KHL with CSKA he left for only one 12-second shift, after which he went to the Resurrection Chemist.
“Ponomarev needs playing practice. The desire is huge, but so far he has not succeeded in everything. Somewhere, sometimes he is overwhelmed by emotions, he makes unnecessary mistakes. This will come with experience, we will slowly let him down, ”said the head coach of the red-and-white Boris Mironov.
Statistics: 6 matches, “-2”
Alexander, like the rest of Lokomotiv, has no good start to the season. Yelesin is not always a part of the team and is not as reliable as expected of him. In the match with Vityaz, for example, he swiftly ran to the attack, when the railroad workers had not yet really left their zone, and allowed Daniel Odette to easily break into the final third of the site and give a pass to the winning goal of Niko Oyamyaki.
However, the dedication to the defender cannot be denied. Even despite the limited playing time, Alexander is the leader of the team in strength techniques and is in the top 3 leagues in this indicator.
Statistics: 3 matches, 96.7% RP, 0.92 KN
After an unsuccessful trip to Canada, Vasily returned to the KHL as a replacement for Shimon Grubec in Avangard Omsk. The Russian sat on the bench for almost seven matches, but at the end of the game with Metallurg he came out for the final 10 minutes and 42 seconds and has not left the goal frame since then.
The reason for this is Demchenko’s incredibly reliable tape play. The 27-year-old goalkeeper did not allow Avtomobilist’s hockey players to return to the game with the score 2: 1, and in the next game he completely “dried up” Moscow “Spartak”, reflecting 32 shots on target. And in terms of the percentage of reflected shots, and in terms of the reliability coefficient, Vasily is ahead of all the other goalkeepers in the league. However, in fairness, he spent much less time on the ice. Therefore, its ability to maintain such a level over a long period still needs to be tested.
Statistics: 6 matches, 4 (3 + 1) points, “-1”
It was expected that after returning from Columbus Mikhail will be one of the main stars not only of CSKA, but of the entire league, but in reality things are a little differently.
So far, Grigorenko is gaining effective points exclusively in the majority, but upon returning to the squad after an almost two-week absence due to injury, he generally looks much more useful and effective. Perhaps that is why he began to get more playing time.The attacker of the army team needs to slightly tighten up the implementation – then CSKA’s rivals will definitely have a hard time.
Statistics: 10 matches, 9 (1 + 8) points, “-1”
Almost no effective action by Grigorenko was without the participation of Nikita Nesterov. In two cases, the defender’s passes were preceded by goals from Mikhail, in another one they together assisted Sergei Plotnikov. Unlike the former Blue Jackets striker, Nesterov played all 10 CSKA matches on the ice, and during this time he managed to score a few more points, as a result of which he shares the second place among the army team scorers with Konstantin Okulov.
At the same time, Nikita noticeably surpasses the rest of the team’s players in playing time. In Moscow, he is clearly more trusted than in Calgary. This is reflected in other, not very pleasant statistics. Nesterov takes first place in CSKA in penalty minutes (14), and also shares the “championship” in terms of “minuses” with Anton Slepyshev and Lukas Vallmark – each of them has already accumulated seven of them.
How to Shoot a Lacrosse Ball 2021
I’ll show you how to properly fire hand-to-hand in just six easy steps.
Consumables:
Step 1: Place the arms
Hand placement is very important for a quick and accurate shot. The comfortable hand position makes it easier for you to handle the stick in all shooting situations. Your shot starts with your hands, so if they are not placed correctly, the rest of your shooting movement will be ineffective. Your hands need to be close together to provide more control over the stick, which will result in more precision when shooting.A general rule of thumb is to keep your upper hand just below the middle of the shaft. If your arms are too far apart, it will be more difficult for you to generate the necessary torque to take a quick punch. This is where all the great shooters will place their hands.
Step 2: Balance and Leg Placement
Further, balance and leg alignment are important parts of an effective shot. Many people are fixated on the fact that all the power of your shot comes from your upper body.This is simply not the case. In fact, it could be argued that your upper body is the least important factor in a successful shooting movement, despite being the area that actually fires the shot. Your lower body is what will generate the most power when firing. For this to happen, you must be properly balanced by the correct positioning of your legs and feet. This includes spreading the legs shoulder-width apart to create a solid and comfortable base for full body work.If your legs are too close together, you will prevent yourself from producing the necessary thrust and force required from your lower body to fire a quick and effective shot. You also won’t have a strong base that allows defenders to knock you off balance, resulting in a failed shot attempt. Your legs and body must be perpendicular to the target before firing.
Step 3: Extend Your Arms
Many beginners have difficulty placing their hands.They will often have hands very close to their bodies, often referred to as “T-rex arms.” Hands that are too close to your body will limit your range of motion, and will also prevent you from generating as much energy as you could in a full swing back. Placing your arms too close to your body will also make it easier for defenders to clear the ball out of your club. The correct mechanism is to keep your arms high away from your body to ensure full range of motion when firing. When your arms are in the air, you allow yourself to be much more precise with the position of the shot.This is due to the fact that you give your hands a lot more freedom and space to move correctly. The added bonus of keeping your arms high and far from your body is more deception for your shot. Because of the placement of your hands, your head and helmet will interfere with your club’s goalie vision and reduce the time it needs to react to your oncoming shot.
Step 4: Eyes
Like many other sports, your eyes play a very important role as an effective shooter.Another mistake many new players make is that they won’t use their eyes correctly when shooting. The eyes are the part of your body that provides your brain with much-needed information that is important for shooting, such as where the goalkeeper is, how far you are from the target, and which part of the network is most open. Your eyes should be directed directly to where you are trying to go. They shouldn’t be surprised at your feet, other players, or anywhere else other than the network location you’re aiming for.If your eyes are properly directed to the target, this will allow the rest of the body and the shot to follow accordingly.
Step 5: Foot and Hip Work
Your quick and precise hit in the leg and also in the thighs is bread and butter. When you approach the target right before shooting, your dominant foot should be planted so that its toes are pointing into the net. This will serve as the basis and your body should follow accordingly.Keeping both feet facing forward will prevent you from firing an accurate shot and throwing away the rest of your shooting movement because it is no longer the target reference point. Another thing that guides your lead foot towards the target is that it allows you to rotate your hips as you move when shooting. Opening your hips makes your shot smoother and allows your legs to generate even more energy as you jump. The swing of your hips provides a full range of motion from your body, much like a golfer’s swing.Correct hip movement is essential for all steps to work correctly and to be effective. If your hips are tight and closed, the rest of your movements will become useless.
Step 6: Run
The last step for a good shot is your completion. Execution is an important mechanic in any sport that requires you to shoot, pass, or throw an object. During the passage, your stick should continue to move in a motion called “overhead”.Continue along this path until your hands allow your stick to move on. Ideally, your stick should be face to face behind you, positioned around your legs, with your upper arm down and across your body. If you don’t follow through enough, the ball will float high above your destination. The ball moves as a result of the movement of the stick and its movement, so if you do poorly, the shot is likely to be bad too. Good execution will ensure that the ball hits where you wanted it to go.
.
 Have your body between your opponent and the ball.
 Turn on SpongeBob or Star Wars, whatever is age appropriate, and cradle for 22 minutes. But eventually players want to take it on the road. Start walking and then move on to running. When players think they have it mastered, switch hands. That will humble them enough to keep practicing.