How can lacrosse players improve their defensive footwork. What are the most effective drills for enhancing defensive skills in lacrosse. Why is proper footwork crucial for successful lacrosse defense.
The Importance of Defensive Footwork in Lacrosse
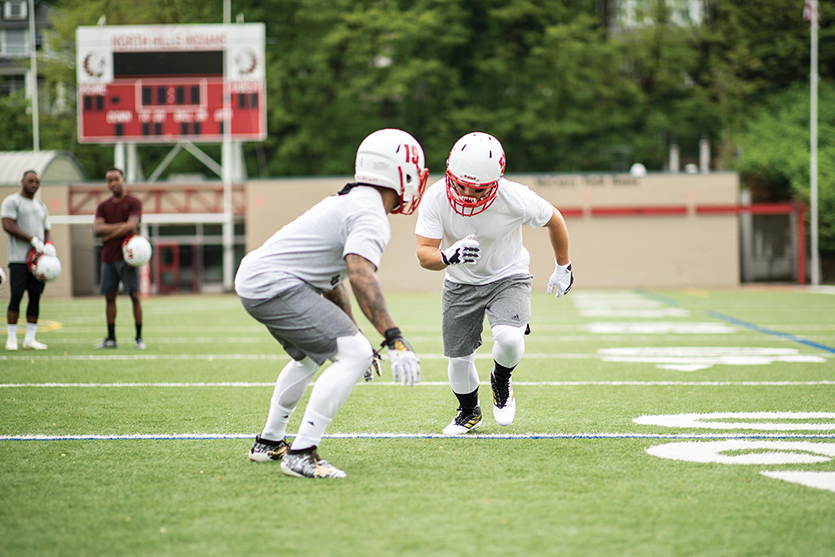
Defensive footwork is a critical yet often overlooked aspect of lacrosse. While it may not make highlight reels, proper footwork forms the foundation of effective defense. Good defense begins with the feet, followed by hip and hand positioning, with stick checks as the final component.
Many youth and beginner players struggle with common defensive mistakes:
- Poor approach – running at the ball from incorrect angles or too quickly
- Over-committing – charging straight at the ball carrier and lunging
- “Stop and chop” – halting movement to attempt a single stick check
- Failing to maintain topside positioning
To address these issues and develop strong defensive skills, coaches should incorporate focused footwork drills into their practice routines.
The In-and-Out Approach Footwork Drill
One highly effective drill for improving defensive footwork is the In-and-Out Approach Footwork Drill. This exercise teaches players to quickly get into proper defensive position and help cover the middle of the field when needed.
Setup and Execution
- Place cones in a circle around the goal area, with one cone on the crease
- Use 4-8 outside cones, depending on desired conditioning intensity
- Cones represent common offensive player positions (midfielders, attackmen, etc.)
- Players move between outside cones and the center, practicing approach and recovery
This drill simulates real game scenarios, helping defenders learn to position themselves between the ball carrier and the goal while also developing the ability to recover and provide defensive support.
Key Defensive Footwork Techniques
To excel in defensive footwork, players should focus on mastering several key techniques:
- Approach – Learn to close distance on the ball carrier efficiently
- Breakdown position – Maintain a balanced, athletic stance
- Drop step – Quickly change direction to stay with dodging attackers
- Pursuit – Follow the ball carrier while maintaining proper positioning
Do defenders need to focus on speed or agility more? While both are important, agility often takes precedence in lacrosse defense. Quick changes of direction and the ability to mirror an attacker’s movements are crucial for successful defensive play.
Incorporating Team Defense Concepts
The In-and-Out Approach Footwork Drill not only improves individual skills but also helps teach team defense concepts:
- First and second slide responsibilities
- Help defense and covering open attackers
- Defensive communication
Players should practice calling out “I got ball!” when approaching an outside cone and “I got your two [Slide]!” when moving back to cover the middle. This verbal communication is essential for coordinated team defense.
Additional Defensive Drills for Skill Development
To create a well-rounded defensive skillset, coaches should incorporate a variety of drills into their practice plans:
Seawolves Drill
This high-level drill focuses on off-ball offensive and defensive play. It creates game-like situations for both attackers and defenders, improving decision-making and positioning.
Triangle Approach Drill
This simple exercise teaches defensemen how to direct a dodging attacker. It helps players understand angles and body positioning to guide offensive players in desired directions.

Touch the Hat Approach Drill
A gauntlet-style drill that tests defenders’ approach techniques under fatigue. This exercise builds stamina and reinforces proper form even when players are tired.
How often should these drills be practiced? Ideally, defensive footwork drills should be incorporated into every practice session, even if only for 10-15 minutes. Consistent repetition is key to developing muscle memory and instinctive defensive movements.
Coaching Tips for Effective Defensive Drills
To maximize the benefits of defensive footwork drills, coaches should keep the following tips in mind:
- Recognize and encourage effort from all players
- Emphasize the importance of loud, clear defensive communication
- Time drills appropriately for players’ age and attention span
- Integrate Speed, Agility, and Quickness (SAQ) work into defensive drills
- Provide specific, constructive feedback on technique and positioning
What’s the most common mistake coaches make when teaching defensive footwork? Many coaches focus too heavily on stick checks and not enough on body positioning and footwork. Emphasizing proper movement and positioning first will create a stronger defensive foundation.
The Role of Conditioning in Defensive Performance
Defensive footwork drills serve a dual purpose: skill development and conditioning. The constant movement and quick direction changes in these drills naturally improve players’ overall fitness and stamina.
To further enhance conditioning for defensive play, coaches can:
- Increase the number of cones or stations in footwork drills
- Add short sprints between defensive movements
- Incorporate plyometric exercises to improve explosive power
- Use interval training to simulate the stop-and-start nature of lacrosse
How does improved conditioning impact defensive performance? Better-conditioned players can maintain proper form and technique throughout the game, even in high-pressure situations or during long possessions.
Adapting Defensive Footwork for Different Positions
While the fundamentals of defensive footwork apply to all positions, there are some specific considerations for different roles on the field:
Close Defenders
Focus on:
- Quick lateral movements to stay with attackmen
- Efficient recovery steps after checks or dodges
- Footwork for tight marking in off-ball situations
Midfielders
Emphasize:
- Transition footwork for quick switches between offense and defense
- Long-distance recovery runs
- Positioning for help defense and slides
Goalies
Focus on:
- Quick steps to cover angles in the crease
- Efficient footwork for clearing after saves
- Positioning to direct the defense
Should defensive drills be position-specific or universal? While some position-specific drills are beneficial, most defensive footwork drills should be universal. This approach ensures all players have a strong foundation and can adapt to different defensive roles if needed.
Measuring and Tracking Defensive Improvement
To ensure players are progressing in their defensive footwork skills, coaches should implement regular assessment and tracking methods:
- Timed trials of footwork drills to measure speed and efficiency
- Video analysis of defensive positioning during scrimmages
- Tracking statistics like caused turnovers and successful clears
- Regular one-on-one feedback sessions with players
How can coaches motivate players to focus on defensive improvement? Highlight the direct correlation between strong defensive play and team success. Recognize and reward excellent defensive efforts during practices and games to reinforce its importance.
Integrating Defensive Footwork into Full-Field Drills
While isolated footwork drills are crucial for skill development, it’s equally important to apply these skills in more game-like scenarios. Coaches can incorporate defensive footwork into full-field drills by:
- Running transition drills that emphasize proper defensive positioning
- Conducting small-sided games (3v3 or 4v4) with a focus on defensive movement
- Practicing unsettled situations that require quick defensive adjustments
- Simulating man-down scenarios to stress the importance of efficient footwork
These integrated drills help players translate their improved footwork skills into actual game performance.
The Mental Aspect of Defensive Footwork
Effective defensive play isn’t just about physical skills; it also requires mental sharpness and quick decision-making. To develop the mental side of defensive footwork, coaches should:
- Teach players to read offensive formations and anticipate movements
- Practice visualization techniques for defensive scenarios
- Encourage players to study film and analyze defensive positioning
- Develop on-field communication skills to coordinate team defense
How does mental preparation impact defensive footwork? A mentally prepared defender can react more quickly to offensive moves, positioning themselves effectively before the attacker even receives the ball.

Advanced Defensive Footwork Concepts
As players progress in their defensive skills, coaches can introduce more advanced footwork concepts:
Splitting Dodgers
Teaching defenders to position their feet to funnel dodgers in specific directions, often towards the sideline or a waiting slide.
Recovery Footwork
Techniques for quickly getting back into defensive position after being beat or after helping on a slide.
Footwork for Doubles and Traps
Coordinated movements to execute effective double-teams and defensive traps.
Off-Ball Defensive Footwork
Positioning and movement to deny cuts and passing lanes while maintaining the ability to help on-ball.
These advanced concepts build upon the fundamental footwork skills and help create a more sophisticated defensive unit.
Adapting Defensive Footwork for Different Game Situations
Defensive footwork isn’t one-size-fits-all; it needs to be adapted for various game situations. Coaches should prepare players for different scenarios:
- Man-down defense: Emphasize quick rotations and efficient sliding
- Fast break defense: Focus on stopping the ball and recovering to mark open players
- Slow-down offense: Teach patient footwork to avoid over-committing on fakes
- End-of-game situations: Practice aggressive footwork for forcing turnovers when trailing
By practicing footwork in these diverse situations, defenders become more versatile and effective in all aspects of the game.
The Future of Defensive Footwork Training
As lacrosse continues to evolve, so too will the approaches to training defensive footwork. Some emerging trends include:
- Use of virtual reality for immersive defensive training
- Advanced motion tracking technology to analyze and improve footwork efficiency
- Integration of sport-specific agility training into defensive drills
- Increased focus on position-less defense, requiring versatile footwork skills
How will these advancements impact defensive play in lacrosse? These innovations will likely lead to more dynamic and adaptable defenders, capable of handling the increasing speed and complexity of offensive schemes.
In conclusion, mastering defensive footwork is crucial for success in lacrosse. Through consistent practice of fundamental drills, integration of team concepts, and adaptation to various game situations, players can significantly improve their defensive capabilities. Coaches play a vital role in emphasizing the importance of footwork and providing structured, effective training methods. As the sport continues to evolve, so too will the techniques and technologies used to develop elite defensive footwork skills.

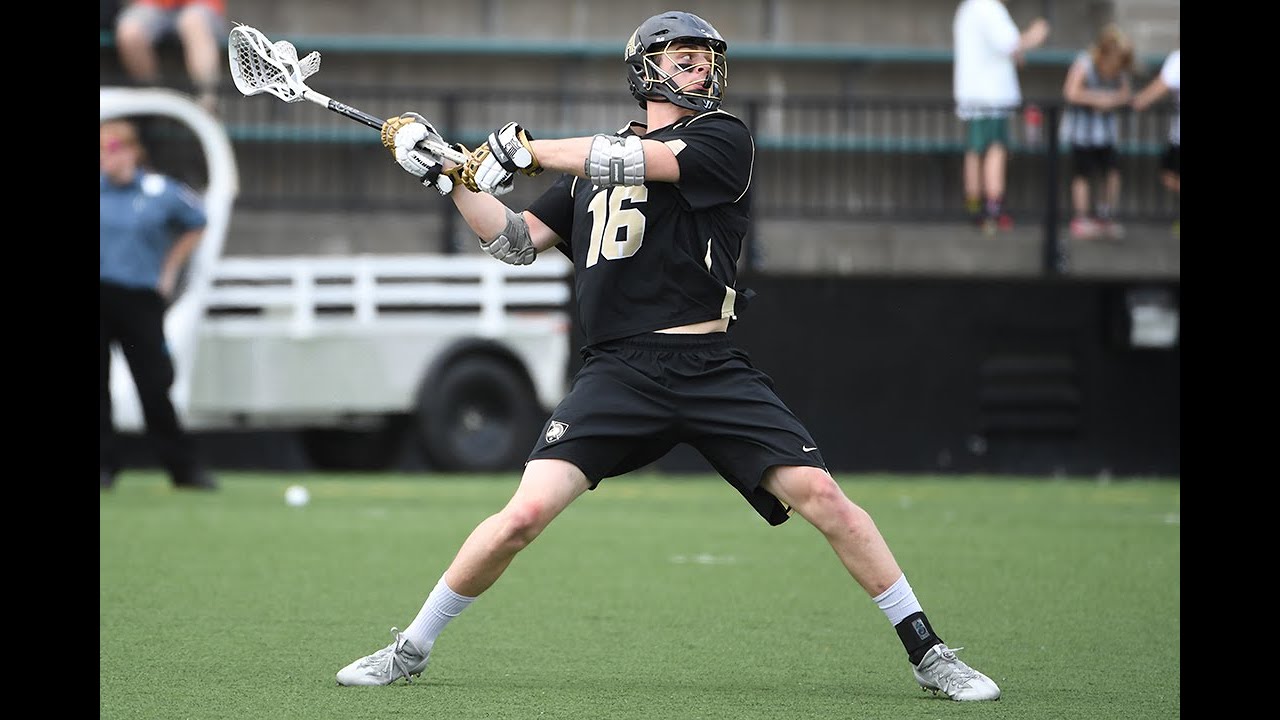
In-and-Out Approach Footwork Drill for Defense
Defensive footwork is one thing coaches and players overlook in practice all the time. Use this quick and easy drill to teach your players how to “Approach”- get out to guard the ball quickly, then back in to help cover the middle in settled and unsettled situations. Plus get some Speed, Agility & Quickness work done at the same time!
Proper footwork on defense doesn’t end up on highlight videos very often, but it probably should. Good Defense starts with the feet first, then the hips and hands. Stick checks come last.
RELATED: Play Good Body Defense. Maybe Don’t Teach the Poke Check First.
Youth and beginning players make some very common mistakes playing individual man-on-man Defense:
- Poor “Approach”- running at the ball from the wrong direction, or coming in too fast, letting the man with the ball run right by.
- “Over-Committing”- Younger players often charge straight out at the man with the ball and “Lunge” at him.
 If he changes speed or direction, it’s over. “Break Down” in a good athletic position, ready to “Drop Step” and “Pursue” the ball, no matter which way he goes.
 - The old “Stop and Chop,”- Defenders stop their feet and throw one stick check, letting the man with the ball run right by. Move those feet and stay in between the man with the ball and the goal!
- “No Top Side!”
 If he changes speed or direction, it’s over. “Break Down” in a good athletic position, ready to “Drop Step” and “Pursue” the ball, no matter which way he goes.
Use this simple drill to teach your players to get to a good defensive position on the field quickly, where they can stay in between the man with the ball and the goal.
They will also learn to get back and help cover the middle of the field, with their sticks up to knock down passes once the ball moves to another attacking player. This is an easy way to help teach “Team Defense”, where your players have First and Second Slide responsibilities.
- Related: Lax Lingo- “Spider!” Defense. Help cover the back side!
Here’s THE DRILL:
Set up cones in a circle around the outside of the goal area, with one on the crease. You can use anywhere from 4-8 outside cones, depending on how much conditioning you want to incorporate into the drill.
This imitates common locations and spacing where attacking players usually are on the field- Midfielders at the corners and top of the box, Attackmen at the wings, goalie’s back left and right, and at X behind the goal.
PRACTICE TIPS:
- Recognize all your players’ effort: Encourage all your players effort and athleticism in these types of drills. They might not be as fun as other practice drills and games, but they are just as important!
- Defensive Communication: Make sure all your players are communicating loudly. “I got ball!” when they are at each outside cone, and “I got your two [Slide]!” when they are back in to cover any open attackers in the middle.
- Remember to Time Your Drills for your players’ age and attention span: You should be able to get your Speed, Agility & Quickness work done in 10-15 minutes at the beginning of each practice.
Defense! Defense! Defense!
Defensive Skill Development Drills – POWLAX Master Coach
POWLAX Master Coach
Creating Confident Coaches
Coaching For Lacrosse… Teaching For Life…
These drills focus on the individual and team components of defensive play.
Leave a Comment
/ Complete Team Drills, Defensive Skill Development Drills, Gameplay Concept Drills, Odd/Even Competition Drills, Offensive Skill Development Drills, Player Favorites / By
Patrick Chapla
Seawolves Drill The Seawolves drill is a high-level off-ball offensive and defensive drill that revolutionized how our players played off-ball this year. I believe that it is one of the main factors that propelled us to our first-ever playoff win because it forces players into game-like off-ball finishing situations. Download the Playbook PDF! Reload For …
Seawolves Drill | Of Ball offense and Defense | Mens and Womens Lacrosse | POWLAX Read More »
Leave a Comment
/ Defensive Skill Development Drills, Footwork Drills / By
Patrick Chapla
Triangle Approach Drill The triangle approach drill is a simple drill that shows defenseman how to direct a dodger. Reload For A Random Offense Video Defense Video Drill Video Skill Video
Leave a Comment
/ Defensive Skill Development Drills, Footwork Drills / By
Patrick Chapla
Touch The Hat Approach Drill This is a gauntlet style drill that will truly test how your defenseman approach when they’re tired. Reload For A Random Offense Video Defense Video Drill Video Skill Video
Leave a Comment
/ Defensive Skill Development Drills / By
Patrick Chapla
Triangle Show Drill (Adjacent Slide and Recover) The Triangle Show Drill teaches players how an adjacent slide package works by simulating adjacent slides and recoveries in a 3v3 set. The players will learn:1) Communication for on-ball and adjacent players.2) Off ball stance and positioning.3) Adjacent slide and recovery mechanics and communication for simple dodges, carry …
Triangle Show Drill Read More »
Leave a Comment
/ Defensive Skill Development Drills, Gameplay Concept Drills / By
Patrick Chapla
Salisbury Call Drill The Salisbury Call Drill is a fast-paced slide and recovery drill that teaches sliding, recovering, bumping, and playing the two inside. Offensively, it focuses on stepping away to accept slides in order to move the ball. Download the Playbook PDF! Reload For A Random Offense Video Defense Video Drill Video Skill Video
Leave a Comment
/ Defensive Skill Development Drills, Gameplay Concept Drills / By
Patrick Chapla
Line Bump Drill (Slide and Recover) An overview of the Fade and Follow Offense that Duke used to put up 19 vs Hopkins in the first round last year. Download the Playbook PDF! Reload For A Random Offense Video Defense Video Drill Video Skill Video
Leave a Comment
/ Defensive Skill Development Drills, Gameplay Concept Drills, Individual Competition Drills, Offensive Skill Development Drills, Player Favorites / By
Patrick Chapla
General Drill (Recovery 1v1’s) General Drill is a recovery 1v1 drill at the edge of dangerous space that forces players to embrace contact to be successful! Modified from UVA Coach Lars Tiffany’s presentation at IMLCA. Download the Playbook PDF! Reload For A Random Offense Video Defense Video Drill Video Skill Video
Leave a Comment
/ Complete Team Drills, Defensive Skill Development Drills, Gameplay Concept Drills, Odd/Even Competition Drills, Offensive Skill Development Drills, Player Favorites / By
Patrick Chapla
Duke’s Scrapping Drill This player favorite will develop your teams transition offense, ground balls, and clearing! All in one drill! Download the Playbook PDF! Reload For A Random Offense Video Defense Video Drill Video Skill Video
Leave a Comment
/ Defensive Skill Development Drills, Gameplay Concept Drills, Off Ball Defense / By
Patrick Chapla
5 On a Die (Slide and Recover) Drill 5 on a Die Drill breaks down the assignments and roles of any man to man defense allowing players to get a greater understanding of slide and recovery principles. Also see the Triangle Show Drill and Line Bump Drill! Download the Playbook PDF! Reload For A Random …
5 On a Die Drill Read More »
Machine Calf Raise
DIAGRAM
- Sit on the incline leg press machine with your buttocks and lower back firmly pressed into the seat.
- Place your feet on the bottom of the platform at a comfortable width for yourself so that the heels protrude beyond the edge.
- Place your feet parallel to each other or spread your toes slightly apart. The legs should be slightly bent at the knees or straight, but without overextension at the knee joints.
- Lower the platform and grasp the side handles of the machine to stabilize the torso. This is the starting position.
- Inhale, hold your breath and begin to straighten your legs at the ankles, squeezing the platform up. The pace is slow and measured. At the peak point, stop for 1-2 seconds to delay the maximum contraction.
- As you exhale, return to the starting position, strictly controlling the weight, briefly linger at the bottom point and begin the next repetition.
- To prevent socks from slipping off the edge of the platform, wear shoes with grooved soles.
NOTES
- To ensure injury prevention and maximum calf loading, do the exercise slowly or at a moderate speed.
- The relatively small amplitude of the exercise is fundamentally important. This movement develops strength and “mass” of the calves precisely with a reduced amplitude. By fully extending your ankles, you do not increase the effectiveness of the exercise, but you increase the risk of feet slipping off the platform.
- Do not do this exercise unless the platform is deeply grooved or your shoes have smooth soles. These seemingly harmless “little things” can lead to serious injury.
- Do not overextend your knees when straightening your legs: this is dangerous!
- Be sure to hold your breath in the positive phase of the movement and try to focus as much as possible on the sensations in your calves. Exhale in the negative phase, controlling the movement of the platform.
- Do not lower the platform too quickly, do not jerk at the beginning of the repetition: this is fraught with the legs slipping off the platform and injury.

ANATOMY
The gastrocnemius biceps is located on the back of the lower leg and forms the top of the calf. With good relief, both of its heads are clearly separated. The soleus muscle is slightly wider than the gastrocnemius, and is located directly below it. A well-developed soleus can be seen on the sides and just below the gastrocnemius.
Gastrocnemius and soleus muscles together form a group of so-called. ankle extensors. At the top, the gastrocnemius is attached to the femur, and the soleus is attached to the tibia and fibula. Below, they “merge” into a single Achilles tendon, which is attached to the calcaneus.
WORK OF MUSCLES AND JOINTS
When unbending at the ankle, the toe of the foot moves down, away from the shin. The calf muscle is most fully tensed when the knee is extended. The soleus “loads” equally powerfully, regardless of the angle of the knee joint. If you want to maximize the load on the calf, take heavy weights and do straight-knee calf raises. Emphasis on the soleus muscle allows rise on toes while sitting, and the range of motion may be limited.
SPORT
In bodybuilding, the leg press calf raise is used to develop mass and topography in the upper back of the lower legs.
Ankle extension provides the final “push” when “sending” the body forward or upward. Therefore, this movement plays a fundamentally important role in race walking, running, long and high jumps, and all sports where jumps are practiced – volleyball, basketball, tennis, lacrosse, athletics.
TIPS FROM RONNIE COLEMAN
- The leg press calf raise is one of my favorite calf exercises. It isolates the target muscles better when compared to standing, sitting, or bent-over calf raises with weights on your back. In addition, here I can take heavier weights.
- I set the back of the machine at a right angle to the seat: this position allows me to achieve a super stretch of the calves in the negative phase.
- My knees are always slightly bent: in my opinion, this position isolates the calves to the maximum and, in addition, eliminates dangerous overload of the knee joints.
- If you want to “squeeze” this exercise to the maximum, be sure to achieve a full stretch of the calves at the bottom point! I lower the weight as low as possible, then pause briefly, and begin a new rep – smoothly and without jerking.
- For a super powerful pump, I always delay the peak contraction by a second. At one time I tried another option – a lot of repetitions without pauses, and found that for me personally, a calmer, slower pace with a delay at the top “works” better.
- I do this exercise with heavy weights, so I never use super intense moves like staggered sets, etc. here. Each repetition lasts four seconds for me, taking into account the pauses at the bottom and top points.
- I don’t really think about whether I breathe properly or not. The main thing for me is “burning”.
- I do three sets in total, resting 1-1.5 minutes between sets. With this exercise, I complete the calf workout, so no special warm-up sets are required for it.
- I train calves twice a week, but not on days I have quads or hamstrings scheduled. I do three calf raises: standing calf raises, seated calf raises, and leg press machine calf raises.

Freestyle footwork. 3 basic exercises that will improve your technique by 100%
Trainer’s advice
Today in our article we will talk about the work of the legs in the crawl. And also tell you about three cool exercises that will improve your technique.
Most people don’t like swimming on crawl legs. There is a logical explanation for this: crawl swimming is difficult, uncomfortable and long. But this skill can be worked out with the help of special exercises. They are suitable for those swimmers who already know how to swim on their feet at least a little.
Exercise 1. He will need a swimming board. It is necessary to swim on the legs of a crawl, stretching out your arms, lowering it under the water and placing a plank across it. Thus, oncoming water will create resistance, thanks to which it will be possible to work out the legs well. If you feel that it is hard for you, then you can raise it to the middle. It is necessary to swim 25 meters with the board forward, then 25 meters with the board in the standard position.
Exercise 2. This is also done with the board. You need to hold on to the board and swim on your feet. It is important not to make a fountain from the feet. They must be under water.
The exercise is performed in this way: 25 meters must be swum with the legs down, and another 25 meters with the legs in the standard position. For more intense workouts, this distance can be extended up to 100 meters. You can complicate the exercise by holding the top of the plank. In this case, the head should be at the top.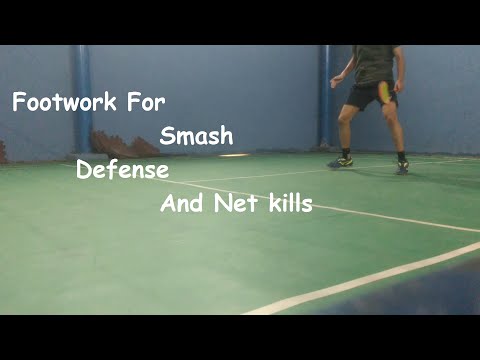 This will create an even sharper angle that will put stress on the legs.
Exercise 3. It can be done with or without a bowl. We begin to swim on the chest, one hand is lowered, and the bowl is in the second hand, which is extended.
In this position, we swim 5-7 kicks, then turn on our side, swim on our side 5 times. From this position, we turn onto our back, do 5 hits and begin to return in the same order (on the side, on the stomach). This exercise allows our legs to work in different planes, so they get a completely different load. The exercise is performed 25 meters on one arm and 25 meters on the other arm.
Important! If you can swim without a bowl, then you can just swim with your arm outstretched. Or both hands can be simply along the body. The most important thing is to follow the correct work of the legs.
Do you want to learn proper freestyle footwork and how to rocket swim? Enrolled in our swimming school SwimRocket.