How can lacrosse goalies improve their skills. What are the most effective advanced drills for lacrosse goalies. Which techniques can help goalies perfect their saves. How does video analysis benefit lacrosse goalie training. What equipment is needed for advanced lacrosse goalie drills.
Rapid Fire: Enhancing Reflexes and Endurance
The Rapid Fire drill is an advanced technique designed to hone a lacrosse goalie’s reflexes and stamina. This drill requires specialized equipment, specifically a tennis ball machine or baseball pitching machine. While these machines can be costly, they offer unparalleled benefits for serious goalie training.
To execute the Rapid Fire drill:
- Set up the machine to fire tennis balls at a specific spot on the cage.
- Program the machine for rapid-fire mode, launching balls in quick succession.
- The goalie must make consecutive saves without breaks.
- After 30-50 shots to one area, adjust the machine to target a different part of the cage.
This drill serves two primary purposes: muscle memory development for making saves and improving conditioning. The rapid-fire nature of the exercise pushes goalies to their limits, enhancing their ability to react quickly and maintain focus under pressure.

Benefits of Rapid Fire Training
- Improved reaction time
- Enhanced muscle memory for save techniques
- Increased endurance and stamina
- Better focus under high-pressure situations
Handcuff Drill: Perfecting Head Position and Eye Tracking
The Handcuff Drill is an innovative approach to ensuring proper head position and eye tracking during saves. This exercise utilizes a specialized product called the Tracer, which connects the goalie’s top hand to their face mask. Alternatively, string, lanyards, or even actual handcuffs can be used.
How does the Handcuff Drill work? By limiting the goalie’s range of motion, it forces them to keep their head and eyes on the ball throughout the entire save motion. This is particularly crucial for low shots, where the goalie’s head should be positioned down and over the ball.
When implementing the Handcuff Drill:
- Attach the Tracer or alternative restraint between the goalie’s top hand and face mask.
- Begin with slower shots to allow the goalie to adjust to the limited movement.
- Gradually increase shot speed as the goalie becomes more comfortable.
- Focus on maintaining proper head position throughout each save attempt.
This drill effectively eliminates bad habits and reinforces correct techniques, leading to more consistent and successful saves.

Video Analysis: Identifying and Correcting Technique Flaws
In the digital age, video analysis has become an indispensable tool for lacrosse goalie training. This method allows coaches and players to identify subtle flaws in technique that may not be apparent during live practice sessions.
To implement video analysis in your training routine:
- Use a smartphone camera or affordable digital camera to record practice sessions.
- Invest in a tripod and smartphone mount for stable footage.
- Record from various angles to capture all aspects of the goalie’s performance.
- Review footage in slow motion to analyze specific elements of technique.
When reviewing practice footage, pay close attention to:
- Stance and body positioning
- Hand placement and movement
- Rebound control
- Any hitches or false steps in the save motion
- Anticipation or guessing on shots
- Throwing technique for clears
Video analysis not only helps identify areas for improvement but also provides visual feedback that can accelerate the learning process. Additionally, this footage can be valuable for creating recruiting videos for university coaches.
No Pocket Stick Drill: Emphasizing Body Positioning
The No Pocket Stick Drill is designed to reinforce proper body positioning during saves. This exercise utilizes an old lacrosse stick with the pocket removed, leaving only a blank head.
To execute the No Pocket Stick Drill:
- Use tennis balls for softer impact.
- Take shots on the goalie in all quadrants of the goal.
- The goalie should attempt to make saves as normal, but the ball will pass through the stick.
- Focus on getting the body behind every shot, as if to “back up” the save.
This drill emphasizes the importance of proper body positioning in making saves. Without a pocket to catch the ball, goalies must rely on their body to stop shots, reinforcing the concept that the stick is an extension of the body rather than the primary saving tool.
Variations and Enhancements
To further challenge goalies, consider combining the No Pocket Stick Drill with a Weighted Shaft variation. Fill the shaft with pennies or sand to increase its weight, which helps improve hand speed and strength.
Long Pole Drill: Maintaining Proper Hand Position
The Long Pole Drill is an effective method for ensuring goalies maintain correct hand positioning when making saves. This exercise utilizes a standard defensive long pole with a 6-foot shaft and regular head.
How to implement the Long Pole Drill:
- Have the goalie play a shallow arc in the goal.
- Take shots on the goalie, focusing particularly on off-stick side shots.
- Shoot at a slightly slower pace than normal to allow for adjustment.
- The goalie should make saves using the long pole instead of their regular stick.
The extended length of the defensive pole forces goalies to keep their hands away from their body when making saves. If the hands are too close to the body, the long shaft will hit the goal pipe, providing immediate feedback on improper technique.
This drill is particularly beneficial for improving saves on the off-stick side, where proper hand positioning is crucial for effective stick rotation. By mastering this technique, goalies can significantly increase their save percentage on challenging shots.

Mirror Drill: Instant Visual Feedback for Save Techniques
Borrowed from elite ice hockey goalie training programs in Canada, the Mirror Drill provides instant visual feedback on save techniques. This exercise allows goalies to analyze and correct their form in real-time, leading to more efficient and effective save motions.
To set up the Mirror Drill:
- Place a large mirror in front of the goalie’s normal position.
- Use a plastic mirror if possible to prevent breakage; if using a glass mirror, exercise caution.
- Have the goalie assume their regular stance and go through save motions.
- Freeze in the save position and analyze form in the mirror.
When analyzing form in the mirror, goalies should focus on:
- Leg positioning relative to the stick
- Overall body positioning to maximize shot-stopping ability
- Proper stick rotation with top hand down and bottom hand up
- Balance and stability throughout the save motion
The Mirror Drill allows goalies to make immediate corrections to their technique, reinforcing proper form and muscle memory. This self-analysis tool can be particularly valuable when a coach is not present, enabling goalies to conduct effective solo training sessions.

Incorporating Advanced Drills into Training Regimens
While these advanced drills offer significant benefits for lacrosse goalies, it’s crucial to integrate them thoughtfully into existing training routines. How can coaches and players effectively incorporate these exercises without overwhelming their practice sessions?
Consider the following strategies for implementing advanced drills:
- Gradually introduce new drills: Start with one or two advanced drills per week, allowing time for adjustment and mastery.
- Rotate drill focus: Alternate between different advanced drills to target various aspects of goalie play.
- Combine with fundamental exercises: Maintain a balance between advanced techniques and essential skills practice.
- Tailor to individual needs: Adapt drills to address specific weaknesses or goals of each goalie.
- Monitor progress: Use video analysis and performance metrics to track improvement and adjust training as needed.
By thoughtfully integrating these advanced drills, lacrosse goalies can elevate their game to new heights, developing the skills and techniques necessary to excel at higher levels of competition.

Equipment Considerations for Advanced Goalie Training
To fully leverage the benefits of advanced lacrosse goalie drills, certain specialized equipment may be necessary. While some items can be costly, they offer unique training opportunities that can significantly impact a goalie’s development.
Essential equipment for advanced goalie training includes:
- Tennis ball machine or baseball pitching machine for Rapid Fire drills
- Tracer or similar device for the Handcuff Drill
- Smartphone or digital camera with tripod for video analysis
- Old lacrosse stick with removed pocket for No Pocket Stick Drill
- Defensive long pole for the Long Pole Drill
- Large mirror (preferably plastic) for the Mirror Drill
When considering equipment investments, weigh the potential benefits against the costs. Some items, like the tennis ball machine, may be more suitable for team or club purchases rather than individual acquisitions. Coaches and players should explore creative alternatives or DIY solutions when possible to make advanced training techniques more accessible.
Maximizing Equipment Usage
To get the most value from training equipment investments:
- Develop a comprehensive training plan that fully utilizes each piece of equipment.
- Share resources among multiple goalies or teams to distribute costs.
- Explore rental options for more expensive items like ball machines.
- Regularly maintain equipment to ensure longevity and optimal performance.
By carefully considering equipment needs and maximizing their usage, lacrosse programs can provide goalies with advanced training opportunities without breaking the budget.
8 Advanced Lacrosse Goalie Drills
Here are 8 advanced lacrosse goalie drills that I learned from lax goalie Coach Bill Pilat. He’s a solid goalie coach with years and years of experience and I highly recommend his material and his live goalie camps.
Keep in mind, these are advanced drills.
Only work them into your goalie’s routine once they understand the basics.
For this drill we need a tennis ball machine or a baseball pitching machine. These are expensive pieces of equipment that not everyone has, hence the reason its an advanced drill.
We’ll setup the machine to fire tennis balls to single spot on the cage.
The name of the drill is Rapid Fire – and that’s exactly what we want. Fire the balls quickly, one after another. With the goalie making the save each time.
After 30-50 shots in one area, readjust the machine and start shooting to another area of the cage.
This drill will work muscle memory for making lacrosse saves and also work conditioning since making saves so quickly with no break will get tiring.
Handcuff Drill
For this lacrosse goalie drill we can use a product from DYG called the Tracer (not an affiliate link) which connects the top-hand to the face mask. If you don’t want to purchase the Tracer, we can use string, lanyards, or even actual handcuffs.
With the goalie’s top-hand attached to the bottom of his face mask, the goalie has no choice but keep his head and eyes on the ball as the shot comes in.
Especially on low shots, the goalie’s head should be down and over the ball. Connecting the Tracer will force the goalie to keep his head down.
When you have the Tracer on, the coach needs to shoot a little slower until the goalie becomes accustomed to the limitations in movement.
Filming goalies is one of the best things you can do to improve their game.
Often times goalies will have a hitch or take a false step on every shot. They don’t feel it and explaining does little good.
However when they see themselves on video, the problem is instantly identifiable.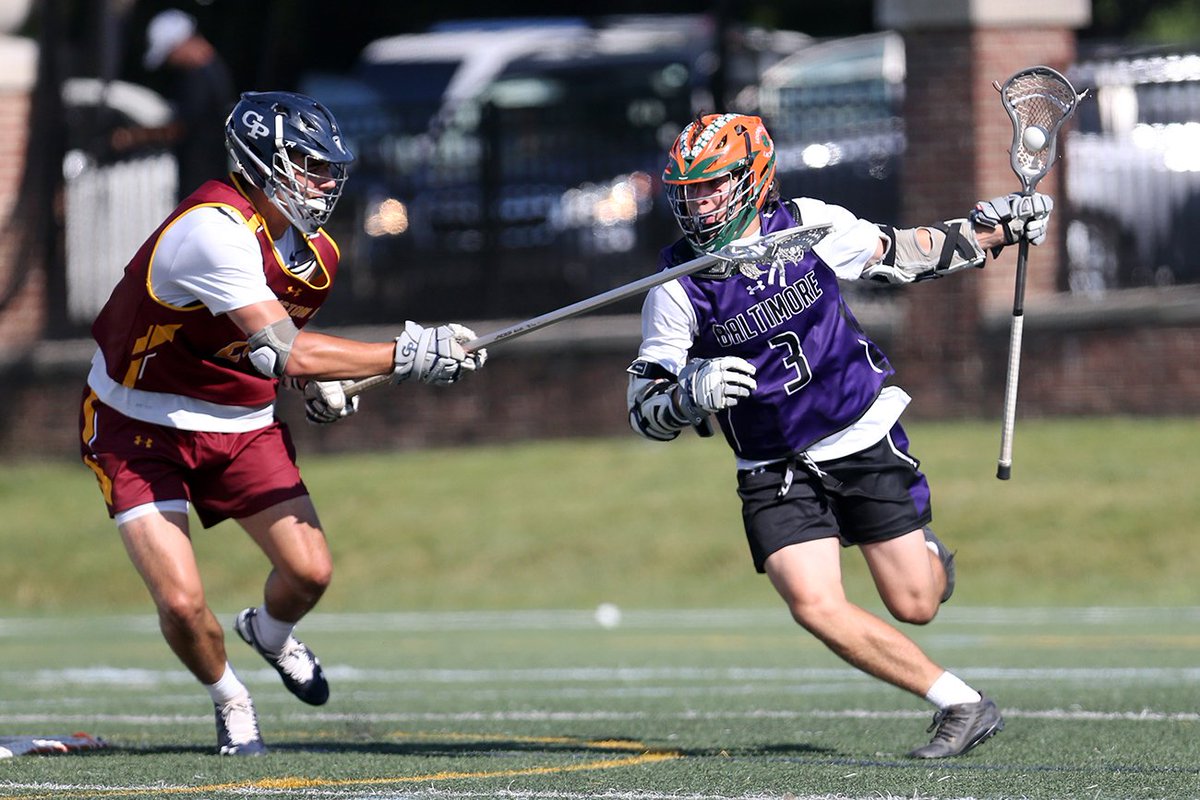 It’s easy to spot when watching film.
There’s no need to buy an expensive camera as the iPhone camera is perfect. Simply purchase a tripod (I have this one) and a device to connect your iPhone to the tripod (I have this one).
When reviewing the practice footage, check the following:
- Stance
- Hands
- Rebounds
- Any hitches or false steps
- Guessing on shots
- Throwing technique
By using film in slow motion you can learn more about the goalies techniques then you can simply by taking shots and watching. This is one of my favorite lacrosse goalie drills to do with our goalies.
The film can also be used in a recruiting video that gets sent to university coaches.
With every save, the goalie should be getting his body behind the ball. This drill will help that aspect of the goalie’s game.
For the No Pocket Stick drill we need an old stick with, you guessed it, no pocket. Just a blank head.
Use tennis balls and take shots on the goalie in all quadrants of the goal.
The ball should pass through the stick as if you’re going to catch it but the goalie’s body should back up the shot. and hit the goalie in the body.
Focus on keeping proper form as we make the saves. In the video I also combine No Pocket stick with another drill called Weighted Shaft where we fill the shaft with pennies or sand to increase its weight.
That will help goalies improve their hand speed too.
This is drill I use to ensure that goalie’s keep their hands out and away from their body when making saves.
Use a normal defensive stick with a long 6 foot pole and regular head.
Especially, for the off stick side shots we want to keep our hands away from our body. This allows the stick to properly rotate.
Have the goalie play a shallow arc and take shots on them, shooting a little slower than normal.
This drill forces the goalie’s hand to be out to make saves.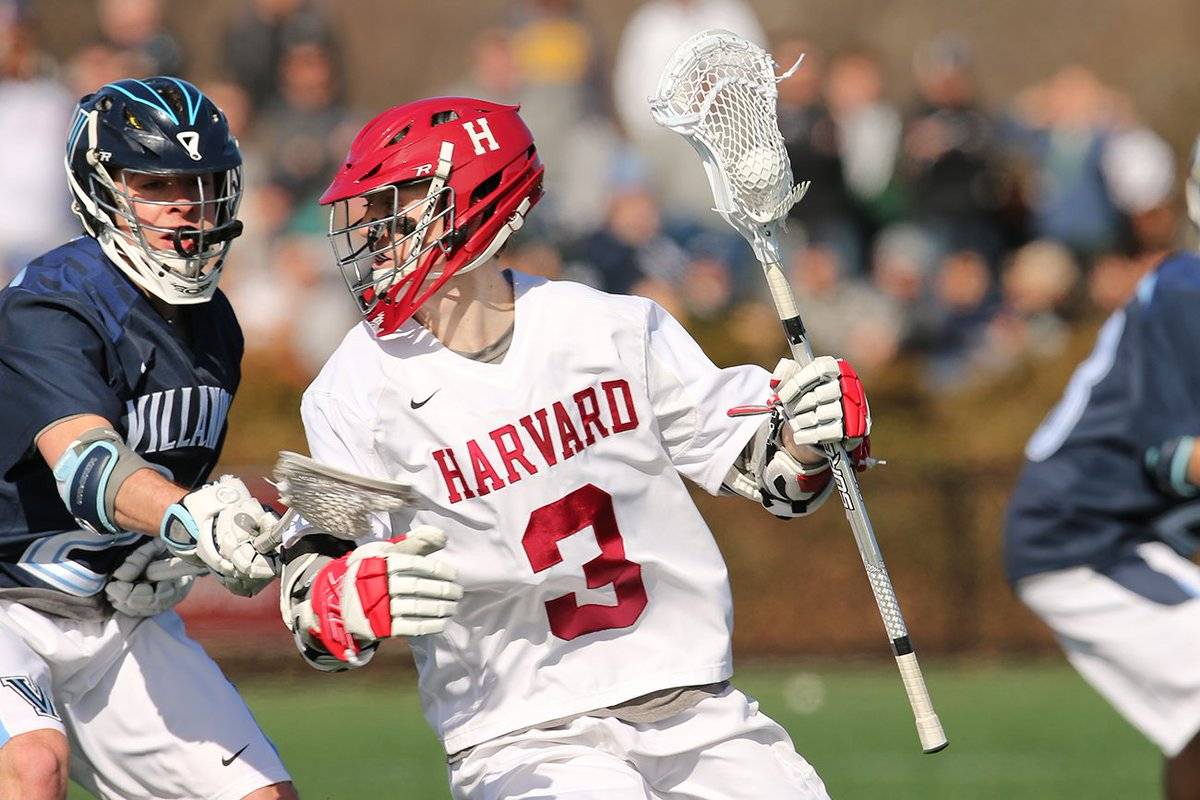 If the hands are in too tight to the body, the long defensive shaft will hit the pipe. The goalies will be able to hear and feel improper technique in this drill.
Keep your hands out to make saves.
This next goalie drill comes from elite ice hockey goalie coaches in Canada. They use this training all the time with their hockey goalies on ice.
The idea is we place a large mirror in front of the goalie. Get in your regular position and go through the motion of making a save in front of the mirror.
Try to get a plastic mirror so its won’t break or crack if a ball hits it or it falls. If you use a normal mirror, just be careful.
Freeze in the save position and lookup to see your form in the mirror:
- Are my legs around the stick?
- Am I maximizing my shot stopping ability?
- Is my top-hand down and bottom-hand up as I rotate the stick?
- Am I balanaced?
Continue making saves and analyzing your form, making corrections to the movements if you see something wrong.
This drill is great for providing instant feedback on every save.
Proper goalie technique involves picking up your trail foot, not dragging it. This drill helps goalie’s footwork by ensuring they don’t drag their trail foot.
DYG sells a product called The Glyde (not an affiliate link) which is used in this drill.
If you don’t want to buy the Glyde you can use a lacrosse shaft instead.
For this drill, we’ll place the Glyde (or lacrosse shaft) in between the goalie’s feet. As we take shots to either side of the goalie, he must ensure to lift his trail foot/leg as he moves his body to make the save.
Dragging the trail foot will result in contacting the Glyde/lacrosse shaft and thus the goalie must focus on really lifting the trail foot.
This will improve foot speed and help your goalie move quicker to make the save.
The trail foot probably is lifted a little more than necessary during a normal save, but that’s fine. The idea of the drill is improve muscle memory and increase the foot speed necessary to save shots.
For this drill we’re going to limit to the goalie’s peripheral vision and make him focus on the ball coming into the stick.
Coach Pilat recommends this product – www.thegoaliemask.com (not an affiliate link) – which fits over the goalie’s helmet and limits his vision.
I’ve also done this drill with tape on the goalie’s helmet.
Now when we take shots on our goalie he must really focus on watching the ball.
Similar to other drills we’re going to need to shoot a little slower because making saves is harder with limited vision.
When the mask is finally taken off, playing goalie will feel much easier.
If you’re looking for even more lacrosse goalie drills, checkout these 2 posts:
- 13 Lacrosse Goalie Drills to Improve Foot Speed and Reaction Time
- 10 Excellent Lacrosse Goalies Drills To Improve Your Game
When working with your lacrosse goalies its important that you vary the drills you use. Too much repetition of the same drill can cause goalies to become bored.
Work these 8 advanced lacrosse goalie drills into your routine and watch your goalie become a champion.
Until next time! Coach Damon
Have you used any of these drills? What are some others you like? Let me know in the comments.
Lacrosse Ladder Drills to Help Improve Quick Feet
Whether you’re hustling down the field to make a great play or dodging defenders right in front of the goal, quick footwork and agility are always key elements to have on the lacrosse field.
Lacrosse is an up-tempo sport, requiring players to juke, move and dodge their way past opponents in an effort to take a shot on goal. A great way to help improve your agility is by adding ladder training drills to your next lacrosse practice. With these helpful Pro Tips, you can help set yourself one quality move closer to the net.
No matter which of these five agility ladder drills you choose to complete, make sure to keep your upper body relaxed with your arms pumping through the exercise.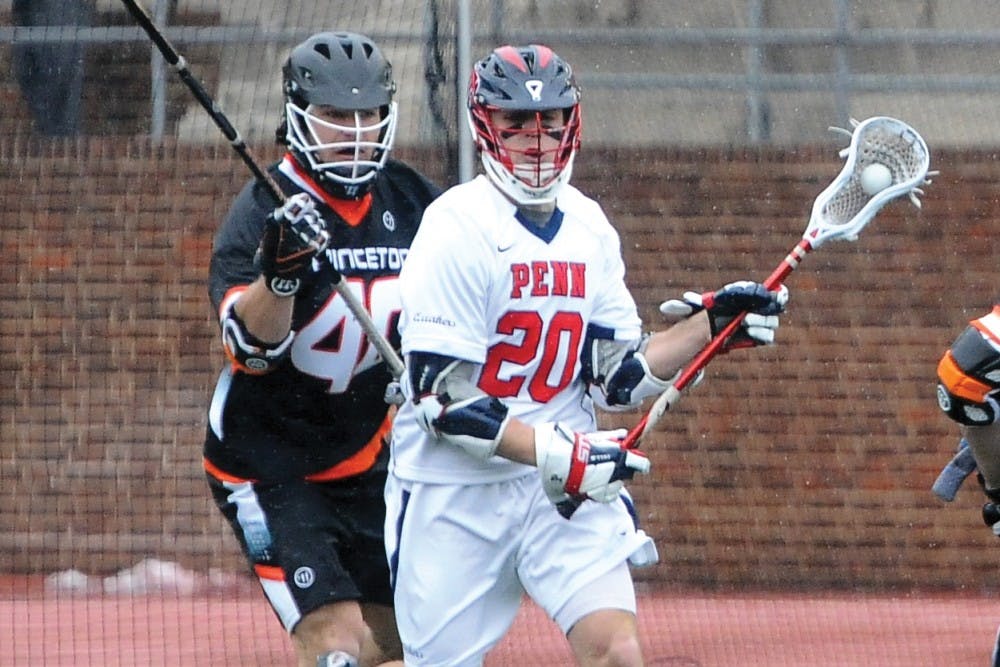 Your elbows should be bent at 90 degrees and you should always aim to land on the balls of your feet for quick steps and enhanced speed.
TWO FEET IN
For this agility ladder drill, place both feet in each rung, one at a time, at a brisk pace until you’ve gone through the entire ladder. Your steps should be quick and precise, with your arms pumping through the motion and your knees rising to a comfortable height.
BONUS PRO TIP: Don’t confuse this drill for “High Knees,” which calls for you to bring your knees up to your chest or waist height with each step. Instead, you should put emphasis on footwork rather than getting those knees elevated.
IN IN, OUT OUT
For this lacrosse drill, step into the ladder rungs one foot at a time, followed by two steps out of the ladder rungs. For example, if your first step is with your right foot, your step pattern should go: Right in, left in, then right out, left out.
Repeat this foot pattern through the ladder as fast as comfortably possible. Remember to keep your upper body relaxed and your arms pumping through this agility drill. And don’t rush yourself. Completing the drill properly is always better than completing the drill quickly and sloppily.
JUMP IN, JUMP OUT
To execute this agility drill for lacrosse, jump into each ladder rung with both feet for the first movement, and then follow up with a jump to the outside of the ladder with both feet at the same time. Your feet should land in unison and you should hit the ground on the balls of your feet, not flat-footed. A good way to break down this exercise is to try and imagine yourself doing jumping jacks down the ladder. The footwork is nearly identical, and this mindset can help alleviate some pre-drill confusion.
SCISSORS
With the Scissors Drill on the agility ladder, start with your lead foot inside the first ladder rung. You’ll then jump and bring your back foot forward, switching your footing inside the square.
So, if you begin with your right foot in the first rung, your next move should be to hop and land with your left foot inside that space and your right foot on the outside. Repeat these movements down the ladder until each square has been tapped.
TRIPLE STEP FORWARD SHUFFLE
This is a slightly more advanced lacrosse drill.
Begin the Triple Step Forward Shuffle by bringing each foot inside the ladder, one at a time. Then take your right foot and step outside of the ladder, followed by your left foot up into the next ladder square. Continue this drill by bringing your right foot back into the square, taking your left foot out and then moving to the next ladder rung with your right foot. Repeat this down the ladder until you’ve reached the end. If you’re hesitant to go full speed, try walking through the ladder to better understand each step, picking up your pace as you become more comfortable with the exercise.
No matter your position on the lacrosse field, practicing your agility and footwork can help you improve your game. So get a leg up on your competition by trying these agility ladder drills at your next lacrosse practice. You can discover even more lacrosse drills with Pro Tips.
Lacrosse Cross Passing
In the game of lacrosse, passing, shooting, and defensive work all begin with the same basic set of skills, and since the use of a lacrosse stick to throw and catch doesn’t always come naturally to beginning players, there are plenty of drills here on KbandsTraining.com that can help develop control and coordination during this process.
To effectively send and receive the ball, lacrosse players need to start with accurate stick handling and cradling technique. At all times, the stick should be held lightly in the higher part of the palm, not the lower part near the wrist. The pads of the fingers and the ball of the hand should be engaged in the grip, and the hold should be light, agile and flexible. Most of the time, catching and receiving motions gain accuracy and force when the hands are held at a wider distance on the stick. The aspects of an effective grip will be discussed in greater detail below.
Accurate technique during cradling and throwing maneuvers will only bring players halfway to success—the rest of the distance will need to be covered by practice. Hours of focused practice, both on and off the field, will help younger players gain a natural feel for the process. The same commitment to practice will help more advanced players improve their skills and gain the competitive edge they need to connect with teammates, execute passing and scoring strategies, and control the field.
With both practice and technique development in mind, players and coaches can observe the video below and work this drill—the lacrosse cross passing drill—into a regular seasonal training program. This drill requires only standard equipment and will engage the entire team in a coordinated series of throws and catches that will elevate all aspects of passing skill.
com/embed/z3HG2rTkUD0?modestbranding=1;rel=0″ frameborder=”0″/>
The Lacrosse Cross Passing Drill: Setting Up and Executing the Drill
As mentioned above, this drill will require very little equipment—Just a line down the center of the field and a standard set of set of lacrosse gear for each player. Half of the team will begin the drill at one end of the line on the right side, and the other half will begin on the left at the opposite end of the line.
As the drill begins, one player at a time from each side will begin a low intensity run down the left or right of the line. As the players approach each other, the ball will be passed from the player on the left to the player on the right. The player on the right will then encounter the next runner on the left side and will pass the ball to that team mate. The receiver of the ball will keep running until he encounters the next player on the right, and so on.
The ball will stay in the center of the field, passed back and forth across the line. The players will run past the passing zone one by one, catching the ball and then passing it to the next player in the line up.
This drill looks simple, but it may take a few rounds to develop the rhythm and team work that are necessary to keep the line in motion. As team skills advance and passes become more accurate, the runners on each side of the line can pick up speed.
The Lacrosse Cross Passing Drill: Proper Technique During the Drill
As each player runs down the line toward the passing and receiving zone, the stick should be held up and at the ready, and as discussed earlier, hand position on the stick should be correct. The hands should be about 12 to 13 inches apart, and the grip should be light, agile, and high in the palm instead of low and tight. This will improve control of the side to side motion of the net and also the leverage motion of the stick. Control and follow through are both important during this drill and during any related game situation, and correct hand position can support both of these elements.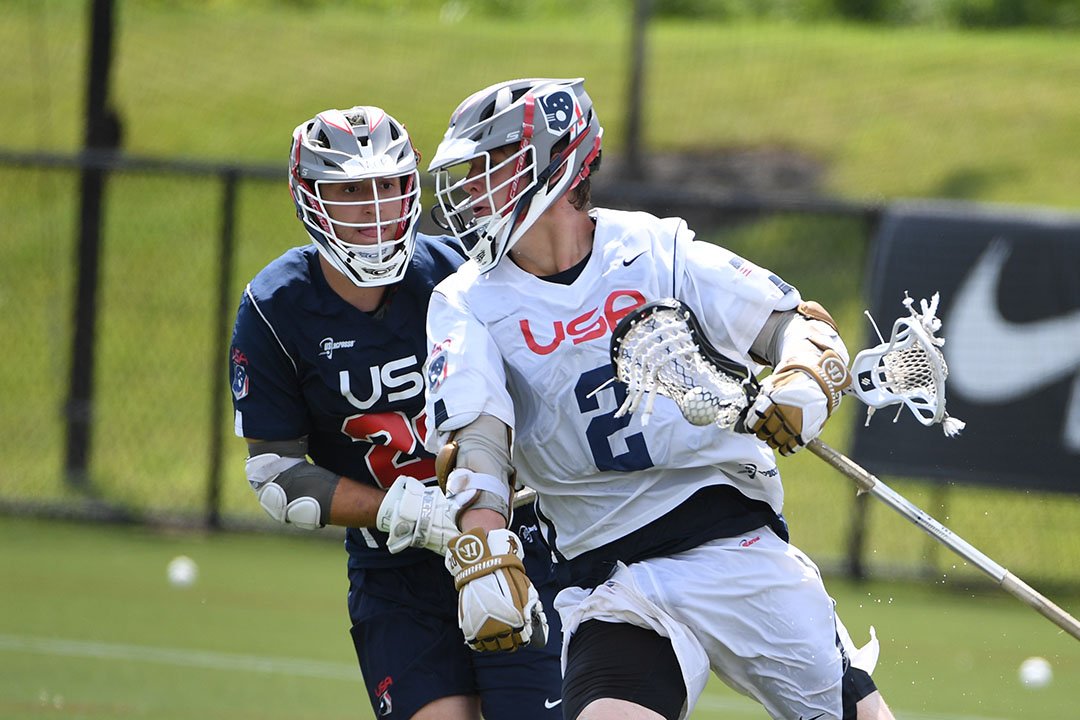
As players complete this drill, the dominant hand will feel more natural at the head of the stick, and that’s fine. Gaining control over throws and passes with the dominant hand is important, since this will be the orientation most players use during a game. But a drill like this one can help players – and teams overall—eliminate weaknesses on the field. So to gain the maximum benefits of the session, coaches should encourage players to shift hands, using both the right and left side of the body and both the dominant and secondary hand equally.
The Lacrosse Cross Passing Drill: Final Notes
Working this drill into the beginning or end of a regular training session a few times a week can generate a dramatic improvement in ball handling skill, including passing and catching. But this exercise can also have a powerful, positive impact on teamwork and rhythm. This will show on the field as teammates begin to read each other’s telegraphed intentions during fast paced scoring combinations and defensive and offensive maneuvers on the field.
Once the basics of passing and catching are under control, players and coaches can move on to the next level and start working more complex shooting and scoring drills into regular training sessions. To reach the next stage, players can visit KbandsTraining.com and explore the lacrosse training section of the site. This section offers a growing library of video demonstrations and drills like this one, targeting both advanced and beginning lacrosse players in all age categories.
The site also offers video drills and technique tutorials for a wide range of other sports, including basketball, baseball, cheer, soccer, and track and field. To improve your game and get the most out of every minute of your time on the practice field, explore the site and feel free to reach out to the Kbands trainers directly with your questions.
Lacrosse Training Equipment
5 Ways to Practice Lacrosse at Home By Yourself – LaxWeekly
Hey everyone! It’s Jake with Lax Weekly and today I’m going to tell you 5 ways to train for lacrosse at home. Right now, we’re in this weird time where coronavirus has pretty much shut everything down. Lacrosse seasons are cancelled, you can’t really see anyone, so I want to help you know exactly what you can do to get better at lacrosse on your own with no equipment!
Whether you’re a beginner or advanced lacrosse player, if you follow what i’m about to tell you, I promise you that you or your son will be so ahead of every other lacrosse player right now. You can check out a video version of this article on my YouTube Channel:
1. Strength Training
The first way you can train for lacrosse is by doing strength training. This means getting stronger and more fit which will make you a better lacrosse player. I’m going to tell you exactly which exercises you need to do to get stronger.
Now most of you might think the only way to do this is by going to the gym, but you can do all the strength training you need at home. All you need is a towel or a soft surface like a carpet and you’re good.
This is great plank form!
To start, focus on training your core and ab muscles since they are the ones you use the most. Also, your core muscles recover really quickly so you can train these muscles every day. The best way to train your core is with the plank. Try to do a plank for 30 seconds and rest for 30 seconds. Do that 5 times. You can also do sit-ups or ab twists and these are both great exercises.
So an example workout could look like this: 30 second plank, then 10 sit-ups, then 20 ab twists. Rest for 30 seconds. That’s one set. Repeat as many times as possible. Maybe the first time you do this you’ll only be able to do 3 or 4 sets. Tomorrow you can aim for 5. If you do this for two weeks, you could get more than 10 I bet. So like I said, pick a few exercises and do them every day. I promise you’ll see a difference in your game.
2. Watching Film
The next way you can get better at lacrosse at home is by watching film. I feel like this is one of the most looked over parts of lacrosse and it’s easy to watch lacrosse without knowing what to look for.
So, here’s what I want you to do. First, find a full lacrosse game. There’s plenty of them on this YouTube channel or you can get an ESPN+ subscription for 5 bucks and they have so many games. So now that you’ve found a game, pick a player in the game that you’re going to watch the whole time. Now watch what they do when they have the ball and they don’t have the ball. How do they move? How do they cut? How do they hold their stick? Take notes and learn everything you can from them.
youtube.com/embed/pZzQhO0XyNg?feature=oembed” frameborder=”0″ allow=”accelerometer; autoplay; encrypted-media; gyroscope; picture-in-picture” allowfullscreen=””/>
And the other way to watch film is by breaking down specific plays. Let’s say there’s a dodge you really like. Replay it over and over again. Why was the dodge so good? What did the defender do wrong? What did the offensive player do right? I have dozens of film breakdowns on my youtube channel that you can go check out, and my newsletter and Instagram have even more. By breaking down film, you’ll be able to see exactly what you need to do to replicate these moves.
3. Having Better Nutrition
The third way to get better at lacrosse at home is by dialing in your nutrition. This is everything you put in your body to fuel you, and I can almost guarantee you that you could have better nutrition than what you have right now.
People love to make nutrition some really hard and complicated thing, but in reality, it’s really simple, and all you need to know are these 3 basics:
A. Limit junk food and sweets –
This includes chips, cookies, brownies, ice cream, cheetos, all the stuff that you already know is bad for you. Sure every once in awhile these things are fine, but if you eat this type of stuff consistently, your body isn’t going to perform or recover as well. Plus you just don’t feel as good. I know I used to eat this stuff so much, but now that I have cut most of these foods out, I feel so much better.
Try to limit these ?
B. Make sure you’re getting enough protein at each meal –
Protein is key to helping build muscle and keeping you strong and injury free. This is stuff like chicken, turkey, fish or eggs. Make sure you’re eating some sort of lean protein like this at every meal.
C. Eat plenty of good carbs –
Carbs are what give you fuel, but there’s better carbs than others. Whole wheat bread, brown rice, sweet potatoes – these are all goods that give you long lasting energy, where as white bread or rice won’t give you as good of energy.
4. Do Wall Ball Drills
The 4th way to get better at lacrosse is with some good ol’ fashioned wall ball. I hope that some of you have a lacrosse wall or a rebounder, (here is a link to my favorite one if you do not) because this is one of the most important parts of any lacrosse player’s game.
My challenge for you is to go do at least 200 reps of wall ball every day that you’re home. I’m going to make a whole video on wall ball soon as well, but it’s not rocket science. Just think about throwing a lacrosse ball to another person, and now just do it on a wall. 100 normal throws right 100 normal throws left every day, and your stick skills will keep getting better.
5. Practice Great Recovery
And the next way you can get better at lacrosse is by practicing good recovery. What does this mean? It means taking care of your body when you are not working out or doing wall ball or training. Here are 3 easy ways to practice recovery:
A. Sleep for 8 Hours/Day –
If you’ve been following me for awhile you know how much i value sleep. It’s not hard – just sleep 8 hours a day at least. Try to put your phone in a different room at least 30 minutes before bed, and do whatever you need to do to relax and rest
B. Drink a Gallon of Water/Day –
You should be drinking a gallon of water every day, and that can be a lot if you don’t usually drink a lot of water. Water is the source of life, it’s what we need to perform our best. Get a reusable water, fill it up and make sure you’re drinking a gallon of water.
C. Stretch out –
Flexible lacrosse players are better. It’s as simple as that. Try to do 5 minutes of stretching when you wake up and before you go to bed. It can be as simple as touching your toes, doing the butterfly stretch or whatever you need to do to be feeling your best.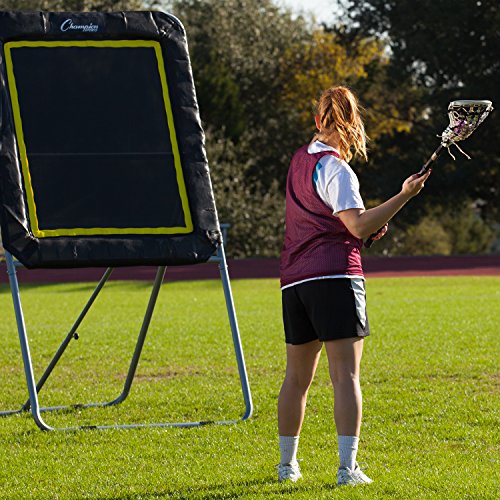
If you want even more lacrosse advice and tips just like this, subscribe to the free lax weekly email newsletter and follow me @LaxWeeklyHQ on Instagram. I’m going to provide as much free stuff as I can to you!
Lacrosse Drill: Ground Balls on the Run
One of my favorite lacrosse drills is what I call “On Run Ground Ball Drill”.
This drill is where you have a line of about 5-10 guys and a coach about 30 yards away. To start the drill you have the coach toss a ball out toward the general direction of the line. Once the ball hits the ground the first player in the line runs and picks it up and then tries to pass the ball to the coach as fast as he can.
What makes this hard is that after you pick up the ball, the players take too long to get ready to make a pass. So, this drill helps with that. A couple things I do with more advance players if I’m the only coach able to run this drill: First, I get the drill started and run though the line twice. I tell the players after they pass to the coach they then replace the coach. The coach passes to the line again, and then subs out. The player that passed to the coach is now waiting to receive the pass from the next person in line. And it continues.
Once they get the hang of it, you have the player that is catching the pass jog around so it is a hard pass and harder catch. This simulates more of a game situation, where players are moving around a lot more and have to adjust to catch the ball–and have to see where the player is going to make a better pass. Then all the coach has to do is coach the players of what they are doing.
Once they have that down I get in there and complete for the ground ball with them or chase after them after they pick the ball up so it makes it harder to pass.
This is one of the simplest drills, but it is a great talent evaluator. Players should take a passion in this drill because it will help their lacrosse game. Great players should be really good at this drill and beginners will have a lot of problems with it.
Find a lacrosse camp or league near you.
For more great lacrosse tips, check out CoachGafner.com
advanced lacrosse drills
120 Minute Early Season Practice. Drills for Shooting Hard. This drill will work muscle memory for making lacrosse saves and also work conditioning since making saves so quickly with no break will get tiring. Drills will be run at a high pace in order to simulate gameplay. How to Coach like John Wooden May 12, 2021 – … Parent in front. Transition & Dodging . Practice quick stick shots close to the goal. For this lacrosse goalie drill we can use a product from DYG called the Tracer (not an affiliate link) which connects the top-hand to the face mask. Ground Balls & Stick Skills. Each drill, in its most basic form, should be able to be executed by an average middle school player. When to use: Intermediate to advanced goalies, evaluate on case by case basis with new goalies. MEN’S HOGAN LACROSSE “BOX DRILL” DRILL SPECS: Drill Theme: Ball Movement Drill Style: Warm Up, Skills . .. To practice advanced offensive stick handling. Sprinting … 2 Highly Efficient Clearing Drills for Up-Tempo Lacrosse. using a shaft and tennis balls, goalies have to make the save with the top of the shaft. Advanced; Goalie Guidelines . WonderHowTo. Lacrosse players not only … The game resembles American Lacrosse, but the equipment does not include much safety devices. 40-40s drill. For more drills that can generate rapid improvements in specific game situations, players and lacrosse coaches can explore the growing list of video tutorials in the lacrosse training section of KbandsTraining.com. If you don’t want to purchase the Tracer, we can use string, lanyards, or even actual … Ultimate Lacrosse: This drill is played just like ultimate frisbee, except with a lacrosse stick. Handcuff Drill. Your lacrosse stick should become part of your body!” The width of the attack zone in this drill is 40 yards, thus the name 40-40s. Shoot n Scoops are also lacrosse goals for small sided games. For practicing wall ball drills at home or with the team, having a rebounder is important as part of effective training.
 New Ideas for Ground Ball Practice. Yell “go” or “break” and have player come around from the back. Lacrosse Speed & Agility Drills. Place four cones apart to make a square approximately 20 x 20 yards. When the coach whistles players will work the ball around the square with the same hand. All players start with sticks in the same hand. The first player runs to the left (right-handed drill) and throws to the person at the front of that line. Can make it competitive with large number of players; first group of 2 lines to get the ball through wins Lacrosse Golf 1 ball per player, 1 bucket or trash can Purpose – to work on accurate passing. 3/27/09 2:38 PM. How this drill works – This is really just a simple game of lacrosse tag. You put the offensive players in the middle with the defensive player (or players) and it becomes a game of tag. Players must stay inside the square area. The players must hold their sticks properly, and carry them around using proper technique when they are running around.
 Last team to avoid dropping the “egg” wins. To practice this drill, three lines of players line up at 3 different pylons that are set … They can be used either indoors or out, for boys or girls. Latest News. In the quick hitch shooting drill, only one cone is required, which … Half Field – Basic Skill / High Intensity. DRILL DESCRIPTION: Four lines of players stand in a diamond formation, each line 12 yards from a cone in the center Have player start behind goal. Lacrosse training drills with the Shoot n Scoop are a great way to learn and improve critical lacrosse fundamentals in a fun and intuitive way. Then take your right foot and step outside of the ladder, followed by your left foot up into the next ladder square. North Carolina Ground Ball Drill. And finally for the last unstoppable midfield dodge, the bull dodge. https://laxlibrary.com/lacrosse-content/ways-to-improve-warm-up-line-drills Have more advanced players practice using the wall to pass with their right hand and catch with their left (and vice versa), catch cross handed, throw behind the back passes & shots, simulate fakes, etc.
 Wall ball drills are great for players to use during practice and at home. Cross handed catching drills. Have two kids face each other. They pass the ball righty but catch the ball on the left without changing their hands. They just move the stick across their face to catch. More advanced players should also practice this drill with their left hands. The Bull Dodge. Our staff coaches in their NCAA played positions. This is an agility drill, which is designed to help you beat the defensive players … Practice advanced technical drills for training in the fastest field game in the world: hurling. Beat the Clock. This is a drill to practice keeping your stick vertical and to make sure you cradle completely from side to side. Cornell 5v4 Scramble. Start tossing with hand and then shoot with a lacrosse stick. Have them take a step back at each turn so they get further and further apart. The key to good on ball defense is being able to dictate where the offensive player is Lateral Run. Hurling is a game popular in Ireland.
 For beginners, a basketball instead of a lacrosse ball & some hula-hoops are great teaching aids. Drill 6V6 w Transition. Against the Wall: Stand with your back to a wall and cradle. Gymnastics requires a great deal of strength, balance, coordination, agility and body awareness to perform the various moves and avoid injury. Stick Skills. Start straddling one stick, your partner rolls a lacrosse ball to the other side. Beginners will greatly benefit from certain gymnastics drills that help to improve all areas of fitness, as well as get their bodies ready for more advanced moves. Here are 3 indoor drills for intermediate to advanced lacrosse players (Rainbow Shooting, 3 Man PAPA, Triangle Passing). Transition and Team Timing. Lacrosse is a fast, intense and extremely skillful sport, one which requires constant practice in order to keep sharp and ready for the next big game. Work on keeping your stick between your shoulders. Begin the Triple Step Forward Shuffle by bringing each foot inside the ladder, one at a time.
 Advanced 4V4 Slide and Recover Lacrosse Drill Jon Torpey, Head Coach High Point In our recent podcast with Head Coach Jon Torpey we heard a new twist on the 4V4 Lacrosse Drill designed to really reinforce defense sliding, recovery, communication and discipline over a long offensive possession. Shooting ability is what separates a scholarship player from a walk-on for many coaches. Defensive practice. There are basic lacrosse drills for K-3 and more advanced lacrosse drills up to high school. Work toward later to accurate clears 3) QUICK HITCH SHOOTING DRILL. One of the most underdeveloped skills that we see in lacrosse players entering the college game from high school is shooting ability. 123 Box Slide Drill. For more advanced players, you should run drills that practice shooting techniques such as Fakes , Behind the Back Shooting , Question Mark Shooting, etc. Split … Quick Stick Stand about 5 yds from the side of the goal, have player cut around a cone placed at different points near the goal crease, player should catch and shoot on the turn.
 – Question mark- hold that stick in your off hand for an extra second as you step away from the defender. Lacrosse Goalie Drill – Agility. You will be allowed to watch drills and competitions without prior approval.If your camper needs something from home, or to meet with you, prior approval from camp administration is mandatory. By completing the suggested reps and sets you will find this drill to be a significant component to your success finishing each shot. A common mistake is to switch hands immediately, which exposes players to a back check. These drills are separated into skill level, with three skill levels being used throughout the book. Each skill level will be represented by a picture, as you will see below: -this will represent younger players (ages 6 to 8 years old) -this will represent middle age levels (ages 8 to 12) – this represents higher age levels (aged 13 to 18) Disciplined Defense. Even basic aspects of the sport, like how to pass in lacrosse and how to hold the stick, need to be continuously reinforced with specific lacrosse drills if you wish to become a top player.
 Turning the corner. Cradling. The Dynamic Traffic Shooting Drill is a great lacrosse video used to demonstrate advanced footwork techniques and dodge transitions in front of the cage. Have a timer so the players race the clock. Club Communications; NCJLA Operations Guide; NCJLA Non-Disclosure Agreement; 2020 Age Levels & Segmentation; Team Strength Score Worksheet; 2020 Season Officials Fees; 2020 Team … Lacrosse Wall Ball Drills. Advanced Lacrosse USA (ALUSA) . PCA offers six online courses – all expert-developed and designed to help coaches, parents, athletes and officials ensure that winning happens both on and off the field in youth sports. These video drills cover every skill area, including sprints, stick technique, scoring, defense, offense, rhythm, and teamwork. Lacrosse April 9, 2013 August 12, 2016 adam.warner. Passing Triangle. US Lacrosse Drills Archive; US Lacrosse Mobile Coach App; Club Admin . Try to make your stick touch the wall on both sides without dropping the ball.
 … An advanced way to train with a rebounder is to pass the ball off of it and cut toward the ball to shoot on the run.
advanced lacrosse drills 2021
Train In The Now | 3d Lacrosse
Program Overview
There are endless ways to improve your game at home. Get in the backyard and move! Lacrosse walls, bounce-backs, backboards, goals and footwork are all on the docket. To that end, we have launched our digital learning series called “Train In The Now” We have rolled this initiative out to service all of our customers with the purpose to get your game to its best! Skill development comes from having a stick in your hand and a coach in your ear. We will provide individual drills that emphasize the pillars of our 3d Methodology and these will provide our players with inspiration to get out of the house and get better each day. We will bring our top 3d coaches from across the Nation to deliver you our #Traininthenow series!
com/embed/kmM9eE3B44A” frameborder=”0″/>
Program Components
Weekly training’s conducted by 3d coaches, training’s and topics consist of:
- Shooting and Finishing
- Defensive / Midfield Footwork and Positioning
- Advanced Wall Ball Work Out
- The Art of Dodging
Equipment Needed
- Lacrosse stick
- Lacrosse balls and/or tennis balls
- Bounce back, wall, and/or partner
- Net
- Cones
Weekly Schedule
For the consistent schedule: Click Here
Zoom Links
The links needed to view each Zoom session will be sent out each day their is a training session.
Costs
$100 per week
Registration Saver
3d Lacrosse has a strict No Refund Policy. Please review our policy at your convenience and consider purchasing the third party insurance offered by Registration Saver, an AIG product.Click here to learn more about Registration Saver
Advocacy
3d has national network of relationships along with an experienced staff that is an unparalleled resource in helping families navigating the complex college recruiting landscape. We believe there is a place for every player that wants to play college lacrosse and we are committed to helping players find the right school and lacrosse program. Whether it is Division I, II, III or MCLA, there are a lot of great options out there and a place for everyone.
Contact
Megan Clune
Coordinator, New England
[email protected]
90,000 TOP-5 exercises for male chest
Forming an ideal pectoral muscle is often one of the main desires of training men. This is no coincidence, because the pectoralis major muscle is the most important and largest muscle. It consists of an upper, middle and lower part. There are dozens of exercises you can do during your chest workout. To make it easier for you, below we have collected the TOP exercises for building muscle mass in the chest. In all of them, it is important to perform them slowly, holding for 1-2 seconds.Depending on the type of exercise and the incline of the body during execution, which part of the chest muscles will take on the main load.
1. Push-ups.
Read Also: 14 Home Chest Exercises
This is the oldest and most recognizable chest exercise that can be done anywhere, anytime. When done correctly, it effectively loads the chest, triceps and shoulders. Only by changing the position of the arms or the tilt of the body can you focus on different parts of the chest.The more advanced can add extra weight when doing the exercise. We recommend that you do 3 sets of 12-15 slow, controlled reps. Push-ups are suitable for completing a workout in order to maximize the desired part of the chest.
More details: Turbo-boosting with a protein diet and strength training
2. Horizontal bench.
The bench press is one of the most popular chest workouts, and over the years has become an indicator of strength or a symbol of demonstrative masculinity. It depends on who is doing it. Either way, this is one of the best upper body exercises to help you build mass and build your chest muscles. It is done using a bar and modular weights to it. The technique of performing the exercise is quite simple, so the bench is suitable for both advanced and beginners. Our recommendation is to always have a partner – your personal trainer or other trainer at the moment – to protect you during the exercise.For best results, press at the start of your workout. Focus on difficult sets with weights that prevent you from doing more than 6-8 reps per set. Use a medium grip when pushing off the bed. If you narrow the grip, you will increase the load on the triceps, and the chest will benefit little from the exercise. The ideal grip is one in which your forearms are parallel to each other in the lowest position.
More details: Top 5 most popular fitness equipment and their advantages
3.Horizontal bench with dumbbells.
Another extremely effective exercise for shaping the chest is the dumbbell press. The balance in this exercise is more difficult than doing it with a barbell. With dumbbells, each side of your body works independently, which activates more stabilizing muscles. The dumbbell press also allows you to train with heavy weights and is a good alternative if you have shoulder problems and cannot use your leg with a barbell. Do this exercise at the beginning of your chest workout with high weights and low reps – 6 to 10.We do not recommend doing the horizontal dumbbell bench in addition to the horizontal arm bench, as these are two movements. similar. It is best to choose one of these to include in your workout. As you exercise, focus on your chest and try to feel their tension. Push the weight with your chest, not your hands. Use only your hands to support the weight. Otherwise, you will not be able to properly load the pectoral muscles.
4. Upper bench with a slight incline.
The upper part of the breast is the most difficult to develop, but it also gives the breast the most aesthetic and volumetric appearance, so this exercise is one of the most effective for creating the perfect breast relief.To do this, in the fitness club, use benches with an adjustable inclination. It is important that the slope is not too great so that you feel the load mainly in the chest, or rather in their upper part. In addition to free weights, this exercise can be done on a Smith machine, giving you more confidence in the heavier series. Do 3 to 4 sets of 8-10 reps with the appropriate weight. Do the exercise with a slightly tighter grip than usual to maximize the tension of the muscle fibers of the chest.
More information: What do we need to know about testosterone?
5. Buckets
Again a fairly familiar exercise. However, it is important to focus on your chest and not your triceps while doing this exercise. This exercise is most effectively performed as follows – the legs are behind the body, you lean forward as much as possible, and the elbows are spread out to the sides of the body. If you are moderately advanced or advanced, you can do the exercise at the end of your workout to fully load your pectoral muscles.
These are just a few of the various chest exercises you can incorporate into your training plan. Consult with a professional instructor who will select the exercises for you that are tailored to your physical fitness. Remember to eat right and drink enough water to achieve the results of your dreams faster.
Learn More: Five Must-Have Sports in the Gym
5 Secrets to Help You Easily Learn New Information – Skyeng Magazine
On Coursera.org, the English-language course Learning How to Learn: Powerful mental tools to help you master tough subjects has been released. The author of SM Olya Bezdeleva passed it and made a synopsis with the main ideas. Here are some tips to help you learn new things more effectively.
Do not listen to those who whine that learning new things (including foreign languages) is easy only at school and student age. The human brain is the most complex device in the known universe, and it is capable of forming new neural connections to a ripe old age.Of course, this process slows down over the years, but with the help of some tricks and tricks you can stimulate it.
When we ponder an equation, try to make sense of Present Perfect Progressive, or reread the same page of a textbook for the tenth time, we use focused thinking ( focused mode ). Imagine a pinball field. The ball that we throw at him is a thought, a topic that we are thinking about now. The closer the “bumpers”, against which the ball beats, are located to each other, the more chances it has to get stuck in one part of the field without hitting another.So it is with thinking: while we are trying to solve a problem in vain, concentrating the efforts of the brain in one part of it, the solution is probably in another. Or in several at once.
In this case, it is useful to resort to diffuse thinking ( diffuse mode ), when the thought travels freely and allows you to look at the situation from an unexpected angle. You can switch to absent-minded thinking when you least expect it: in the shower, on a walk, during quiet activities like cleaning.
Salvador Dali often used this technique when he needed a boost of creativity. He took a bunch of keys, sat down in a comfortable chair and just relaxed, hovered in the clouds. At some point, he fell asleep, the keys slipped out of his hand and fell to the floor – this noise returned Dali from a state of pleasant half-sleep.
Then he remembered the ideas and images that came to his mind during the rest, and began to work on them. Therefore, the next time you come to a dead end, trying to remember something or understand a problem, leave this matter and rest, and the solution will come by itself.
Procrastination happens to everyone from time to time. After all, if you are busy with one thing, so many activities and interesting things pass by! When you think about something you need to do or learn, but don’t really want to, areas of the brain associated with pain are activated. Of course, the brain tries to stop unpleasant signals by switching attention to something else. As a result, we feel better, but not for long. As a result, as soon as we get down to business, the brain ceases to feel “discomfort”.
Back in the late 1980s, Italian Francesco Cirillo invented the tomato method (similar to the tomato-shaped kitchen timer), which helps fight procrastination in the here and now. All you need is a timer that needs to be set to 25 minutes. During this time, try to concentrate on the task without distractions.
As soon as time runs out, reward yourself: drink tea, chat with a friend, flip through Instagram (but not for long!) So the brain gets used to the fact that after hard work a well-deserved rest follows.
When we start going to the gym, we do not expect (although we secretly hope) that in a week we will pump up muscles and pull the bar more than our own weight. It’s the same with the brain. It is a body that loves practice and consistency. If you want to read faster, memorize more and think faster – you need not only to train, but also to gradually increase the load.
Short-term and long-term memory serves us. If the first is like an inferior blackboard, from which what is written in chalk will soon be erased, then the second is a safe warehouse where huge amounts of information are stored.It takes time for what you have just learned or read to “move” into long-term memory. Everyone knows that last-minute learning is not the best strategy. If we represent the knowledge obtained in this way in the form of a brick wall, it will all be oblique and crooked, because neurons simply do not have time to organize themselves into strong and harmonious connections.
To keep the “wall of knowledge” even and beautiful, start learning early and use the simple technique of spaced repetition ( spaced repetition ).Let’s say you learned something on Monday. Break the covered material over several days and repeat on Wednesday, Thursday, and Saturday. The authors of the course advise you to make a plate with a repetition schedule and not overdo it. Be sure to leave your brain a day or two to rest and recover.
By the way, whole training methods are built on the method of spaced repetition. For example, the algorithm of the Skyeng online school of English application helps you learn words effectively – reminds you of the right word the moment it is ready to fly out of your head.
Too much practice is also not a good idea. As soon as you have repeated the conjugation of verbs or historical dates a sufficient number of times and all this wealth has moved into long-term memory, you need to move on to new material, increase the degree of complexity. Just imagine for a second that you want to be a good carpenter. Once you have learned how to hammer nails well, it is worth starting to master other more advanced tools.
It is easy to repeat what already bounces off the teeth, it can lead to the emergence of the illusion of competence ( illusion of competence ).This is when it seems that you know everything, but in fact you have only learned the easy way. In psychology and cognitive science, the Einstellung effect is described – the effect of the “mechanized brain”. In this case, old attitudes and known solutions to problems may prevent us from solving new problems. The brain is fixated on what it already knows, and simply does not see a simpler, more creative and alternative solution.
You can fight this if you alternate between easy and difficult, play logic games, collect large puzzles, learn foreign languages and solve math problems.
The last tip is in the spirit of the Captain of the Obvious, but nature has not yet come up with anything more useful. To study productively, memorize new things, speak foreign languages (substitute what you need), you need to sleep well and play sports. While you are awake, toxins build up in the brain, which it gets rid of during sleep. The cells shrink, thereby increasing the space between them, and all the “bad” is excreted.
Sometimes it seems that sleeping an extra hour is an unaffordable luxury and a waste of time.But full sleep is the only way for the brain to cleanse itself and recover. In addition, systematic sleep deprivation can lead to headaches, depression, heart attack, diabetes and premature death. So even on the craziest schedule, take 6-9 hours of sleep. The learning and memorization process will go much faster, and the body will say thank you.
In terms of exercise, physical activity is the only known way to slow brain aging and stimulate the formation of new neural connections.You don’t have to run circles in the stadium or die on the simulators. A short daily walk, swimming pool, skating rink or dancing is enough.
90,000 Best Butterfly Swimming Exercises
Butterfly is a difficult swim move to master; it requires synchronization between the two main parts of your body, your arms and legs. A dolphin bounce and upper body strength are needed to move and pull your body through the water in a wave-like fashion. If any part of your stroke is weak, it is best to do exercises that will help strengthen and improve the area that needs attention.
Positional exercise
Dolphin strike is a whip-like movement of the body from the chest to the toes. Your legs are held together and move up and down at the same time. One of the best exercises for strengthening and perfecting your kicking technique is to swim in the pool for several lengths in different positions without moving your arm. Practice hitting by swimming the same length of the pool with your arms extended above your head, arms and head folded below the surface of the water. Keeping your arms in the same position, repeat the exercise on the right side, on the back, and then on the left side.Swimming flippers can be used to reduce exercise intensity.
Vertical impact
For a more balanced dolphin kick, Katie Arnold, USA Swimming Coach, recommends a vertical dolphin kick drill. Start in deep water, cross your arms over your chest, and do quick and quick up and down kicks to keep your head above the water. Your body remains upright without moving forward or backward. Arnold recommends doing the exercise for 30 seconds followed by 30 seconds of rest.As the technique improves, remove your hands from the water, bend your elbows under the water and repeat the exercise for 20 seconds. Bob Bowman, trainer at the North Baltimore Aquatic Club, recommends that advanced swimmers use weight when performing this exercise; it helps build strength while kicking speed and power.
Exercise for weapons only
Practice pushing hands without hitting. You will need a pulling buoy for the exercise. This is a foam device that you hold between your thighs to hold your legs while swimming.The stretching part of the arm movement is when the arms are extended forward into the water, move to the sides, catch the water and lower the water to the center of the body in a semicircle. The pushing part of the impact is when your palms push the water out from under your body. Concentrate only on the clean and jerk and do this exercise for four pool lengths. Rest and repeat.
Exercise on one arm
Arm strength can be improved by focusing on one arm at a time. You will need to use a kickboard and a pair of fins for this exercise.Begin the exercise face down in the water with both hands, holding the board at arm’s length. Free the board with your right hand, exhale and practice hand movement. During the pushing part of the punch, raise your head to inhale and kick. Extend your arm in front of your head to begin the next right-handed punch. Hit 50 yards, rest and repeat with your left arm. To make the exercise more difficult, do not use the kickboard; just keep your still hand straight out in front of you.If you have trouble breathing, wear a mask and snorkel.
.