How does Paul Rabil build his explosive lower-body power. What exercises comprise Paul Rabil’s upper-body strength routine. Why is Paul Rabil considered the best lacrosse player on the planet.
Paul Rabil: The Lacrosse Phenom’s Physical Prowess
Paul Rabil stands as an undisputed titan in the world of lacrosse. His exceptional blend of size, power, and muscle mass, coupled with his explosive shooting ability, has earned him the title of the best lacrosse player on the planet. Rabil’s shot has been clocked at an astounding 111 mph, making him a formidable offensive threat from any position on the field.
How has Rabil achieved such physical dominance? The answer lies in his meticulously crafted workout routine, designed to build explosive lower-body power and upper-body extension strength. This high-volume weight training regimen has resulted in Rabil’s full-body dominance whenever he grips a lacrosse stick.
Breaking Down Paul Rabil’s Power-Packed Workout Routine
Rabil’s workout routine is a carefully structured program that targets key muscle groups essential for lacrosse performance. Here’s a detailed breakdown of his exercises:
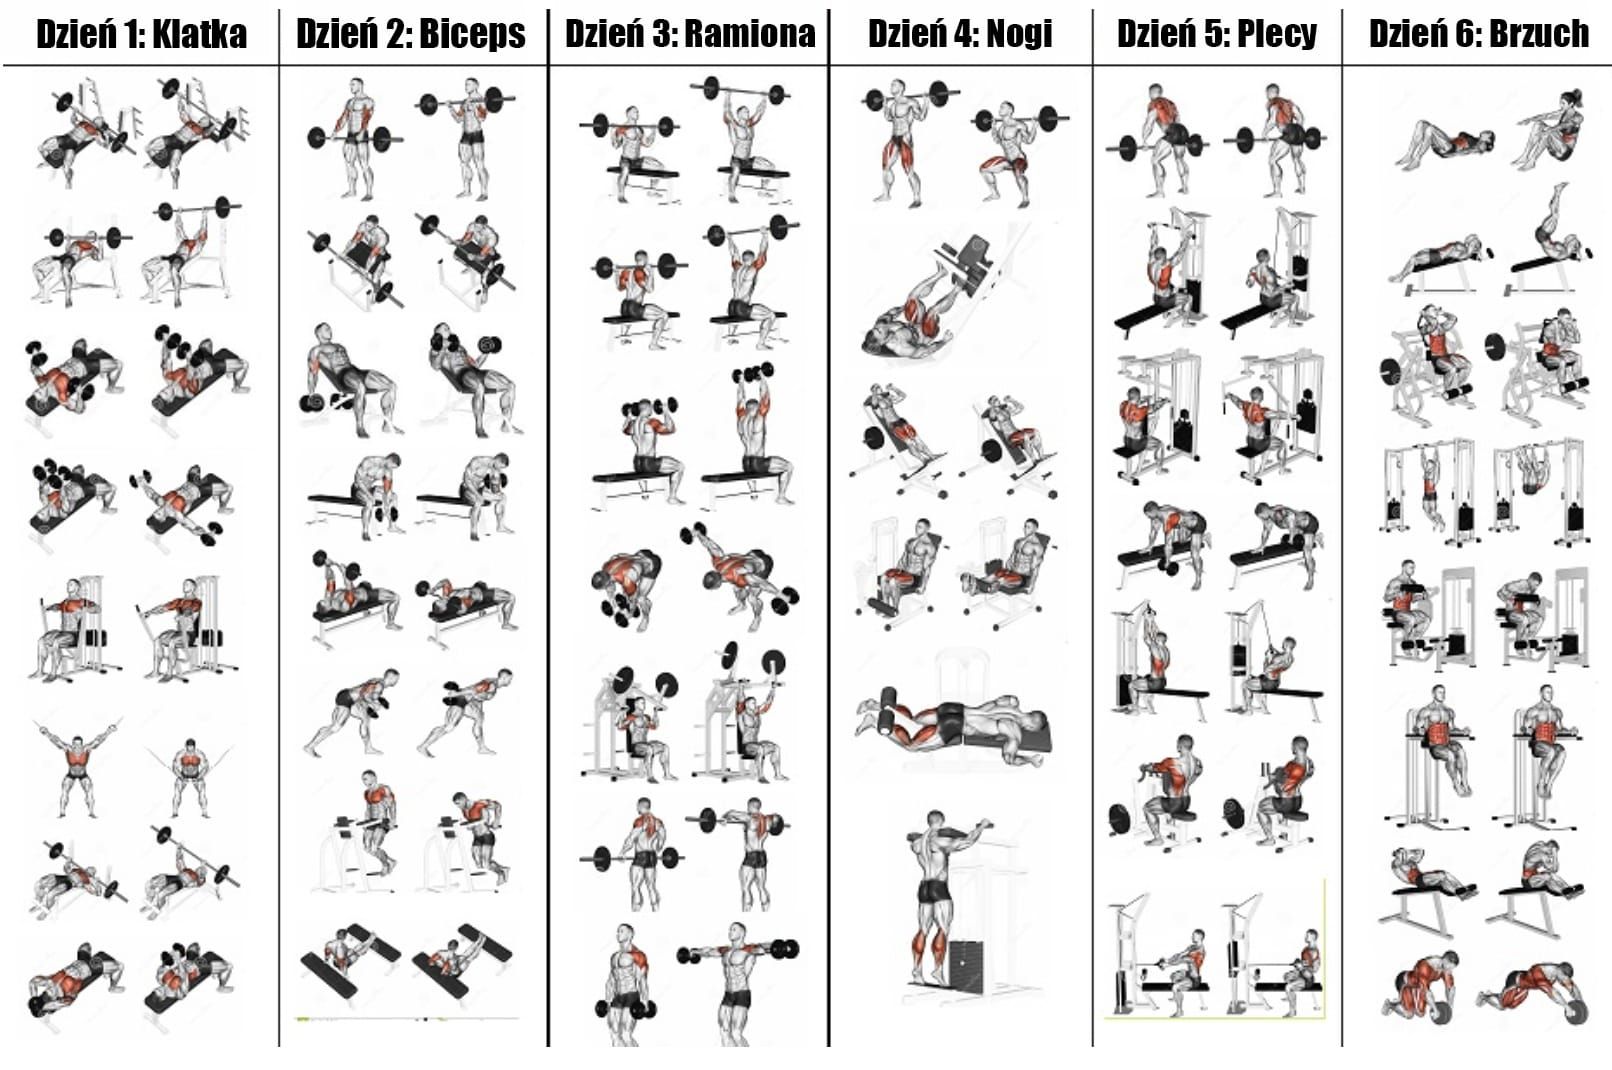
- Power Clean: 3-5 sets of 3-5 reps (60-90 seconds rest)
- Clean Jerk to Lunge: 2-3 sets of 3-5 reps each leg (60-90 seconds rest)
- Squat*: 2-3 sets of 5 reps
- Box Jumps*: 2-3 sets of 5 reps (120 seconds rest)
- Dips: 1-2 sets to max reps (60-90 seconds rest)
- JM Press: 2-4 sets of 3-8 reps (60-90 seconds rest)
- Bodyweight Tricep Extension: 2-5 sets of 5-8 reps (60-90 seconds rest)
- Incline Elbows-Out Dumbbell Tricep Extension: 3 sets of 8-10 reps (60 seconds rest)
- Hanging Pike-Ups: 2-3 sets of 6-8 reps (90 seconds rest)
*Note: Squat and Box Jumps are performed as a superset
The Science Behind Rabil’s Lower-Body Power Development
Rabil’s workout routine places a strong emphasis on developing explosive lower-body power, which is crucial for quick accelerations, rapid direction changes, and powerful shots in lacrosse. The inclusion of exercises like Power Cleans, Squats, and Box Jumps is no coincidence.

Power Cleans are a cornerstone of athletic power development. They engage multiple muscle groups simultaneously, improving overall body coordination and explosiveness. When performed correctly, Power Cleans can significantly enhance an athlete’s ability to generate force rapidly – a key component in Rabil’s lightning-fast shot speed.
Can Squats really improve an athlete’s performance on the lacrosse field? Absolutely. Squats are a fundamental exercise for building lower body strength and power. They target the quadriceps, hamstrings, and glutes – all crucial muscle groups for sprinting, jumping, and maintaining a strong stance during gameplay. By incorporating heavy squats into his routine, Rabil ensures his legs have the strength and power needed for explosive movements on the field.
Box Jumps, performed in a superset with Squats, further enhance Rabil’s plyometric abilities. This exercise develops fast-twitch muscle fibers, improving Rabil’s ability to generate maximum force in minimal time – a vital skill for quick starts and rapid direction changes in lacrosse.

Upper-Body Strength: The Key to Rabil’s Shooting Power
While lower body power is crucial, Rabil’s workout doesn’t neglect upper body strength, particularly focusing on tricep and shoulder development. These muscle groups are essential for generating the incredible shot speed that Rabil is known for.
The JM Press, named after powerlifter JM Blakley, is a hybrid movement combining a close-grip bench press and a tricep extension. This exercise is particularly effective for developing the triceps and improving lockout strength, which translates directly to more powerful shooting in lacrosse.
Dips, another staple in Rabil’s routine, target the triceps, chest, and shoulders. By performing dips to maximum repetitions, Rabil builds muscular endurance in these key upper body areas, ensuring he can maintain shot power and accuracy even in the late stages of a game.
The inclusion of various tricep extension exercises further underscores the importance of this muscle group in Rabil’s shooting mechanics. Strong triceps enable Rabil to generate explosive power at the end range of his shooting motion, contributing to his record-breaking shot speed.

Core Strength: The Unsung Hero of Rabil’s Performance
While not as prominently featured, core exercises like Hanging Pike-Ups play a crucial role in Rabil’s overall athletic performance. A strong core is essential for maintaining balance, transferring power between the lower and upper body, and resisting rotational forces during gameplay.
Hanging Pike-Ups are an advanced core exercise that targets the entire abdominal region, with a particular emphasis on the lower abs. This exercise not only builds core strength but also improves body control and coordination – skills that are invaluable in the fast-paced, dynamic environment of a lacrosse game.
Balancing Power and Endurance: The Rabil Approach
One of the most striking aspects of Rabil’s workout routine is its balance between power and endurance training. While exercises like Power Cleans and Squats focus on developing raw power, the inclusion of higher-rep exercises and minimal rest periods also builds muscular endurance.
This balanced approach reflects the demands of lacrosse as a sport. Players need explosive power for sprints, shots, and defensive maneuvers, but they also require the endurance to maintain high performance throughout a grueling game.
How does Rabil’s routine achieve this balance? By strategically varying the rep ranges and rest periods. Power-focused exercises like Power Cleans are performed for lower reps (3-5) with longer rest periods (60-90 seconds), allowing for maximum force production. In contrast, exercises like Dips are performed to maximum repetitions with shorter rest periods, building muscular endurance and lactic acid tolerance.
Implementing Rabil’s Routine: Considerations for Aspiring Athletes
While Rabil’s workout routine is undoubtedly effective for him, it’s important to note that it’s designed for an elite, professional athlete. Aspiring lacrosse players looking to incorporate elements of Rabil’s routine into their training should consider the following:
- Proper Form: Exercises like Power Cleans and JM Presses require precise technique. It’s crucial to learn proper form before attempting these exercises, preferably under the guidance of a qualified strength coach.
- Progressive Overload: Start with lighter weights and gradually increase the load as you build strength and perfect your form.
- Recovery: Rabil’s routine is high-volume and intense. Ensure you’re getting adequate rest and nutrition to support recovery and prevent overtraining.
- Sport-Specific Training: While strength training is important, it should complement, not replace, sport-specific lacrosse training.
- Individual Needs: Tailor the routine to your individual needs, weaknesses, and goals. What works for Rabil may not be optimal for every player.
The Role of Nutrition in Supporting Rabil’s Training Regimen
A workout routine as intense as Rabil’s requires proper nutritional support to fuel performance and aid recovery. While specific details of Rabil’s diet are not provided in the original text, it’s safe to assume that he follows a carefully planned nutrition strategy.

For athletes engaging in high-intensity training, a diet rich in lean proteins, complex carbohydrates, and healthy fats is typically recommended. Protein is crucial for muscle repair and growth, while carbohydrates provide the energy needed for explosive movements and endurance. Healthy fats support hormone production and overall health.
Hydration is another critical factor, especially given the demands of lacrosse. Proper fluid intake before, during, and after training helps maintain performance and aids in recovery.
The Mental Game: Beyond Physical Training
While Rabil’s physical prowess is impressive, it’s important to note that success in lacrosse – or any sport – isn’t solely about physical attributes. Mental toughness, strategic thinking, and game intelligence are equally crucial.
Rabil’s success on the field is undoubtedly a combination of his physical training and mental preparation. Aspiring athletes should remember to develop both aspects of their game. This could involve studying game footage, practicing visualization techniques, or working with a sports psychologist to improve focus and performance under pressure.
The Evolution of Lacrosse Training
Rabil’s training routine represents a modern, scientifically-informed approach to lacrosse conditioning. It’s a far cry from the training methods of past generations, which often relied more heavily on sport-specific drills and less on structured strength and power development.
This evolution in training methodology has contributed to the increasing athleticism seen in modern lacrosse. Players today are faster, stronger, and more explosive than ever before, thanks in large part to advanced training techniques like those employed by Rabil.
The Impact of Rabil’s Success on Lacrosse
Paul Rabil’s dominance on the lacrosse field, underpinned by his rigorous training regimen, has had a significant impact on the sport. His success has helped raise the profile of lacrosse, attracting more athletes to the game and inspiring young players to push their limits.
Moreover, Rabil’s approach to training has influenced how lacrosse players at all levels prepare for the game. The emphasis on explosive power, upper body strength, and overall athleticism is now commonplace in lacrosse training programs across the country.
Beyond the Field: Rabil’s Entrepreneurial Spirit
While not directly related to his workout routine, it’s worth noting that Rabil’s influence extends beyond his physical prowess on the field. As a co-founder of the Premier Lacrosse League (PLL), Rabil has shown entrepreneurial acumen in addition to his athletic skills.
The creation of the PLL, which aims to provide better wages and benefits for professional lacrosse players, demonstrates Rabil’s commitment to the sport and its athletes. This off-field initiative further cements Rabil’s status as a true leader in the world of lacrosse.
The Future of Lacrosse Training
As sports science continues to advance, it’s likely that training methods for lacrosse will evolve further. While the fundamental principles of strength, power, and endurance training are likely to remain relevant, new technologies and techniques may emerge to enhance athletic performance even further.
For example, the use of data analytics and wearable technology could allow for more personalized training programs, optimizing workouts based on individual player metrics. Virtual reality training could provide new ways to improve decision-making skills and reaction times.
Regardless of how training methods evolve, Paul Rabil’s dedication to physical preparation and his resulting success on the field will likely continue to inspire lacrosse players for generations to come. His workout routine serves as a testament to the impact that strategic, science-based training can have on athletic performance.
How Paul Rabil Builds Explosive Lower-Body Power and Upper-Body Strength
Skip to content
Paul Rabil is without doubt the best lacrosse player on the planet. His size, power and muscle mass, combined with his explosive shooting ability (he’s been clocked at 111 mph), make him a lethal offensive weapon anywhere on the field.
Paul developed these assets with a high-volume weight training routine that builds explosive lower-body power and upper-body extension strength. The result: full-body dominance whenever Paul has a stick in his hand.
Exercise | Sets | Reps | Rest (seconds) |
| Power Clean | 3-5 | 3-5 | 60-90 |
| Clean Jerk to Lunge | 2-3 | 3-5 each leg | 60-90 |
| Squat* | 2-3 | 5 | |
| Box Jumps* | 2-3 | 5 | 120 |
| Dips | 1-2 | Max reps | 60-90 |
| JM Press | 2-4 | 3-8 | 60-90 |
| Bodyweight Tricep Extension | 2-5 | 5-8 | 60-90 |
| Incline Elbows-Out Dumbbell Tricep Extension | 3 | 8-10 | 60 |
| Hanging Pike-Ups | 2-3 | 6-8 | 90 |
| *Superset Squat and Box Jumps | |||
Watch video of Paul Rabi’s strength and speed training for lacrosse.
Share This Story!
MOST POPULAR
Paul Rabil is without doubt the best lacrosse player on the planet. His size, power and muscle mass, combined with his explosive shooting ability (he’s been clocked at 111 mph), make him a lethal offensive weapon anywhere on the field.
Paul developed these assets with a high-volume weight training routine that builds explosive lower-body power and upper-body extension strength. The result: full-body dominance whenever Paul has a stick in his hand.
Exercise | Sets | Reps | Rest (seconds) |
| Power Clean | 3-5 | 3-5 | 60-90 |
| Clean Jerk to Lunge | 2-3 | 3-5 each leg | 60-90 |
| Squat* | 2-3 | 5 | |
| Box Jumps* | 2-3 | 5 | 120 |
| Dips | 1-2 | Max reps | 60-90 |
| JM Press | 2-4 | 3-8 | 60-90 |
| Bodyweight Tricep Extension | 2-5 | 5-8 | 60-90 |
| Incline Elbows-Out Dumbbell Tricep Extension | 3 | 8-10 | 60 |
| Hanging Pike-Ups | 2-3 | 6-8 | 90 |
| *Superset Squat and Box Jumps | |||
Watch video of Paul Rabi’s strength and speed training for lacrosse.
Share This Story!
Page load link
Paul Rabil I The Skills
Tags
Lacrosse
Men’s
Midfielder
Professional
PLL Co-Founder and All-Star
Paul Rabil has not only made his mark on the game of lacrosse as a player, but also as a leader and entrepreneur. Rabil found success in the MLL as a 2 time league MVP, 2 time champion, and 2015 MVP of the Steinfeld Cup Championship game. However, Paul was one of the few players who was actually making a living playing the game. In order to push for higher wages, stock and benefits for players, Paul co-founded the Premier Lacrosse League with his brother Mike Rabil. Paul and Mike wanted to give more players the opportunity to make the game their full time jobs. The PLL began its inaugural season on June 1, 2019, and Paul was selected to the league’s first All Star Game.
CourseVideo Course
$89
Level up on and off the field
Purchase a course to learn how the world’s best work on their physical and mental game. All of our courses provide insight into the drills and exercises that the most accomplished athletes use to level up.
Buy Course $89
Lessons
1. Introduction
Meet your new coach, Paul Rabil. Paul is not only one of the best lacrosse player’s in the world, but he is also a successful entrepreneur. In his courses, he will teach you different technical and mental skills, and hopefully leave you with a new perspective on the game.
2. Intro to Stick Skills
As Paul says, stick skills are the most important part of playing lacrosse. No matter your natural athletic ability, if you can’t catch and throw, you won’t be on the field. In this lesson, Paul gives an overview of what he will teach in this course.
3. Passing Fundamentals: The Push-Pull Method
In this lesson, Paul will talk about the push-pull technique of passing. He will show you where to place each hand and how to use both hands to become a more effective passer.
4. Overhand Passing
From a consistency standpoint, the overhand pass is the best. In this lesson, Paul will teach you the technique involved in throwing a strong and accurate overhand pass.
5. Sidearm Passing
In this lesson, Paul will cover the technique of a sidearm pass. He will demonstrate how to throw this pass in a way that you will be able to stay consistent in your delivery.
6. Underhand Passing
The underhand pass is the most challenging, but it can be extremely useful in game situations. In this lesson, Paul takes you through the proper technique for this difficult pass.
7. Drill: Windmill Passing
Windmill passing incorporates overhand, sidearm, and underhand passing. In this lesson, Paul demonstrates a windmill passing routine that you can bring into your everyday stick skill practice.
8. Drill: Quickstick Passing
Quickstick passing is a great way to practice having soft hands, and making quick passes. In this lesson, Paul covers the technique for quickstick passing, and provides you with a routine that you can try out at home.
9. Drill: Behind the Back Passing
A behind the back pass can be an effective move to do in a game when your hands are tied or a defender is coming towards you. In this lesson, Paul covers the proper technique for a behind the back pass, and how you should practice it at home.
10. Intro to Shooting
As Paul says, “those who can shoot well can put the ball in the net, and they can win games for their teams.” In this lesson, Paul gives you insight into all the techniques and drills that he covers in this shooting drill.
11. Shooting Fundamentals: Time & Room Shooting
Basic shooting form is pertinent to a player’s success as an offensive player. In this lesson, Paul covers the fundamental techniques involved in a time and room shot.
12. Overhand Shooting
The goal of an overhand shot should be to get the most velocity and the most accuracy possible. In this lesson, Paul gives you the tips you need to work on perfecting your overhand shot.
13. Sidearm Shooting
A sidearm shot can be used whether you are shooting with time and room or shooting on the run. In this lesson, Paul breaks down the proper form for a sidearm shot.
14. Underhand Shooting
The underhand shot is the most difficult, but it can also be extremely useful in a game. In this lesson, Paul covers the tips and tricks needed to have an effective underhand shot.
15. Drill: Swat the Fly
In this lesson, Paul demonstrates his favorite shooting drill. Grab some balls and a partner, and try out one of the drills that Paul has used to become one of the best shooters in the game.
16. Drill: Shooting from Your Knees
Shooting from your knees will help you to isolate the right muscle groups to be a more effective on the run shooter. In this lesson, Paul gives you a breakdown of the drill as well as a routine to run through on your own.
17. Drill: Shooting on the Run
Shooting on the run is a drill that requires repetition. In this lesson, Paul will take you through the best way to practice this drill to improve your shooting on the run.
18. Drill: Inside Shooting
There is so much unseen skill involved in inside shooting. Between tight space, pressure from your defender, and the goalie closing the gap, shooting inside can be very challenging. In this lesson, Paul takes you through a drill that will help you to get comfortable shooting inside.
19. Intro to Dodging
Dodging is underrated as the genesis of winning games. In this lesson, Paul discusses the importance of dodging, and how you can become a successful dodger.
20. Dodging Fundamentals
In this lesson, Paul talks about and demonstrates how to approach your defender and set yourself up for a successful dodge.
21. Technique: The Split Dodge
The split dodge is Paul’s favorite move to put on a defender. In this lesson, Paul will lay out the steps you need to successfully execute this dodge.
22.
 Technique: Same Hand Split Dodge
When defenders anticipate that Paul is going to use his favorite move, the split dodge, he can use the same hand split dodge to catch them off guard. In this lesson, Paul covers the technique involved in a same hand split dodge.
23. Technique: Swim Move
A swim move can be extremely useful in a game. In this lesson, Paul explains the fundamental techniques of a swim dodge, and outlines when to use it in a game.
24. Drill: Split Down the Alley
In this lesson, Paul takes you through a drill that will help you to practice your split dodge. He demonstrates the drill, while also explaining how many reps to do, and how to aim for success.
25. Drill: Same Hand Split Across the Middle
The same hand split dodge is useful for when a defender is anticipating a regular split dodge. In this lesson, Paul takes you through a drill that will help you to practice your same hand split dodge.
26. Drill: Dodging Circuit
In this lesson, Paul demonstrates a drill that will bring everything together. It will help you to practice your dodging, while also practicing all the other skills Paul has taught in his courses.
27. Dedication to Greatness
In this lesson, Paul outlines what it means to put in extraordinary effort. Improvement requires a dedication to your craft, which means a continuous effort and consistency. Hear firsthand how Paul has dedicated himself to lacrosse over the years.
28. Contact & Injury
Playing a contact sport can be scary, and can sometimes result in injury. In this lesson, Paul discusses how to use contact to your advantage as an offensive player, and how to keep improving even when dealing with an injury.
29. Facing Adversity
One of the biggest challenges in sports and life is facing failure and handling adversity. In this lesson, Paul talks about how he handles adversity and uses it to fuel his improvement.
30. Goal Setting
In this lesson, Paul talks about his first experience playing lacrosse, and how he set goals at every stage of his career, and focused on the present at every step.
31. Physical and Mental Fitness
In order to be the best you can be, you need to invest in your mental and physical fitness. In this lesson, Paul talks not only about nutrition and physical wellbeing, but also about how your mental well-being can affect your play, and how he takes care of both.
32. Motivation & Work Ethic
In this lesson, Paul talks about work ethic and the importance of constantly striving to be better, even when people think you are the best at what you do.
33. Passion
Passion is an important element to succeeding in a sport or other industry. In this lesson, Paul discusses his passion for lacrosse and what attracted him to the sport.
34. College Recruiting: Scholarships
In this lesson, Paul breaks down the often confusing recruiting world of college lacrosse, and explains the way in which scholarships are divided up.
35. College Recruiting: The Players
In this lesson, Paul gives his advice for any player looking to take their lacrosse skills to the collegiate level.
36. College vs. Pro Lacrosse
In this lesson, Paul discusses the difference between pro and college teams, and pro and college coaches.
37. The Premier Lacrosse League
The game of lacrosse has a lot of history behind it, and it is growing at a rapid pace. In this lesson, Paul discusses the rich history of the sport, and where he hopes it will go in the future.
Tags
Lacrosse
Men’s
Midfielder
Professional
FAQs
How do group lessons work?
What if i can no longer make my scheduled group lesson?
Paul Wade workout chart
All exercises from Paul Wade’s Training Zone: Prisoner Training and Calisthenics
If you liked the project, please support via the link.
🤖 And one more thing: my website is about neural networks, as well as tg-channel (suddenly you want to read about how easy it is to use ChatGPT in Russia).
| → | ⇉ | ⇛ | |||||||
|---|---|---|---|---|---|---|---|---|---|
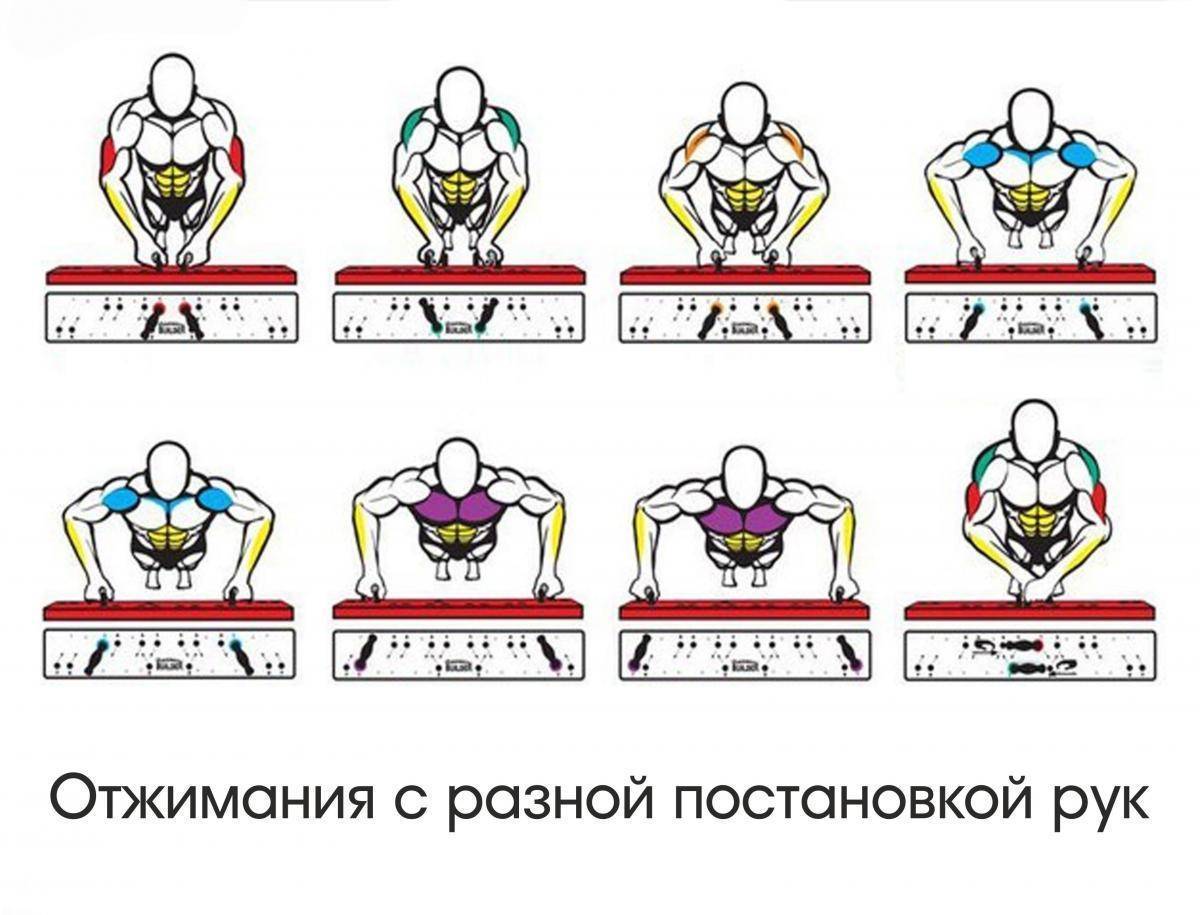
| wall push-ups | 1×10 | 2×25 | 3×50 | ||||||
| ↑ | Legs closed, arms shoulder-width apart and at chest level, straightened. Bend your elbows until your forehead touches the wall. | ||||||||
| incline push-ups | 1×10 | 2×20 | 3×40 | ||||||
| ↑ | Support at waist level: window sill, high bed, bedside table, etc. Bend the elbows until the torso touches the surface. | ||||||||
| knee push-ups | 1×10 | 2×15 | 3×30 | ||||||
| ↑ | Kneel down, rest your hands in front of you, cross your legs behind you. | ||||||||
| half push-ups | 1×8 | 2×12 | 2×25 | ||||||
| ↑ | Under the belt is an object the height of a basketball – 23-24 cm. Bend the elbows until they touch. At the initial and advanced stage, the ball can be moved to the chest. It is better to buy a ball at this stage, because it will still come in handy as such. | ||||||||
| full push-ups | 1×5 | 2×10 | 2×20 | ||||||
| ↑ | Classic push-ups | ||||||||
| push-ups | 1×5 | 2×10 | 2×20 | ||||||
| ↑ | The palms are brought together and the fingers lightly touch each other. Bend your elbows until your chest touches your hands. | ||||||||
| uneven push-ups | 1×5 | 2×10 | 2×20 | ||||||
| ↑ | Under one of the arms is an object 23-24 cm high, ideally an unstable one, such as a basketball. Hands directly under the shoulders for balance. We bend our elbows until the chest touches the hand that lies on the ball. | ||||||||
| one-arm half push-ups | 1×5 | 2×10 | 2×20 | ||||||
| ↑ | Under the groin, an object the height of a basketball – 23-24 cm. Put your free hand behind your back. Bend your arm until it touches the ball. | ||||||||
| lever push-ups | 1×5 | 2×10 | 2×20 | ||||||
| ↑ | One arm is laid aside, a basketball is under it, the other is under the shoulder. Bend the arm at the elbow until the face is at the level of the base of the hand. | ||||||||
| one arm push-ups | 1×5 | 2×10 | ∞ | ||||||
| ↑ | Move the center of gravity to one of the hands, put the free hand behind the lower back. Bend the arm at the elbow until the face is at the level of the base of the hand. | ||||||||
| → | ⇉ | ⇛ | |||||||
|---|---|---|---|---|---|---|---|---|---|
| shoulders on the floor | 1×10 | 2×25 | 3×50 | ||||||
| ↑ | Classic “birch”: elbows rest on the floor, palms – on the lower back, legs stretched up. Bend your hips and knees until your knees touch your forehead. | ||||||||
| folding knife | 1×10 | 2×20 | 3×40 | ||||||
| ↑ | Bending over, touch the surface of a coffee table, chair, or low bed with your hands. | ||||||||
| supported squat | 1×10 | 2×15 | 3×30 | ||||||
| ↑ | Repeat the same movement as the previous exercise, but this time using any object above hip height (high-backed chair or table). | ||||||||
| half squat | 1×8 | 2×35 | 2×50 | ||||||
| ↑ | Hands on the waist, on the chest or on the neck. Legs shoulder width apart. We bend at the hips and knees until the knees form an angle of 90 °, in other words, until the thighs become parallel to the floor. | ||||||||
| full squat | 1×5 | 2×10 | 2×30 | ||||||
| ↑ | Repeat the same movement as the previous exercise, but this time until the back of the thighs lie on the shins. | ||||||||
| tight squats | 1×5 | 2×10 | 2×20 | ||||||
| ↑ | Heels touch each other. Hands in front of you. We go down until the chest touches the knees. Please note: upon reaching the VI level. squats and leg raises (abs) you can begin to perform level I bridges. | ||||||||
| uneven squats | 1×5 | 2×10 | 2×20 | ||||||
| ↑ | One foot on the floor, the other with the heel resting on the basketball. Bending the leg (the one that rests on the floor), move the ball until it touches the calf of the other leg. | ||||||||
| one leg partial squat | 1×5 | 2×10 | 2×20 | ||||||
| ↑ | One leg is extended forward, the other is bent until the lower leg and thigh form an angle of 90 °. | ||||||||
| single leg squat with support | 1×5 | 2×10 | 2×20 | ||||||
| ↑ | We perform a full squat on one leg, but at the same time we make our task easier by leaning at the bottom point on a basketball. | ||||||||
| single leg squat | 1×5 | 2×10 | 2×50 | ||||||
| ↑ | Slowly perform a squat on one leg. Hands in front of you. At the end point, the torso rests on the knee of the bent leg. | ||||||||
| → | ⇉ | ⇛ | |||||||
|---|---|---|---|---|---|---|---|---|---|
| pull knees to stomach | 1×10 | 2×25 | 3×40 | ||||||
| ↑ | Sitting on a chair or bed, hold on to the edge, stretch your legs forward, lifting them a few centimeters from the floor. | ||||||||
| lying knee raises | 1×10 | 2×20 | 3×35 | ||||||
| ↑ | Lying on the floor, keep the legs together and at an angle of approximately 90°, 2-5 cm from the floor. Raise the knees above the hips until they are perpendicular to the floor and the calves are parallel. | ||||||||
| bent knee raises | 1×10 | 2×15 | 3×30 | ||||||
| ↑ | The position is the same as in the previous exercise, but this time, the legs are bent at a 45° angle. | ||||||||
| frog raises | 1×8 | 2×15 | 3×25 | ||||||
| ↑ | Do the positive part of Level 3, lift the bent leg, but instead of pausing at the top, straighten the legs fully. | ||||||||
| straight straight leg raises | 1×5 | 2×10 | 2×20 | ||||||
| ↑ | Raising straight legs from the position shown in the bottom picture. | ||||||||
| hanging knee raise | 1×5 | 2×10 | 2×15 | ||||||
| ↑ | Exercise on the horizontal bar: arms shoulder-width apart, bend your knees and raise them to the level of the pelvis. | ||||||||
| bent leg raise | 1×5 | 2×10 | 2×15 | ||||||
| ↑ | The name of the exercise is not entirely correct. The rise is carried out with both legs in a half-bent form. | ||||||||
| hanging frog lifts | 1×5 | 2×10 | 2×15 | ||||||
| ↑ | |||||||||
| partly straight leg raises | 1×5 | 2×10 | 2×15 | ||||||
| ↑ | |||||||||
| hanging straight leg raise | 1×5 | 2×10 | 2×30 | ||||||
| ↑ | |||||||||
| → | ⇉ | ⇛ | |||||||
|---|---|---|---|---|---|---|---|---|---|
| short axles | 1×10 | 2×25 | 3×50 | ||||||
| ↑ | Lying on your back, bend your knees (heels 15-20 cm from the buttocks) and cross your arms on your stomach. | ||||||||
| straight axles | 1×10 | 2×20 | 3×40 | ||||||
| ↑ | Sitting on the floor, keep the upper body straight and vertical, palms resting on opposite sides of the hips. Raise the pelvis until the torso and legs form a straight line. Exhale on the rise, inhale – down. | ||||||||
| angled axles | 1×8 | 2×15 | 3×30 | ||||||
| ↑ | Requires a small, stable object (knee height). Leaning against it with your hands, perform a semblance of a bridge, rising on your hands a few centimeters. Breathing is normal. | ||||||||
| head bridges | 1×8 | 2×15 | 2×25 | ||||||
| ↑ | Similar exercise, but this time the low support is not required, the floor is used instead. | ||||||||
| half axles | 1×8 | 2×15 | 2×20 | ||||||
| ↑ | Requires an item the size of a football or basketball. We put it under the lower back and make bridges rising and falling until the ball touches the back lightly. | ||||||||
| full axles | 1×6 | 2×10 | 2×15 | ||||||
| ↑ | Making full bridges, technique shown. | ||||||||
| wall walking bridges (down) | 1×3 | 2×6 | 2×10 | ||||||
| ↑ | Stand with your back to the wall at arm’s length. We bend back, raising our head, then we stretch our hands to the wall and put them with our fingers down at the level of the head. Safely resting, we alternately move our hands to the base of the wall. | ||||||||
| wall-walking bridges (up) | 1×2 | 2×4 | 2×8 | ||||||
| ↑ | The exercise is performed directly opposite to the previous one. At the highest point, a push is needed to fully straighten. | ||||||||
| closed axles | 1×1 | 2×3 | 2×6 | ||||||
| ↑ | Hands on hips, pelvis pulled forward. At the same time, bend your knees, bend your back and throw back your head. At a level below 1 meter to the head, it is necessary to remove the hands from the belt and send them from behind the head until they touch the floor. The movement is uniform and smooth. At the bottom point, you need to lower yourself to the floor and take the starting position again. | ||||||||
| twin axles | 1×1 | 2×3 | 2×10-30 | ||||||
| ↑ | Hands on hips, pelvis pulled forward. At the same time, bend your knees, bend your back and throw back your head. At a level below 1 meter to the head, it is necessary to remove the hands from the belt and send them from behind the head until they touch the floor. The movement is uniform and smooth. At the bottom point, you need to lower yourself to the floor and take the starting position again. | ||||||||
| → | ⇉ | ⇛ | |||||||
|---|---|---|---|---|---|---|---|---|---|
| vertical pull-ups | 1×10 | 2×20 | 3×40 | ||||||
| ↑ | Stand at a distance of 10-15 cm from a securely fixed vertical object (door frame, beam, etc. | ||||||||
| horizontal pull-ups | 1×10 | 2×20 | 3×30 | ||||||
| ↑ | Requires an item that has an opening at the bottom and is strong enough to support your weight. This is probably your table =). From a horizontal position, grab the object with a direct grip (hands shoulder-width apart) and hang on straight arms. Keep the body straight. Bending the elbows, we pull ourselves up until it touches the surface at the level of the brushes. | ||||||||
| pull-ups “Folding knife” | 1×10 | 2×15 | 3×20 | ||||||
| ↑ | Requires a high chair installed under the horizontal bar. | ||||||||
| partial pull-ups | 1×8 | 2×11 | 2×15 | ||||||
| ↑ | Exercise on the horizontal bar without additional items or shells. Grab the bar with an overhand grip, hands shoulder-width apart, elbows at a right angle (this is a key difference from full push-ups), shoulders parallel to the floor. Bend your knees and bring your ankles one behind the other. Pull yourself up until your chin is over the bar. Pause for 1 second and slowly descend to the starting position. | ||||||||
| full pull ups | 1×5 | 2×8 | 3×10 | ||||||
| ↑ | Hang from the horizontal bar, grasping it at shoulder width or slightly wider. | ||||||||
| narrow pull-ups | 1×5 | 2×8 | 3×10 | ||||||
| ↑ | We perform pull-ups with a direct grip, placing the hands close to each other. Technique in illustration. | ||||||||
| unequal pull-ups | 1×5 | 2×7 | 2×9 | ||||||
| ↑ | Grab the bar with one hand in an overhand grip, and with the other hand grab the wrist of your working hand so that the thumb of your non-working hand is under the palm and your fingers are under the back of the hand. Bending your working arm at the elbow, pull yourself up until your chin is above the bar. | ||||||||
| one-arm partial pull-ups | 1×4 | 2×6 | 2×8 | ||||||
| ↑ | Grasp the bar with one hand with a grip that suits you. | ||||||||
| one-arm pull-ups with support | 1×3 | 2×5 | 2×7 | ||||||
| ↑ | Throw the towel over the bar, grasp the bar with one hand in either grip and the other hand on the towel at eye level. Helping ourselves with a towel, we pull ourselves up until the elbow of the working arm bends at a right angle. Without interrupting the rise, let go of the towel. After the descent, grab the towel again. | ||||||||
| one arm pull-ups | 1×1 | 2×3 | 2×6 | ||||||
| ↑ | We perform the exercise according to the image. | ||||||||
| → | ⇉ | ⇛ | |||||||
|---|---|---|---|---|---|---|---|---|---|
| wall headstand | 30 sec. | 1 min. | 2 min. | ||||||
| ↑ | Place a rug or pillow at the base of a secure wall. Get on your knees and put your head on the mat (head at a distance of 15-25 cm from the wall). Hands shoulder-width apart, palms at the head. We put the knee of a strong supporting leg closer to the elbow, the other leg is straightened. Push off with your supporting leg while lifting the other leg up. Straighten your legs against the wall. Keep your mouth closed, breathe through your nose. After sustaining the required time, bend your knees and slowly lower yourself to the starting position. | ||||||||
| Raven Stand | 10 sec. | 30 sec. | 1 min. | ||||||
| ↑ | Squat down, knees apart. Place your palms on the floor in front of you, about shoulder-width apart. Bend your arms slightly at the elbows. Lean forward slightly, gradually transferring body weight from feet to hands. Once you’ve got your balance, lift your feet off the floor. Keep your leg muscles tense. Once done, gently place your feet on the floor. | ||||||||
| handstand against the wall | 30 sec. | 1 min. | 2 min. | ||||||
| ↑ | Place your hands 15-25 cm from the wall, bend your knees, pull the knee of your strong leg to your elbow. Push off with your other foot from the floor and stretch both legs above you, touching the wall with your heels. | ||||||||
| partial wall handstand push-ups | 1×5 | 2×10 | 2×20 | ||||||
| ↑ | Get into a handstand as described in Level III. | ||||||||
| handstand wall push-ups | 1×5 | 2×10 | 2×20 | ||||||
| ↑ | Get into a handstand as described in Level III. Begin to slowly bend your elbows. Stop as soon as there are about 15 cm left from the top of your head to the floor. Stop for a second, and then push up. | ||||||||
| Handstand narrow push-ups against the wall | 1×5 | 2×9 | 2×12 | ||||||
| ↑ | Assume a handstand, but at the same time bring them together until the index fingers touch. Bend your elbows until your head touches the floor. Then go up. | ||||||||
| unequal handstand wall push-ups | 1×5 | 2×8 | 2×10 | ||||||
| ↑ | Place a basketball against the wall. | ||||||||
| one-arm partial push-ups | 1×4 | 2×6 | 2×8 | ||||||
| ↑ | Get into a handstand. Slowly shift your body weight onto one hand, then gently lift your free hand off the floor. Then bend the elbow of the working arm and lower yourself to half the distance of the head from the floor. Then push up. | ||||||||
| one-arm push-ups with support | 1×3 | 2×4 | 2×6 | ||||||
| ↑ | Stand in a handstand. Slowly shift your weight onto one of your hands. Extend your free hand forward, palm up, and lightly touch the floor. Maintaining balance with your free hand, slowly bend the elbow of your working arm until your head touches the floor. | ||||||||
| one arm push-ups | 1×1 | 2×2 | 2×5 | ||||||
| ↑ | The exercise is similar to the movement at Level XVIII, but this time you will have to fully push up until your head touches the floor. You can make jerks and help yourself with your feet. | ||||||||
Table with a summary of programs from the first book “Prisoner Training” with photos and a brief description. Recommended for readers of “Convict Conditioning” as an additional material. Important: the description texts are for informational purposes only, the original ones are images only. To avoid misunderstandings, take full descriptions in the author’s book.
Convict Conditioning is Paul Wade’s book on health promotion techniques and the natural development of muscle strength. The program involves the use of only one’s own weight, as “simulators” – a minimum set of surrounding objects, the rarest of which may be only a horizontal bar. “Prisoner Workout” includes a set of gymnastic (calisthenic) exercises compiled by Paul Wade from the theory and practice of “old school” athletes: push-ups, squats, pull-ups, leg raises, bridges, handstands.
The essence of the “Prisoner Training” is simple: each of the basic exercises is divided into ten stages, each stage offers a modified (in relation to the basic) exercise, after completing which, the trainee moves from a simple movement to more complex ones.
The two most important rules of the book Convict Conditioning:
- Almost all exercises are performed at a deliberately slow pace with pauses.
- The transition to the next level is possible only after perfect “polishing” of the technique of the exercise.
IMHO, the book is written in the “best” traditions of Alain Carr – with a share of bragging, humiliation of the role of modern techniques, NLP repetitions and fashionable motivating appeals. Nevertheless, I recommend a thorough reading, especially the chapters with a full description of the workouts.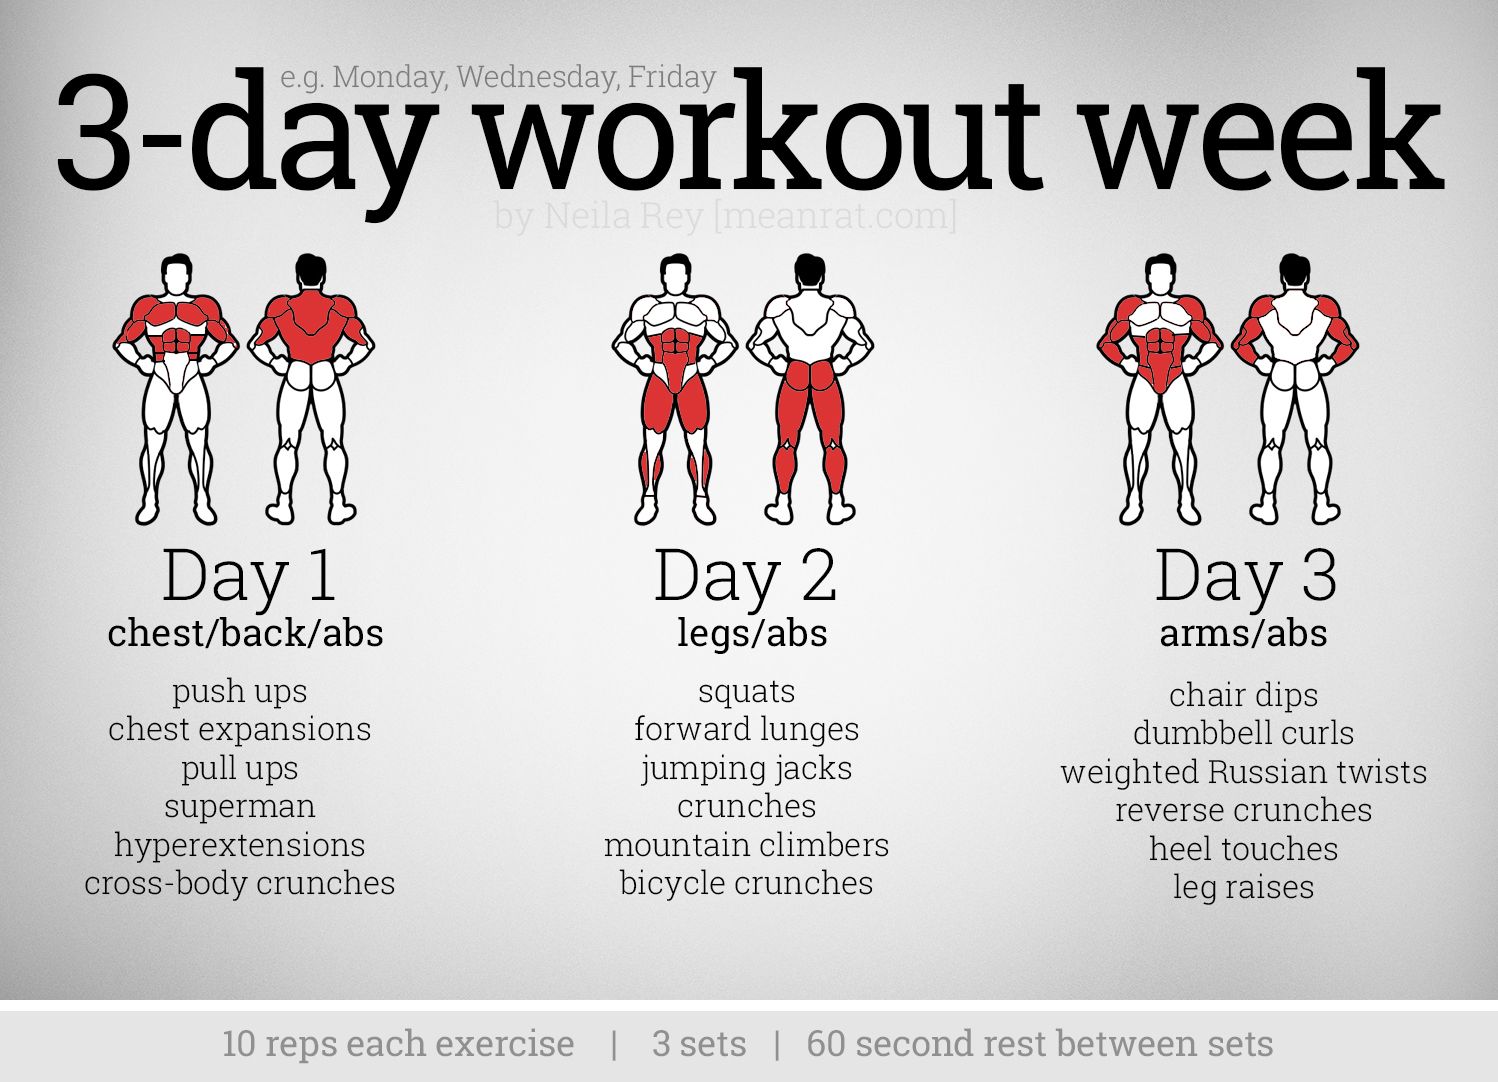
Updated on 05/09/2023 00:00 UTC
Training area | trenja-doma
“Training area”. Paul (Coach) Wade.
The author described his experience as a prison coach in this book. He spent 23 years in prison, starting at 1979 years old. At that time, there were no fitness rooms in prisons, and all the exercises presented in the book were performed with their own weight. The prison guard got hooked on Wade’s training system, appreciated it and advised him to write a book about it in order to preserve this valuable information. The book is written on 290 pages (the person had a lot of time).
I will try to “isolate” the most essential information from it. Those who wish to read the entire book can easily download the original from the Internet.
“Throw away your dumbbells. Fuck the gym.”
The author of the book calls for throwing dumbbells, barbells, exercise machines and other equipment into the landfill. He claims that only in a natural way can one develop real strength and acquire good health. As an example, he cites Spartan warriors who trained with their own weight and were the best warriors of that time. Wade also criticizes and rejects gym training, arguing that they develop strength there only “for demonstration.” And exercise with weights leads to injuries and wear and tear of the joints.
Golden Six.
Paul Wade’s programs consist of 6 exercises (golden six).
1. Push-ups (chest, triceps, deltoids)
2. Squats (quads, calves, glutes)
3. Pull-ups (lats, biceps)
900 02 4. Leg raises (for muscles of the abdomen, intercostal muscles)
5. “Bridge” (for the muscles of the back, back of the thigh)
6. Push-ups in the handstand (for deltoids, triceps, trapezium)
10 difficulty levels.
Each exercise has 10 difficulty levels.
You need to strive to complete the 10th level in each exercise – the level of “Master”.
Master level.
1. Push-ups – push-ups on one arm.
2. Squat – Single Leg Squat
3. Pullup – One Arm Pullup
4. Leg Raise – Hanging Straight Leg Raise
5. Bridge – Full Bridge from a Standing Position
6. Handstand Push-ups – One Arm Push-ups
3 training norms in each level of the exercise.
Presented in the form of standards: Beginner level, Intermediate level, Advanced level. The transition to the next exercise should be done only after mastering the advanced level of the previous exercise.
Development. Load progression.
1. Step-by-step development of the Golden Six exercises. To facilitate the mastering of the levels of the “Golden Six”, it is recommended to master the exercises starting from the 1st level, even if the initial level of those involved allows them to fulfill the standards of 1, 2, 3, and higher levels. They take a certain amount of time to develop.
2. Load progression. Start at the lowest level and add 1-2 reps every week or even every 2 weeks. If you decide to train intensively, then add 3-4 repetitions per week. Be sure to keep a training diary, where you record your achievements and progress.
3. Don’t rush! The goal is not to jump to the next level as quickly as possible, but to get the maximum benefit from the current level of exercise. It is not recommended to move to the next level of the exercise until the previous one has been mastered with perfect technique. Only in this way can one acquire “real, not ostentatious strength.”
4. The correct technique is to perform exercises without “chitting”, jerking and “bouncing”. Smooth lowering and lifting. The author strongly recommends to perform all exercises in the 2-1-2 mode until the fifth level. That is, 2 seconds for lifting and lowering and 1 second delay in the “final phase”. This technique will well complicate the “light exercises” and will strengthen the joints. After level 5, you can speed up the exercises. Sometimes it is necessary to perform exercises in an “explosive manner”.
5. Rest between sets. Rest as much as necessary to fully restore strength for the next set.
6. Exercises are not performed to failure. Finish the set with the feeling that you can perform 2-3 more repetitions.
Options.
Each exercise ends with a list of options. These exercises load the same muscles as the main ones. They are given, most likely, for review, since, according to the author, 10 main levels of the “Golden Six” are enough.
Programs.
Training programs are designed to develop the strength of the practitioner. As the author repeatedly repeats, “real and not ostentatious”, which will become your acquisition for the rest of your life. The author does not make any dietary recommendations.
The book presents several good training programs. An experienced athlete will be able to take advantage of the idea and build their own training program on their basis from already known exercises.
 Bend the elbows until the face is at the level of the base of the hand.
 Legs shoulder width apart. Keeping your torso as parallel to the floor as possible, bend at the knees and hips. Do not lift your heels.
 Gently raise the knees to the chest until they are at a distance of 15-25cm. from her. At this point, you need to exhale. On returning to the starting position – inhale.
 Raise the hips and back until all the weight is transferred to the shoulders and feet. Inhale on the way down.
 In the lower position, lightly touch the floor surface with your head.
 As you progress through these steps, you may need to move away from the wall. The end point is hands on the floor. After that, we lower ourselves to the floor and get back on our feet.
 ) and grab it with your hands at chest level. Ideally, if the hands are shoulder-width apart. Leaning back, we straighten our arms bent at the elbows. Hold for a second and return to the starting position.
 Rest your ankles on a chair (not your hips!). Straighten your legs. The height of the chair should be such that in this position your legs and torso form a 90° angle. From this position, we lift ourselves up with the help of our hands, pushing off the chair with our feet until the chin is above the crossbar. After a second delay, we return to the starting position.
 As in the previous exercise, cross your legs. Pull yourself up until your chin is over the bar. Pause for 1 second and slowly descend to the starting position.
 The free hand should be in any comfortable position. Bend the elbow of the working arm at a right angle (this is the main difference from full pull-ups on one arm) – this is the starting position. Pull yourself up, bending your elbow until your chin is over the bar.
 Begin to slowly bend your elbows. Stop as soon as there are about 15 cm left from the top of your head to the floor. Stop for a second, and then push up.
 Get into a handstand, then place one of your hands on top of the ball. Distribute the weight on both hands and bend your elbows until your head touches the floor. Then take the starting position.
 Then return to the starting position.