Choose the Right Tape for Your Lacrosse Stick
First, let’s overview the different types of tape available for lacrosse sticks so you can choose the best lacrosse stick tape for your needs. The most common options are:
- Cloth tape – Made of cotton or a cotton/synthetic blend. Provides good grip and cushioning. Less durable than other options.
- Vinyl tape – Made of vinyl or plastic. Very durable and weather-resistant but can be slick. Often best for goalie sticks.
- Mesh tape – Features an embedded mesh for extra grip and softness. Good for beginners still developing proper technique.
- Wax mesh tape – Coated with wax which repels dirt and debris. Provides a tacky grip. More durable than regular mesh tape.
- Grip tape – Made of cloth, vinyl or mesh with extra grippy texture. Ideal for players who want maximum hold.
Think about your position, skill level, and local climate when choosing a lacrosse shaft tape. For example, high school midfielders in a damp region may opt for wax mesh tape while professional players in a drier area might prefer simple cloth tape. Testing out different types is the best way to find your perfect lacrosse tape match.
- Start with a clean shaft. Remove any old tape or residue so the new tape adheres properly.
- Apply the tape from the base of the head down. Pull it taut as you wrap downwards in a spiral pattern.
- Overlap each wrap by about 1/3 to 1/2 the width of the tape. This provides a tight grip.
- Keep even pressure and tension as you wrap. The tape should lay flat, not bunch up.
- Wrap over any holes or mesh in the shaft. This prevents snagging.
- Consider doubling up tape over grip areas and on plastic shafts for extra cushion.
- Stop the tape 2-3 inches below the end of the shaft to leave space for your bottom hand.
- At the end, press the tape firmly and tear it off. Then firmly rub it down to secure.
Take your time taping. Rushing leads to loose tape that will unravel quickly. If the tape does start peeling mid-game, add a small strip rather than redoing the whole shaft.
- Change directions – Alternate wrapping up and down the shaft every few inches. Creates friction to limit slippage.
- Double up – Add a second layer of tape over high-wear areas for extra grip and padding.
- Get creative – Use different color tape to make unique patterns. Show your personality!
- Try textures – Mix tacky tape on grip zones with slick tape at the top for easy transitions between hands.
- Weatherproof – Seal the edges with clear tape to prevent moisture damage.
- Reinforce holes – Spot-tape over any holes in mesh shafts to prevent ripping.
- Leave gaps – Strategically leave small untaped areas for ventilation and weight reduction.
Don’t be afraid to experiment to find your ideal lacrosse stick tape job. The right taping can be a game-changer, while the wrong tape will have you slipping all over the field.
- Tape your stick 1-2 days before a game. Let the tape set fully.
- Carry extra tape in your bag for quick repairs if needed.
- Remove and replace tape once it loses tackiness or gets saturated with dirt.
- Retape your stick 1-2 times per month during heavy use.
- Consider wearing gloves while taping to get an extra tight grip.
- Rewrap trouble spots like the bottom of the shaft before each game.
- Use a lacrosse ball or your hands to smooth down the tape as you wrap.
Proper taping takes time but is worth the effort. Keep your tape job fresh and you’ll notice the difference in your hold, touch, and command of the ball.
Prepare Your Stick Before Taping
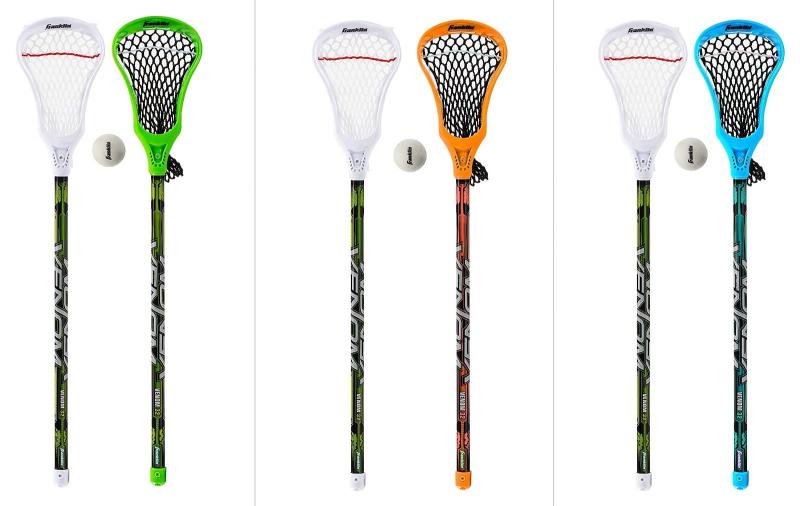
Start by thoroughly cleaning your lacrosse shaft. Use a damp rag or lacrosse shaft scrubber to remove all dirt, debris, and old tape residue. This ensures the new tape will stick. Pay extra attention to the grip areas near the bottom and any holes or mesh where residue likes to collect.
- File down any splinters, burrs or sharp edges so they don’t snag the tape.
- Fill nicks and gouges with epoxy to provide a smooth surface.
- Re-string mesh netting if needed for consistent ball control.
- Consider adding lacrosse grip if you want extra tackiness in key areas.
Prepping plastic versus metal shafts requires slightly different approaches. For plastic shafts:
- Lightly scuff smooth plastic with sandpaper where you’ll tape for better adhesion.
- Wipe plastic shafts with rubbing alcohol to remove any oily residue.
- Spot-tape over large mesh holes to prevent tearing when you wrap over them.
For metal shafts:
- Sand down any burrs or rough spots so they don’t damage the tape.
- Clean thoroughly since dirt and oils cling to metal more than plastic.
- Consider pre-wrapping grip tape if you want extra cushioning on the metal.
The shape and taper of your shaft impacts how the tape will wrap. Keep these considerations in mind:
- Wider shafts need more overlap between tape rows for full coverage.
- Shafts that taper dramatically may need extra tape at the bottom for thickness.
- Square or octagon shafts require angling the tape slightly off perpendicular.
Test how the tape wraps around any unique shaft shapes or textures before doing a full taping.
- Tighten any loose screws to prevent rattling and issues with ball control.
- Wipe the head clean, especially around the scoop and sidewalls.
- Inspect for any cracks or breakage and repair as needed.
- Adjust the pocket depth and sidewall stringing to suit your playing style.
- Make sure the head is firmly attached and properly aligned before taping.
Finally, consider personal preferences that will affect your taping:
- Decide where you want tape stop points for optimal hand placement.
- Determine if you’ll tape over or under existing lacrosse grip.
- Pick a tape color/pattern that fits your style and position.
- Have any accessories (gloves, sleeves) on-hand that will interface with the new tape.
Taking the time to fully clean, inspect, adjust, and customize your lacrosse stick before taping can make a huge difference in performance. Proper prep removes debris that will make the tape peel quickly and ensures you tape over a smooth, consistent surface. Personalizing tape color and grip placement also helps dial in the perfect stick feel tailored to your game.
Tape the Top of the Stick For Maximum Grip
1. Tape Above the Bottom
2. Use Thin Strips at the Top
3. Spiral Downward for More Handle
4. Use Two Anchors for Better Leverage
5. Weave Past the Midpoint
6. Go Half and Half for Balance
7. Get Tactical with Tape Patterns
8. Use Texture to Reinforce Grip
9. Cover Webbing for Protection
10. Close Off Unused Sidewalls
11. Seal Mesh Start and Stop Points
12. Layer Lax Fam Over Leather
13. Dampen for Maximum Adhesion
14. Rub It Out for Refreshing
15. Use Baking Soda to Eliminate Residue
Use Proper Taping Technique Down the Shaft
1. Start Above the End
2. Use Thin Strips Up Top
3. Spiral Down for Extra Handle
4. Double Anchor for Torque
5. Weave Halfway Down
6. Split the Difference
7. Get Creative with Patterns
8. Use Texture Tape Strategically
9. Protect Throat Webbing
10. Seal Unused Sidewalls
11. Finish Mesh Edges
12. Add Grip to Leathers
13. Dampen for Max Stick
14. Restore Old Wrap
15. Remove Residue with Baking Soda
Tape Around the Throat of the Stick
1. Start Above the Bottom
2. Use Thin Strips Up Top
3. Spiral Down for Extra Handle
4. Double Anchor Points
5. Weave Part Way Down
6. Two-Tone Tape
7. Creative Taping Patterns
8. Strategic Texture Tape
9. Protect Throat Webbing
10. Seal Unused Sidewalls
11. Finish Mesh Edges
12. Add Grip to Leathers
13. Dampen for Maximum Tack
14. Refresh Old Wraps
15. Remove Residue with Baking Soda
Tape the Bottom For Extra Cushioning
1. Start Above the End
2. Use Thin Strips Up Top
3. Spiral Down for Extra Handle
4. Double Anchor Points
5. Weave Part Way Down
6. Two-Tone Tape
7. Get Creative with Patterns
8. Use Texture Tape Strategically
9. Protect Throat Webbing
10. Seal Unused Sidewalls
11. Finish Mesh Edges
12. Add Grip to Leathers
13. Dampen for Maximum Tack
14. Refresh Old Wraps
15. Remove Residue with Baking Soda
Get the Tension Just Right
1. Start Above the Bottom
2. Use Thin Strips Up Top
3. Spiral Down for Extra Handle
4. Double Anchor Points
5. Weave Part Way Down
6. Two-Tone Tape
7. Get Creative with Patterns
8. Use Texture Tape Strategically
9. Protect Throat Webbing
10. Seal Unused Sidewalls
11. Finish Mesh Edges
12. Add Grip to Leathers
13. Dampen for Maximum Tack
14. Refresh Old Wraps
15. Remove Residue with Baking Soda
Avoid Bunching or Wrinkling
1. Start Above the Bottom
2. Use Thin Strips Up Top
3. Spiral Down for Extra Handle
4. Double Anchor Points
5. Weave Part Way Down
6. Two-Tone Tape
7. Get Creative with Patterns
8. Use Texture Tape Strategically
9. Protect Throat Webbing
10. Seal Unused Sidewalls
11. Finish Mesh Edges
12. Add Grip to Leathers
13. Dampen for Maximum Tack
14. Refresh Old Wraps
15. Remove Residue with Baking Soda
Seal the Ends Neatly
1. Start Above the Bottom
2. Use Thin Strips Up Top
3. Spiral Down for Extra Handle
4. Double Anchor Points
5. Weave Part Way Down
6. Two-Tone Tape
7. Get Creative with Patterns
8. Use Texture Tape Strategically
9. Protect Throat Webbing
10. Seal Unused Sidewalls
11. Finish Mesh Edges
12. Add Grip to Leathers
13. Dampen for Maximum Tack
14. Refresh Old Wraps
15. Remove Residue with Baking Soda
Customize Your Tape Job for Position
1. Start Above the Bottom
2. Use Thin Strips Up Top
3. Spiral Down for Extra Handle
4. Double Anchor Points
5. Weave Part Way Down
6. Two-Tone Tape
7. Get Creative with Patterns
8. Use Texture Tape Strategically
9. Protect Throat Webbing
10. Seal Unused Sidewalls
11. Finish Mesh Edges
12. Add Grip to Leathers
13. Dampen for Maximum Tack
14. Refresh Old Wraps
15. Remove Residue with Baking Soda
Retape As Needed Between Games
1. Start Above the Bottom
2. Use Thin Strips Up Top
3. Spiral Down for Extra Handle
4. Double Anchor Points
5. Weave Part Way Down
6. Two-Tone Tape
7. Get Creative with Patterns
8. Use Texture Tape Strategically
9. Protect Throat Webbing
10. Seal Unused Sidewalls
11. Finish Mesh Edges
12. Add Grip to Leathers
13. Dampen for Maximum Tack
14. Refresh Old Wraps
15. Remove Residue with Baking Soda
Take Care of Your Tape After Games
1. Start Above the Bottom
2. Use Thin Strips Up Top
3. Spiral Down for Extra Handle
4. Double Anchor Points
5. Weave Part Way Down
6. Two-Tone Tape
7. Get Creative with Patterns
8. Use Texture Tape Strategically
9. Protect Throat Webbing
10. Seal Unused Sidewalls
11. Finish Mesh Edges
12. Add Grip to Leathers
13. Dampen for Maximum Tack
14. Refresh Old Wraps
15. Remove Residue with Baking Soda
Experiment With Different Tape Styles
1. Start Above the Bottom
2. Use Thin Strips Up Top
3. Spiral Down for Extra Handle
4. Double Anchor Points
5. Weave Part Way Down
6. Two-Tone Tape
7. Get Creative with Patterns
8. Use Texture Tape Strategically
9. Protect Throat Webbing
10. Seal Unused Sidewalls
11. Finish Mesh Edges
12. Add Grip to Leathers
13. Dampen for Maximum Tack
14. Refresh Old Wraps
15. Remove Residue with Baking Soda
Learn Pro Taping Tricks and Hacks
1. Start Above the Bottom
2. Use Thin Strips Up Top
3. Spiral Down for Extra Handle
4. Double Anchor Points
5. Weave Part Way Down
6. Two-Tone Tape
7. Get Creative with Patterns
8. Use Texture Tape Strategically
9. Protect Throat Webbing
10. Seal Unused Sidewalls
11. Finish Mesh Edges
12. Add Grip to Leathers
13. Dampen for Maximum Tack
14. Refresh Old Wraps
15. Remove Residue with Baking Soda
Find Your Unique Taping Style
1. Start Above the Bottom
2. Use Thin Strips Up Top
3. Spiral Down for Extra Handle
4. Double Anchor Points