The Best Tie Off Knots For Tennis Racquet Stringing
Tennis EquipmentTennis Strings
What’s the best finishing knot for your racquet? Does it Even Matter?
Jonathan
Follow on Twitter
March 31, 2021
29 5 minutes read
If you’re learning to string a tennis racquet, the knots you use are a crucial endpoint (and potentially a starting point) for ensuring your racquets stringbed can stand up to the task of hitting a tennis ball for several hours.
Using a poorly tied knot can compromise a string job by causing it to lose tension too quickly. Or, in a worst-case scenario, bad knots can slip through the grommet or even come undone, causing the stringbed to fall apart completely. Not an ideal scenario if you’re in the middle of a match.
So which knots should you use? Are some tie off knots better than the others? Let’s take a look.
The Types of Knots Used In Racquet Stringing
There are several types of knots that stringers will use when stringing a racquet, but the four most common are as follows:
- Double Half Hitch
- Parnell Knot
- Wilson Pro Knot
- Starting Knot
Double Half Hitch
The double half hitch knot is the most common tie off knot and is the simplest knot to learn.
It is the knot you’ll find in any guide to racquet stringing and is a great starting point for when you first start learning to string a racquet.
In some racquets, you might be able to get away with a single half hitch knot, but that will require narrow grommets and thicker gauge string; otherwise, you will get some slippage.
I used this knot when I first learnt to string a racquet, and I’ll still use it from time to time.
It’s also the knot most retailers like Tennis Warehouse, Tennis Express, Tennis-Point etc., will use when they string a racquet for customers before shipping.
Advantages
- Reliable
- Easy to learn and tie
Disadvantages
- Can strangle the anchor string
- A bulkier knot so harder to do in a tight area
Parnell Knot
This is the knot I use for all four knots when doing a two-piece string job.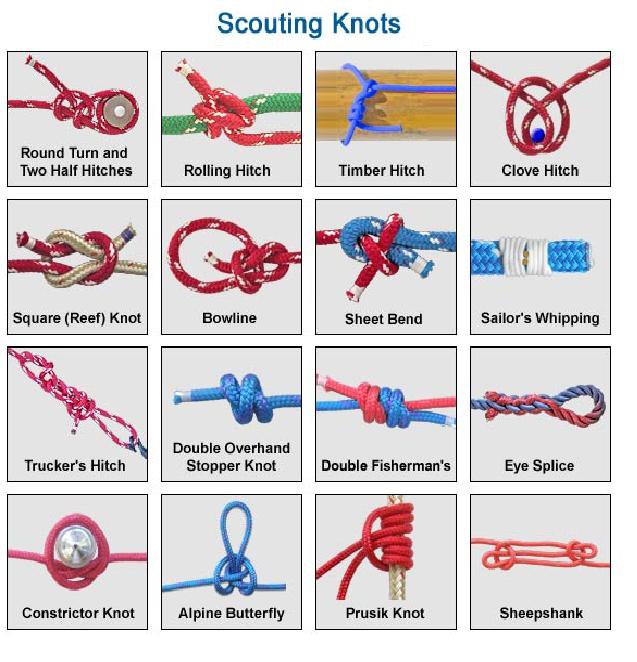
When I first started learning to string a racquet, I used the double half hitch, which my manual recommended.
After getting more comfortable with the fundamentals, I researched other options and came across the Parnell Knot, a more reliable and cleaner-looking version of the double half hitch.
While I didn’t have issues with the double half hitch coming undone or breaking, I have used the Parnell Knot ever since. I found it a much cleaner looking knot and easier to get the cut end against the frame.
Whereas the Double Half Hitch is the most basic of all the tie-off knots, it can create a weak spot as it strangles the anchor string when you tie it.
With the Parnell Knot, because you tighten the first half hitch, there’s a piece of string blocking it from strangling the anchor string.
The double half hitch can also come undone more easily, as it is really two single half hitches on top of the other. In comparison, the Parnell knot cinches up and won’t come undone.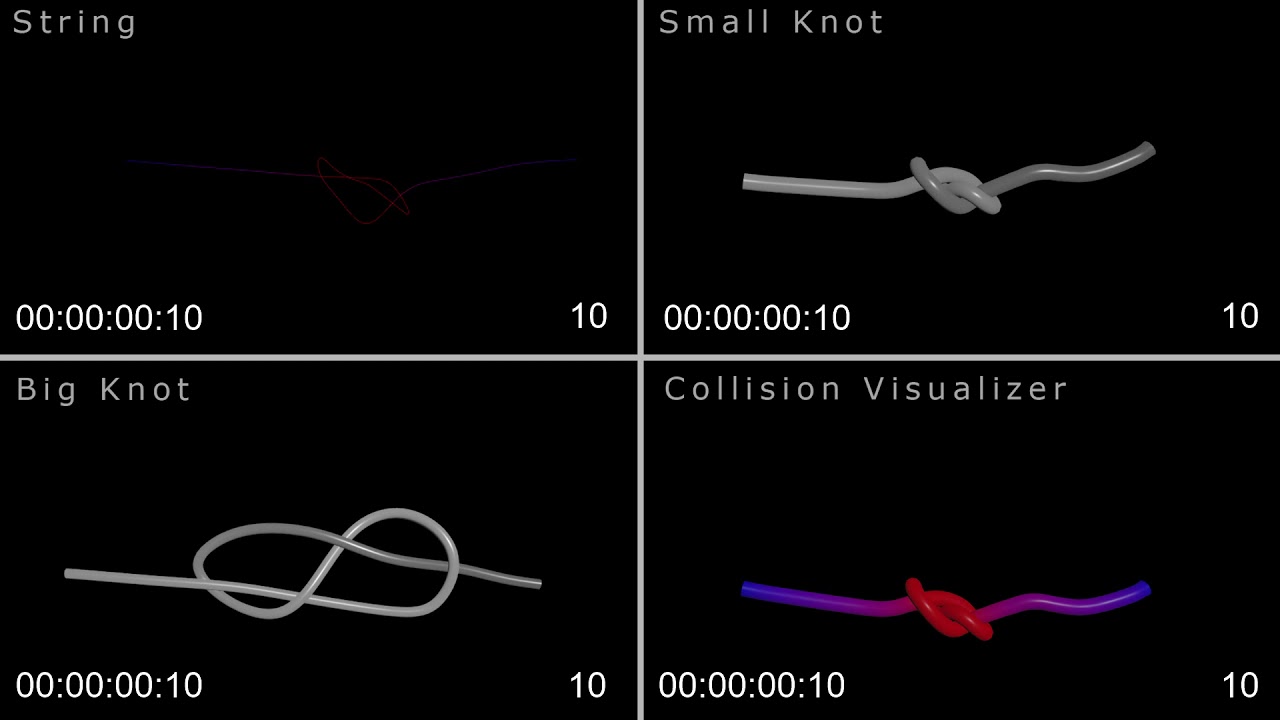
Advantages
- It won’t come undone
- Less pressure on anchor string
- It looks clean/tight against the frame
Disadvantages
- Some say it’s bulkier compared to the Pro Knot
Wilson Pro Knot
The Wilson Pro Knot gets the name due to the Wilson tournament stringers using it on all their string jobs.
The Pro Knot is a small and compact knot making it easy to tie off in tight spaces. While it’s almost the same as the Parnell Knot, rather than going back around the anchor string, you only go back through the loop.
I will sometimes use this knot when using a thicker string or in a real tight space, but if you plan and make sure your tie-off hole has the cross string running underneath the anchor string, you can tie a bigger knot in the open space.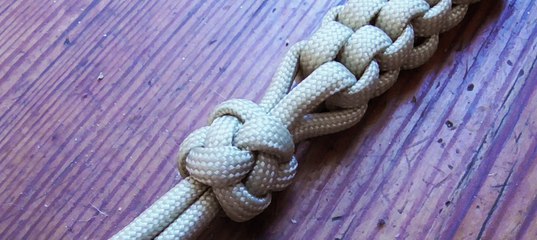 When you pull it tight, it will glide over the cross string and cinch up.
Advantages
- Clean looking knot
- Easy to tie in tight spaces
Disadvantages
- A small knot, so thin strings + large grommets can be a problem
Starting Knot
Whenever you string a racquet as a two-piece string job, either a hybrid or because you prefer the stringbed being two pieces, you will be starting the cross strings from scratch.
That means you’ll be pulling tension directly on a knot, so it needs to stand up the forces applied and not slip back through a grommet.
The starting knot is one way of doing this, and the result is a bulky knot that can withstand direct tension.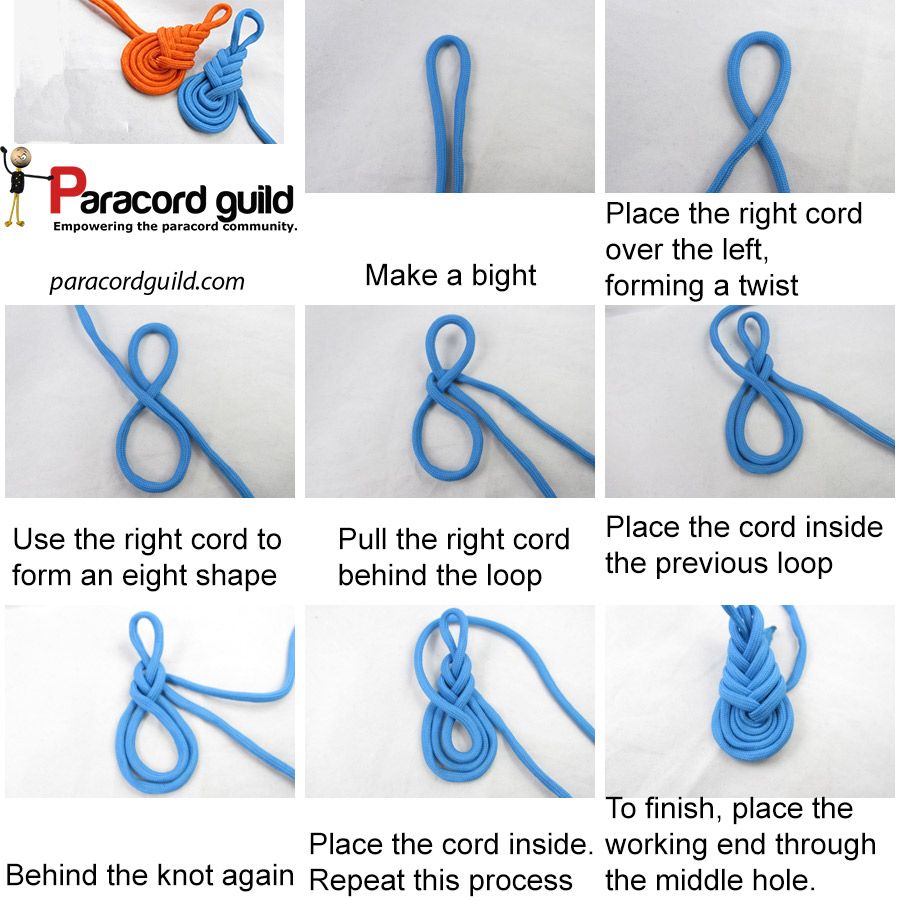 The starting knot works well, but there is another option that I’ll cover below.
Advantages
- Can withstand direct tension
- Won’t slip through the grommet
- Can be done ‘super’ bulky
Disadvantages
- With stiffer polyester strings, starting knots can be hard to cinch up
- Less aesthetically pleasing
An Alternative to the Starting Knot
When I first started stringing, the DVD I received with my stringing machine recommended using a starting knot when doing a two-piece string job.
But like how I discovered the Parnell Knot, I’d seen several advanced stringers opting to avoid this knot and instead use a starting clamp, shown in the picture above.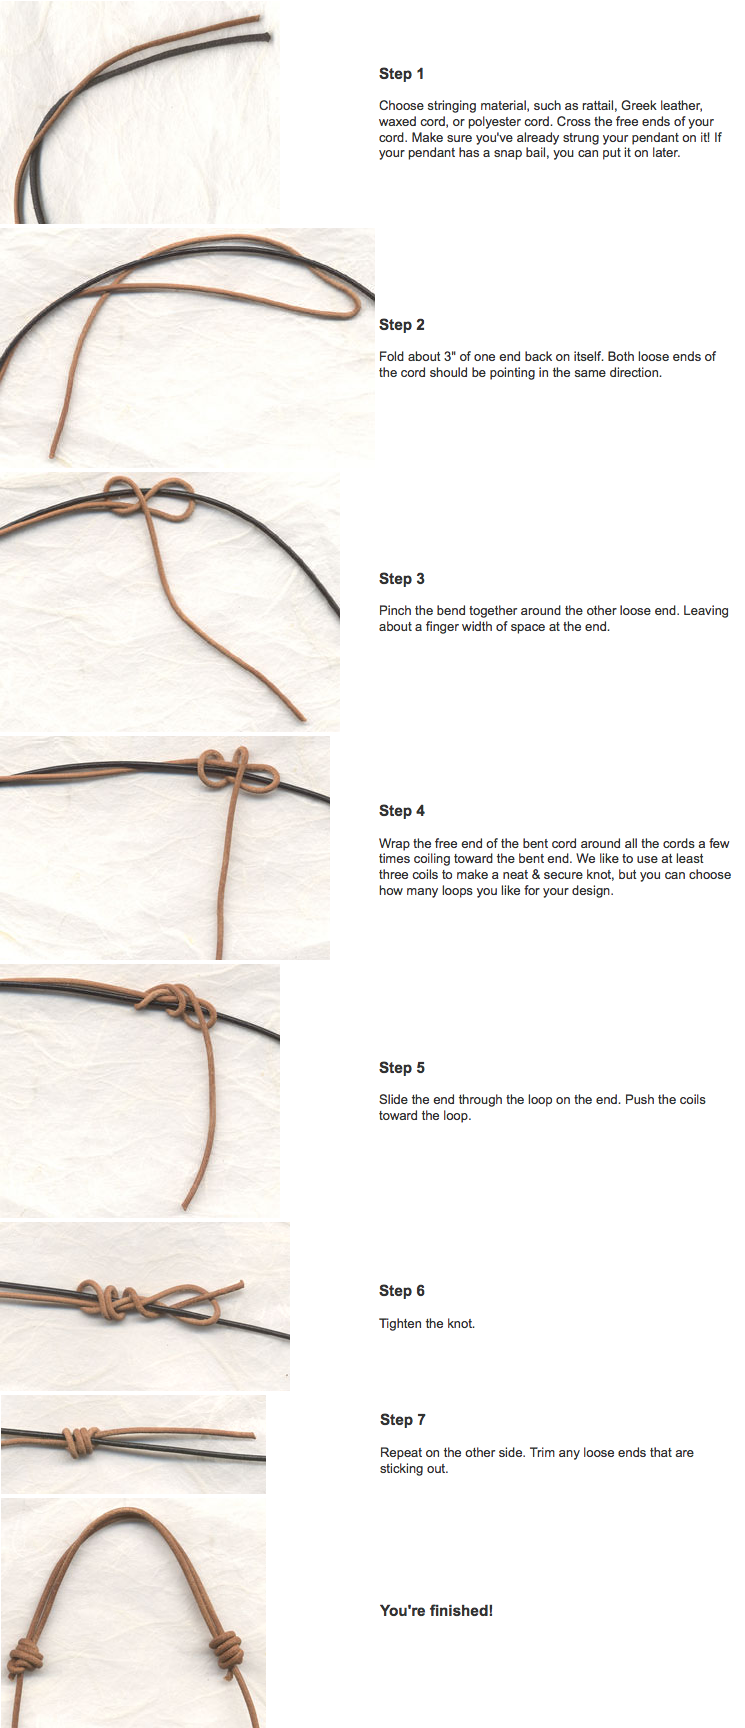
I gave this a try, and I’ve not used a starting knot since, as it’s a much easier method, produces a more reliable tension, and you get a much cleaner knot that matches the other three.
I would still recommend learning the starting knot, so it’s in your arsenal should you need it, but using a starting clamp for the crosses is my preferred method.
Is One Knot Better than the Other?
So is one finishing knot better than the rest? Not really; if you asked Richard Parnell what he thought was the best, he’d likely say the Parnell Knot; if you asked someone who strings in the Wilson team, they’d probably tell you the Pro Knot. 😁
The best knot for me is the one you can comfortably tie and performs its function, i. e. doesn’t slip, cause breakage or impact playability. All four of the ones listed above, when tied correctly, are good choices.
For most people, I think that is the Parnell Knot is the best choice because it has never let me down; not only that, it’s created by a guy that is highly knowledgeable about stringing and has strung hundreds of thousands of racquets in his career with that knot.
What about bad knots? They certainly exist; the picture above is a good example of this, as it’s far too bulky and looks slapdash. If that was done by someone flying blind on their first few string jobs, then that’s fine, but if a seasoned stringer is producing that? I’d be a little sceptical.
A bad knot doesn’t make a bad stringer, of course, but most good stringers will produce a neater looking tie off with the tag end up against the frame to prevent it catching on clothes, fingers etc.
Find Your Ideal Tennis String
Are you looking for a new string to try in your racket? Use our easy to use tennis string finder tool.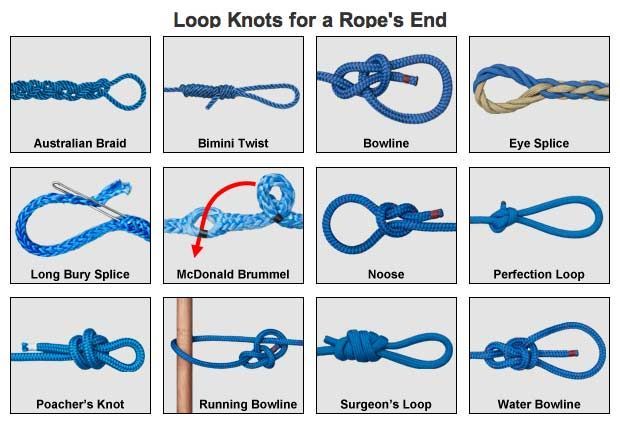 It lets you filter by string type, gauge, colour, price, stiffness and shape.
General Tips for Tie-Off Knots
- Practice makes perfect
- Don’t pull tension on your knots using the stringing machine
- Use a starting clamp to help you grip the string when tightening the knot
- Try to use the same knot consistently
- Remember to increase the tension by 10% before pulling the last mains or crosses before tying off to compensate for the inevitable tension loss
- Use Youtube for more visual and how-to guides
And remember, a good stringer is always learning!
Which knot do you use when stringing racquets? Have you devised your own variation of one of the knots above like Richard Parnell? Let me know in the comments.
Subscribe to Perfect Tennis
Join 12k Tennis Fans Who Get Our Updates
News, racket reviews, guides and more.
Related Articles
Stringing Knots
Stringing Knots
There are a number knots used in stringing a
racquet:
- Double half hitch knot
- Starting knot
- Pro Knot, also
called the Richard Parnell Knot - Comprehensive
list of stringing knots
Double Half Hitch
Knot
The double half hitch knot is used to tie off the end of
the string.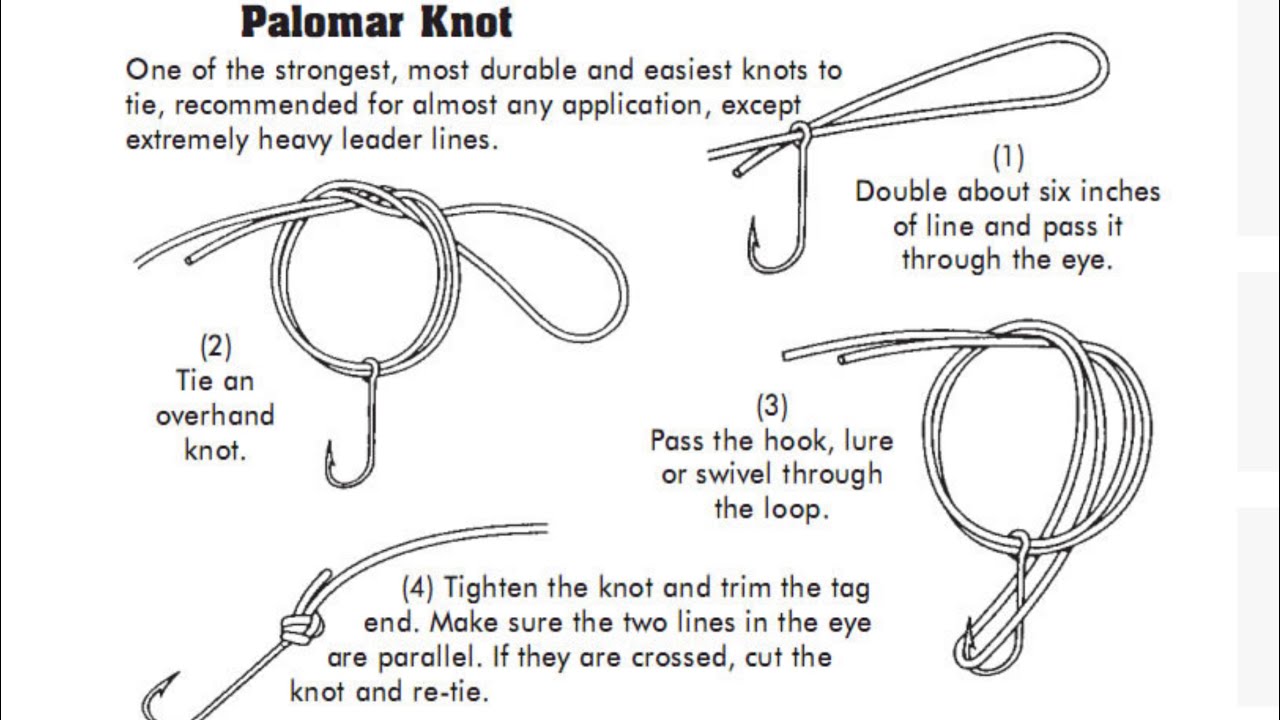 Although commonly used and known for tying off the end of the string, it
can be used as a starting knot as well.
The knot is depicted in the drawing and in a couple of
pictures below.
Starting Knot
As noted above, some folks use the double half hitch to
start the crosses. But others use a special knot used specifically to start the
crosses.
The knot is depicted in the drawing and in a couple of
pictures below.
Pro Knot /
Richard Parnell Knot
The professionals favor this knot for a number of
reasons. I can see why. When done correctly, the knot is very compact with
the end of the string neatly tucked against the frame.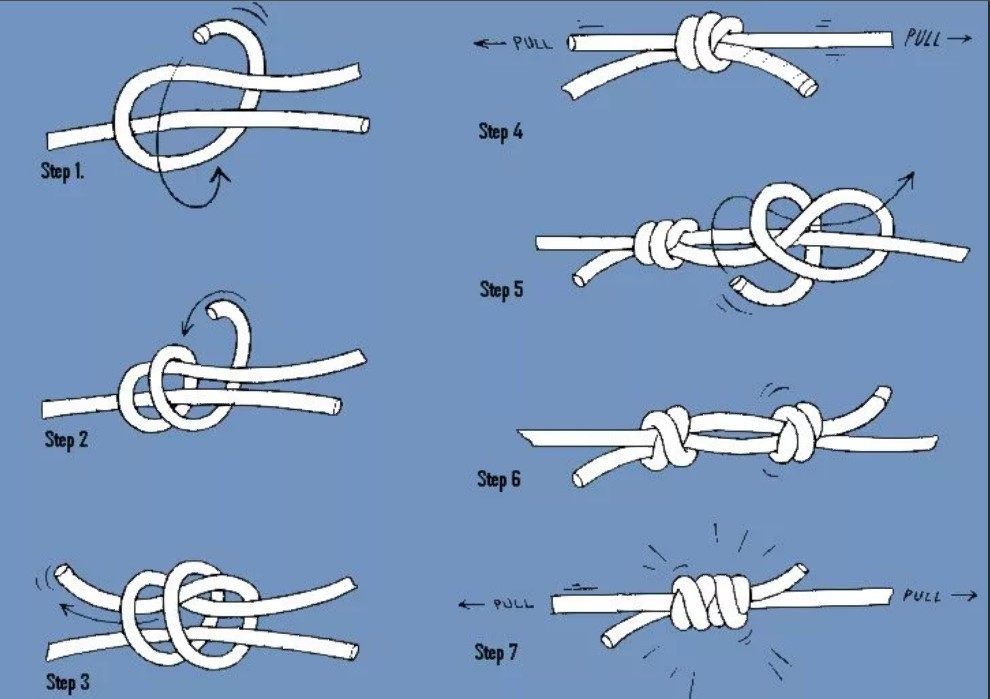 It is very secure with no
slippage or breakage issues with all string types even with fragile strings like gut.
I prefer this knot over the two knots above. It is
fast, secure, and very easy to do!
To see of a video of this knot, click one
of the GrandSlamStringers.com video clips below:
- Front view
- Rear view
Thanks to David Pavlich, Jaycee, and Joe at
stringforum.net who provided the wisdom on the different knots.
Comprehensive
list of Stringing Knots
Ian Cheong sent me an email pointing out a document that
has a comprehensive list of stringing knots. It is published by the European Racquet
Stringers Association (ERSA).
It used to be at the following link:
http://www.ersa-stringers.com/RT3.2006WEB.pdf
Unfortunately, ERSA has removed or relocated it. 🙁
It’s a shame because it is one of the best references I’ve
seen on stringing information and instructions.
If anyone has any info on this document or an updated
version of it, please feel free to let me know so I can post the info here.
Got Tips or Suggestions?
If you have any suggestions or tips for other tennis
enthusiasts, please let me know and I’ll post it here for you.
How to tie knots
People use rope not only in everyday life, but also in hiking trips. The use of rope products is wide: drying clothes, helping with the crossing, for games. Every experienced one knows how to knit knots for all occasions.
Knots are divided according to purpose:
- “Weaving”, “Counter” are necessary for connecting ropes of equal diameter.
- “Bramshkotovy” is designed for fastening ropes of different diameters.
- Nodes “Explorer”, “Eight” are used for insurance.
- Knots “Bowline”, “Choke”, “Stirrup” fix the rope on the support.
Half bayonet.
The bayonet knot is the simplest of the non-tightening knots. It is used on sailing and new ships. The knot is used for insurance: other nodal connections will not be untied.
Creation instruction.
- Create a loop around the object.
- Tie a loose knot.
- Using thread, secure the end of the cord and the main rope.
- Bayonet assembly ready to go!
Figure-eight knot.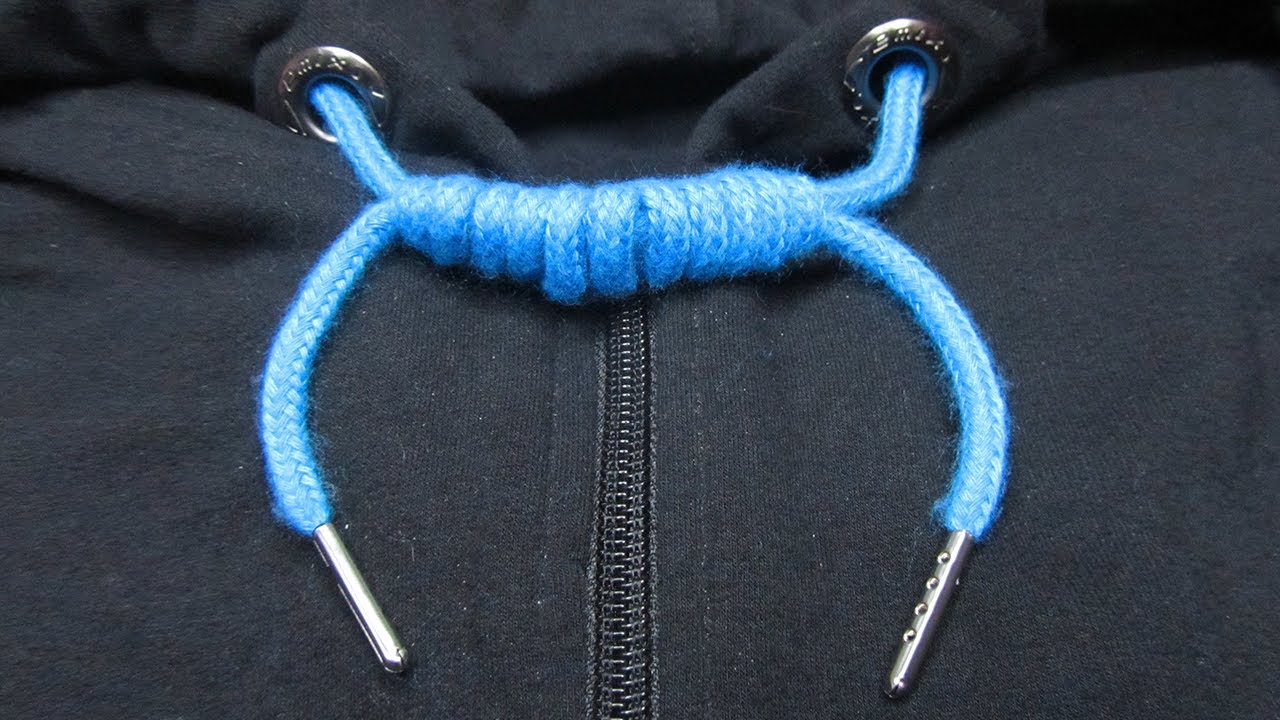 https://www.youtube.com/watch?v=N8aT7TCEX4k
“Eight” – “Flemish” type of knot used for knitting loops, connecting the ends of the fishing line; popular among sailors and climbers because of the reliability and speed of knitting.
Creation instructions.
- You need to take the fishing line and bend it in half to form a loop. Fold the ends on top of each other at the base. Bring the bottom of the loop behind the top – a figure eight is formed.
- Pull these ends into a loop and tie a knot for strength and security.
- The G8 node is ready.
Counter knot figure eight. https://www.youtube.com/watch?v=_L-RHpiKVgc
90 002
sea and land; It is considered strong and perfectly fastens thick ropes and thin threads.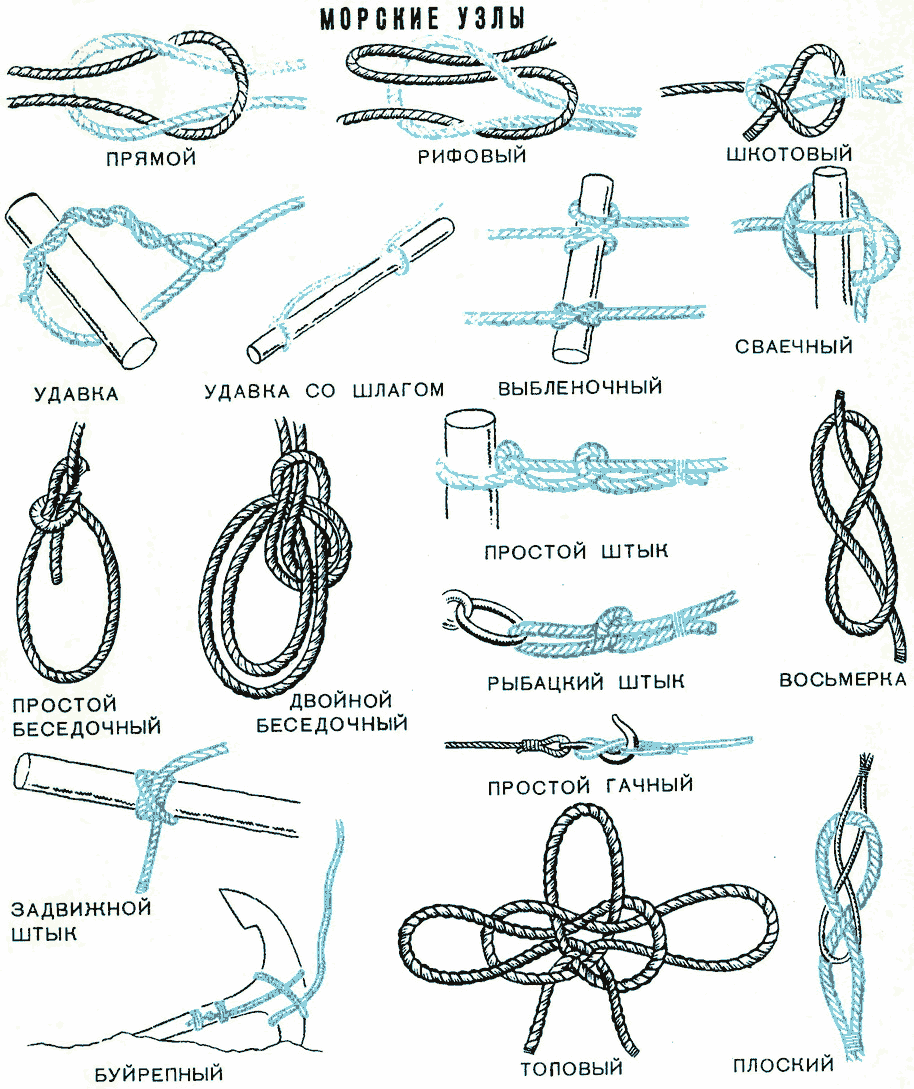 In Europe, the knot appeared about 800 years ago.
Creation instruction.
- Tie a figure-eight knot on one rope. We draw the end of the lace into the first loop of the Eight.
- Similarly with the other rope in the other direction.
- Having received a braided eight, we tighten the knot.
- The counter knot of the eight is ready.
Bowline knot. https://www.youtube.com/watch?v=U5YohsB7eYY
90 003
Bowline knot is used in fishing: attaching a net to a raft; used in the maritime industry. The knot is not untied under load pressure, it is used to create a tightening loop.
Creation instructions.
- Make a loop by turning the rope 180 degrees clockwise (the ends of the rope are free).
- Wrap one end around the support and loop through the end of the string.

- Use a working cord to wrap the support, draw the end of the rope into the loop on the other side.
- Tighten and tie the last knot.

Carrot knot. https://www.youtube.com/watch?v=S7GRCGx8zT0
The “Carrot” knot is used to connect monofilament ropes are used for carp fishing.
Creation instruction.
- Using braid, create a loop without tightening.
- Pass the working end of the fishing line into the loop of the rope. Wrap the line around the cord several times.
- Place your hand on the point where the turnover ends. It is necessary to wrap the fishing line around the rope in the opposite direction the same number of times.
- Pass the end of the line through the loop, then wet it. Now it is worth tightening the loop from both ends.
Palomar node. https://www.youtube.com/watch?v=rFPXOvhDw2U
90 002
The Palomar knot has high strength and a simple tying pattern. The knot is suitable for monofilament and braid, various hooks.
Creation instruction.
- Take the end of the cord (up to 30 cm) and fold it in half.
- Pass the loop through the eye of the hook.
- Make a knot in the loop and make a hook inside.
- Lace ends can be cut or burned.
- The Palomar assembly is ready.
Clinch knot. https://www.youtube.com/watch?v=h6sB9QJr3u4
The clinch knot is used for feeders and lures.
Instructions for creating a clinch knot.
- Insert the running end of the line into the eye of the hook.
- Wrap this end around the main end.
- Pass the end of the fishing line through the eyelet of the hook.
- Should be a single clinch.
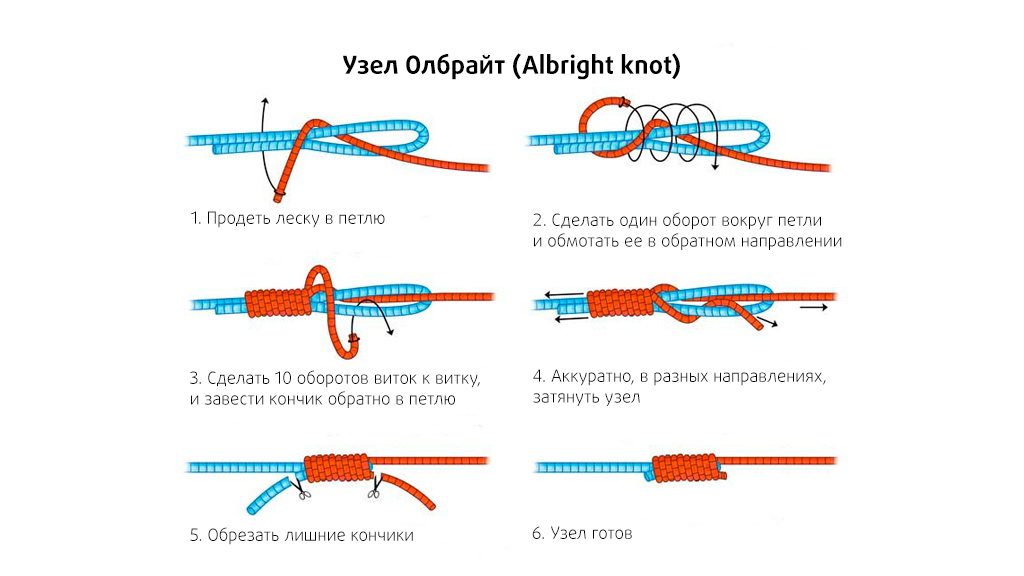
Double knot.
90 003
Double knot – two double simple knots tied around the end of another knot.
Creation instructions.
- Place two laces parallel to each other.
- Thread the end of one around both laces.
- Then push through a few turns and tighten.
- Do the same with the other end of the rope.
- Tighten both ropes.
Arbor. https://www.youtube.com/watch?v=erEcN3pBcWI
900 02
Arbor is at the end of the loop ropes. Serves for attaching the mooring cable to the ring. It has many features. The node perfectly withstands many loads.
Creation instruction.
- Leave a small loose piece of rope and create a small loop.
- Insert the end of the cord into the hole. Wrap around the running end and tuck into the loop.
- Arbor knot ready for use.
Straight knot. https://www.youtube.com/watch?v=68Ol63r21J0
9000 2
The straight knot is the most famous knot used to connect two shoelaces. The knot has found application on ships, tourism, and manufacturing.
Creation instructions.
- Take the ends of the ropes. We wrap one end of the other end of the lace.
- We make a loop, taking the end of another lace. we put the rope through the eye of the loop, wrapping the initial end.
- Tighten the knot.
Stirrup Knot. https://www.youtube.com/watch?v=GT5VlCyvdXc
9000 2
affairs. Sailors used a knot to fasten steps at rope ladders.
Creation instructions.
- put the rope through the support.
- Take the far end of the lace and create a loop.
- You will get two loops. Throw this loop on the support.
- Pull the ends of the cord.
Bracket assembly. https://www.youtube.com/watch?v=KdmBa2ZCxTk
90 002
Creation instruction.
- Create a large diameter loop.
- Pull a small cord into the loop.
- Start the end around the thick loop.
- Make a full circle and wrap the end under itself.
- Repeat in the same way.
- Tie control knots.

Conductor assembly.
9000 2
Guide Knot – Looped rope attachment used by climbers for fastening.
Instructions and diagram for creating the “Explorer” node.
- Take the rope and fold it in half.
- Tie a simple knot at the end of the rope. Tighten the knot.
Strangle knot. https://www.youtube.com/watch?v=hCOy5Bl5yP0
Knot “Knot” – a representative of fasteners for round surfaces, with high reliability and durability. It is not difficult to tie a knot, having spent this minimum amount of time.
Instructions and diagram for creating a knot “Choke”
- Take a single rope and decide on a support.
- Form a loop using the support.
- Wrap the free end of the string around one part of the rope 3 times.
- Tie control knot
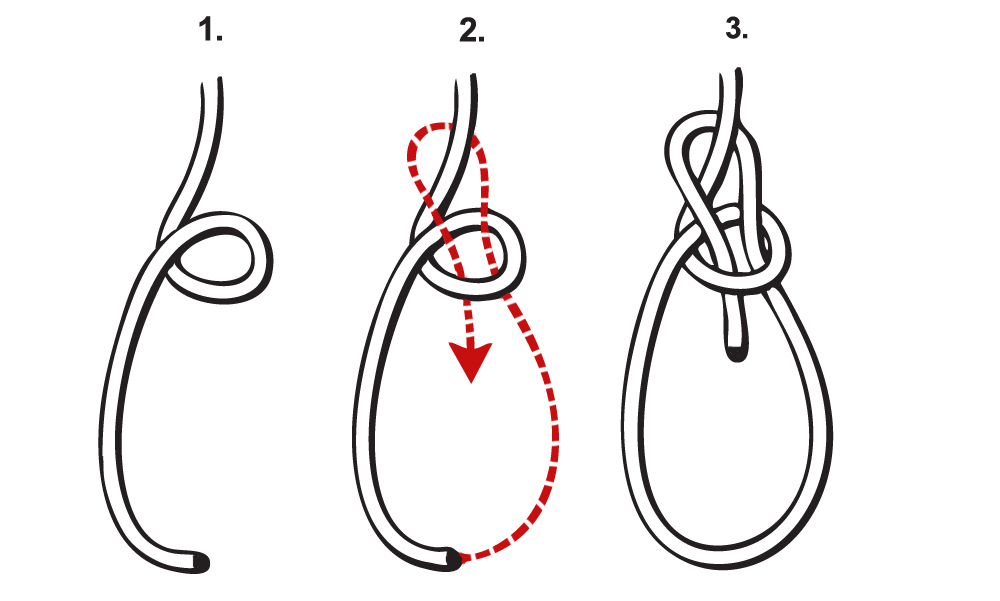
Stop assembly. https://www.youtube.com/watch?v=ylsF_rKB7cI
900 02
Stop knot helps to set the correct depth for the lure. The knot can be found on feeder gear.
Instructions and diagram for creating a stop assembly.
- Take the rope and fold it in half so that one end is larger.
- Wrap the long end around the short end about 5 turns.
- Insert the free end into the starting hole.
- After wetting the knot, begin to tighten it.
6 easy knots you might need
Survival
28 May
These versatile options are sure to help you out in a variety of life situations.
Iya Zorina
Author of Lifehacker, athlete, CCM
Having mastered a few simple knots, you can fasten even very heavy objects with just one rope, and if necessary, quickly release them.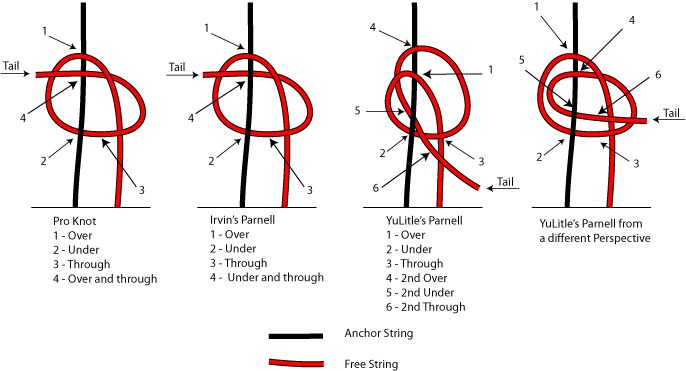
We’ll show you five ways to securely tie things in transit, make an adjustable loop to hook onto a pole, and make a very strong knot that’s perfect for towing a car on a cable.
1. Arbor knot
For its simplicity and strength, this knot is also called the bowline, or “king of knots”.
With it, you can make a non-tightening loop at the end of the rope, fix it in rings or eyelets, wrap it around a support – a tree or a pole. After removing the load, the gazebo is easy to dissolve.
1. Make a small peg – loop to further tighten the knot. Keep in mind that it is not the main loop, so you do not need to make it big.
Frame: Interparus Yachting / YouTube
2. Pass the running end through the peg, passing it from below.
Frame: Interparus Yachting / YouTube
3. Wrap the running end around the main end.
Shot: Interparus Yachting / YouTube
4. Pass the running end into the peg so that it is parallel to the end of the rope already there.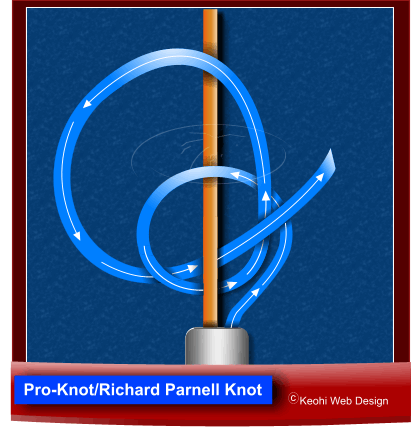
Frame: Interparus Yachting / YouTube
5. Tighten the knot well.
Frame: Interparus Yachting / YouTube
2. Triple bayonet
This knot was used in maritime affairs. With it, you can tie the mooring ends of the ship to the mooring fixtures or secure heavy loads. It is really strong and suitable for strong pulling, but is easily untied when needed.
1. Throw the rope over the support, pass the running end behind the main end, and then insert it inside the loop and tighten.
Frame: Moscow RopeAccess / YouTube
You will end up with a knot called a half bayonet.
Frame: Moscow RopeAccess / YouTube
2. Follow the same steps again: pass the running end under the root, insert inside the loops and tighten.
Frame: Moscow RopeAccess / YouTube
It is important here that the half-bayonet is exactly the same as the first one. If you pass the running end not under the root, but above it, you get a cow knot, not a bayonet.
3. Perform the steps a third time. You will get a triple bayonet, which is considered the most reliable knot.
Frame: Moscow RopeAccess / YouTube
Note that all three nodes are the same.
3. Long Midshipman’s Knot
If you want to tie something, but still be able to adjust the length of the rope later, try this knot. It allows you to easily change the size of the loop, but when it is tightened, it holds tightly.
1. Make a loop, wrap the running end around the root from above and slide it through the loop.
Frame: Trailguide Pictures / YouTube
2. Wrap the running end around the root one more time.
Frame: Trailguide Pictures / YouTube
3. Repeat the same a third time with one more turn.
Frame: Trailguide Pictures / YouTube
4. Wrap the running end around the main end above the entire winding, and then slide it inside the resulting loop and tighten.
Frame: Trailguide Pictures / YouTube
5. If you did everything right, the knot will easily walk along the rope, and under load it will tighten on its own.
Shot: Trailguide Pictures / YouTube
4. Looped Figure 8
This knot is useful for those who want to make a secure loop to attach a carabiner to. It is easy to tie, it can withstand heavy loads, and if necessary, it is quite easy to untie.
1. Fold the rope in half.
Shot: VPSK Bogatyr Novosibirsk / YouTube
2. Make a loop of double rope by placing it on your finger.
Frame: VPSK Bogatyr Novosibirsk / YouTube
3. Make a peg by bringing the end with a loop on top.
Frame: VPSK Bogatyr Novosibirsk / YouTube
4. Wrap the end with a loop around the other double end.
Frame: VPSK Bogatyr Novosibirsk / YouTube
5. Insert the end with the loop into the peg that is on your finger.
Frame: VPSK Bogatyr Novosibirsk / YouTube
6. Tighten the knot.
Frame: VPSK Bogatyr Novosibirsk / YouTube
The double eight is ready.
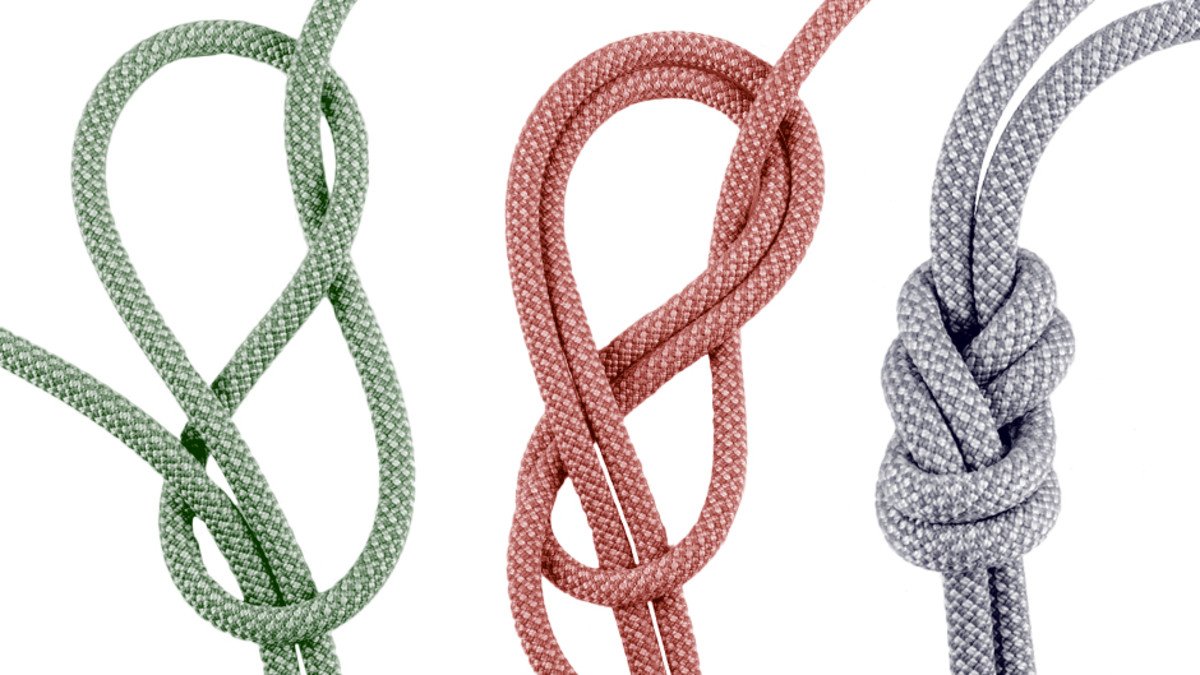
5. Figure of eight with one end
This knot is a bit like the previous one, but it is a bit more complicated. But with its help, you can tie a rope to some static object and do it without using a carabiner.
Before hooking the rope to the support, you need to make a blank on it – a simple figure of eight.
Make a peg and the end that went on top, loop around the other end and stick it from outside to inside. Tighten. You will get a knot with two hemispheres.
1. Attach the rope to the support.
Shot: Change of mountain / YouTube
2. Insert the running end into the upper hemisphere of the knot from the inside out.
Shot: Change of mountain / YouTube
3. Slide the running end under the root and shove it into the lower hemisphere of the knot from the outside to the inside.
Shot: Change mountain / YouTube
4. Now you will need to shove the running end into the left side of the upper hemisphere of the node from the outside in, and then pull it out of the lower hemisphere. In the picture below, the required holes are marked in red.
Shot: Change of mountain / YouTube
5. Insert the running end of the rope, pull it out of the bottom of the knot and tighten.
Frame: Mountain change / YouTube
6. The figure eight is ready.
6. Driver’s knot
With this knot, you can secure a thing well with just one rope, without additional devices. Drivers often use it to secure cargo in the body or on a trailer.
1. Hook one end of the rope and roll up the peg. With your right hand, hold the connection, and with your left, move the loop down, passing it under the rope.
Frame: Stef Roberts / YouTube
2. With your right hand, turn the loop over and insert the end that is in your left hand into the hole.
Frame: Stef Roberts / YouTube
3. Tighten the knot.
Shot: Stef Roberts / YouTube
4. Secure the rope on the second side, and then insert the running end into the loop.
Frame: Stef Roberts / YouTube
5. Tighten the rope well.
Shot: Stef Roberts / YouTube
6. Holding the knot with your left hand, drag the running end under the other ropes with your right hand.